How to Sew A Detachable Statement Collar- Part Two
Learn to sew a detachable statement collar with perfect collar points.
Welcome to part two of the series, How to Sew a Detachable Collar. Detachable Statement Collars are such quick and satisfying sewing projects. There is so much mix and match potential in the variations that you might find yourself amassing quite a collection. Throughout this series, we will begin with a basic collar pattern and learn how to change the design to create a look that is uniquely you.
In my introductory post, I showed you how to make a Peter Pan-style rounded collar with additional tips for sewing curves. For this installment, we are going to learn a bit about the structure of woven fabric and how it relates to creating sharp points to sew a Pilgrim-Esque maxi collar.
If you missed the first post, catch up here: How to Sew a Detachable Statement Collar, Part One
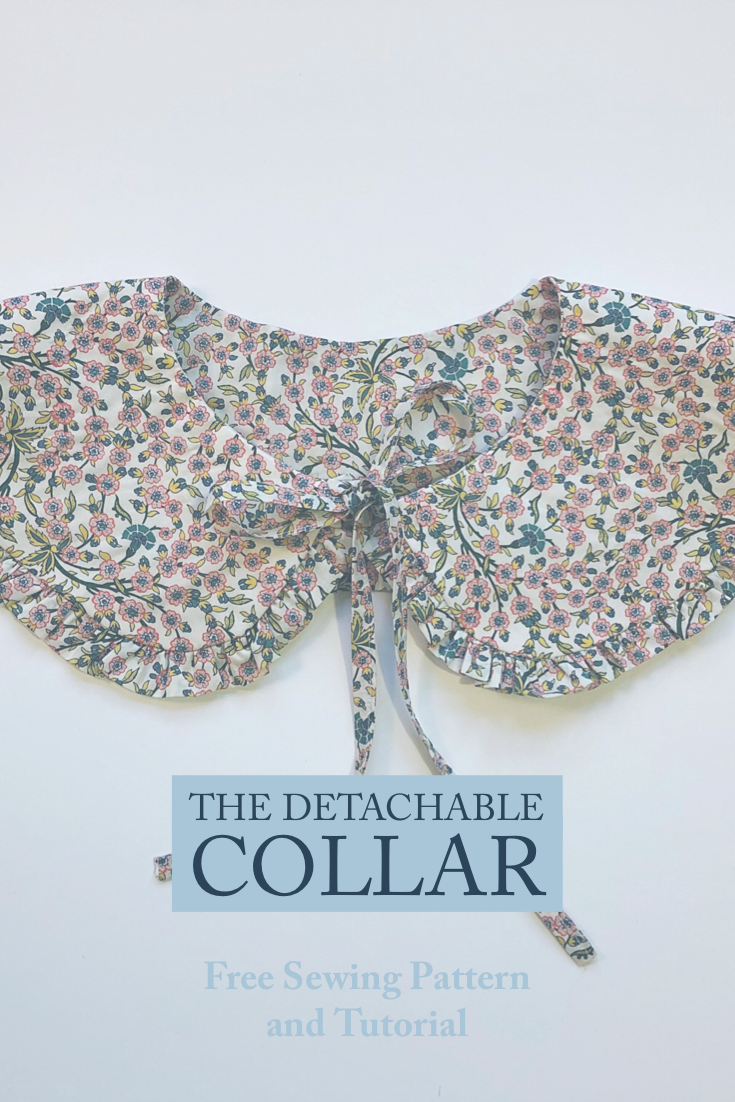
These are two of the many variations that you can create with this pattern. The chambray collar looks great with a mock-neck top worn with a stack of chains and pearls. The plaid taffeta collar has a bit of a softened point and I added a self fabric gathered ruffle to amp up the fun. The possibilities to add your own touch are only limited by your imagination. Have some fun with it!
The pattern is available for download here and also at weallsew where you will find the step by step tutorial. I can’t wait to see what you make!
New to using PDF sewing patterns? Check out this link for tips on assembly.
Head over to weallsew to download and get the tutorial.
Happy Sewing!
XOXO, Hilarie
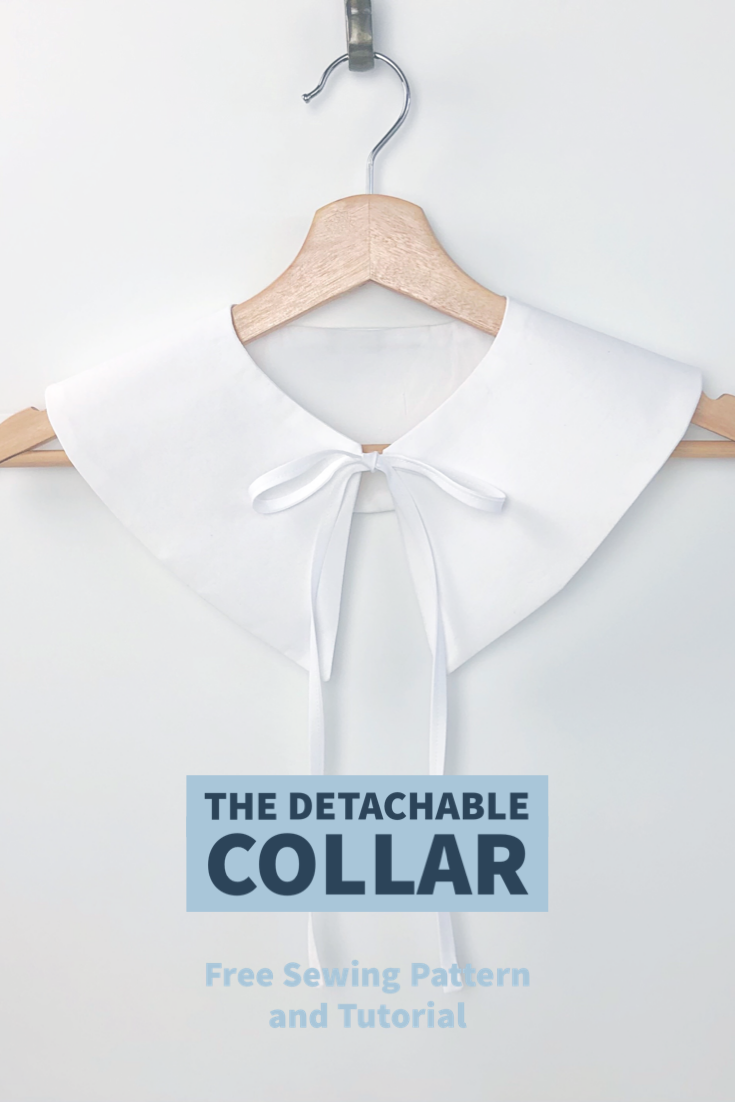
The Detachable Statement Collar Free Sewing Pattern and Tutorial
Statement collars are everywhere right now- and with good reason. They can be easily tied on over tees, coats, sweaters and even dresses for an instant outfit upgrade. The collars are really easy to make and to give as gifts too!
Detachable Statement Collar Free PDF Sewing Pattern and Tutorial
Statement collars are everywhere right now- and with good reason. They can be easily tied on over tees, coats, sweaters and even dresses for an instant outfit upgrade. The collars are really easy to make and to give as gifts too!
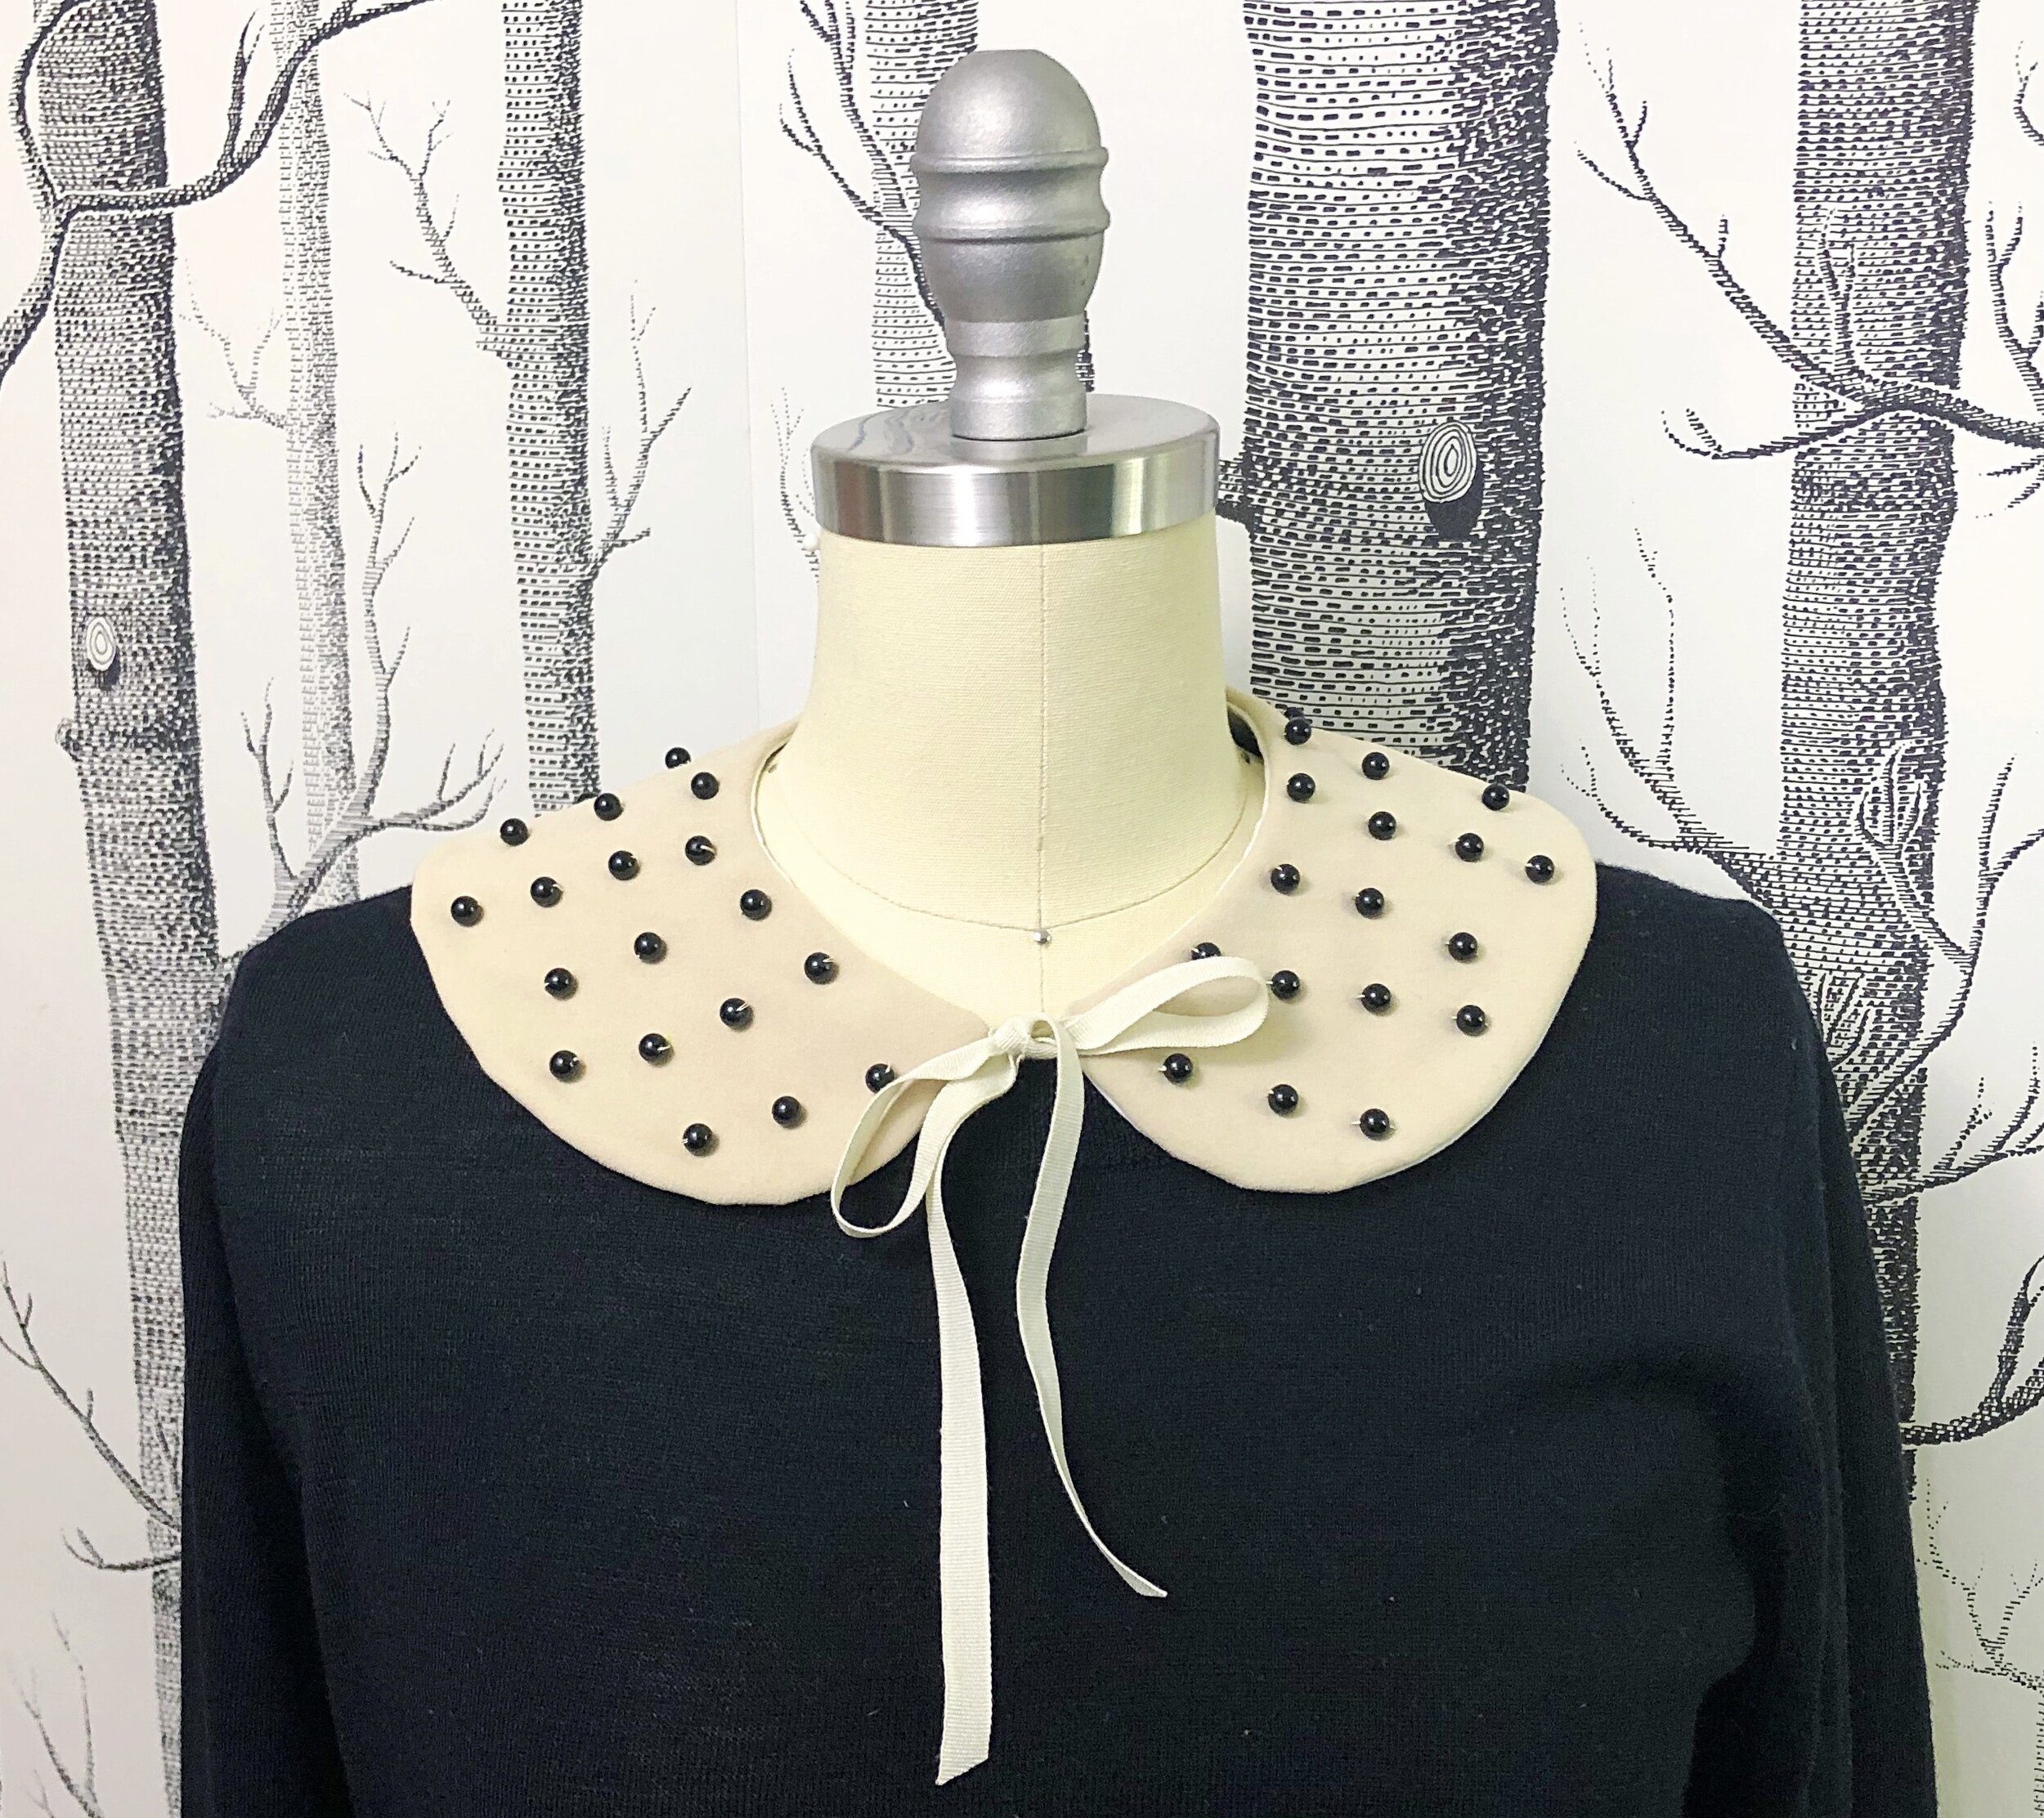
From pristine white collars with lace trim to knitted capelets and quilted denim, there are collars for every occasion and outfit. Beaded collars, fur collars, collars with plumes, collars with lace, collars with piping, and tiers of ruffles. For someone who loves fashion and sewing, these collars offer a sewist a chance to pull out all of the stops and finally try an embellishing technique that perhaps has seemed too daunting for a larger project.
Detachable statement collars are really easy to make- the hard part is choosing a style as there are so many new and fun options. Mini, maxi, round and pointed. Lace, ruffles, trimmed and beaded- the variations are endless. I thought you might enjoy learning all about collars in general and how to make and customize them. To that end, I have designed a group of patterns that I will share with you over the coming lessons. To that end, you can think of this as a sort of mini-course in collars.
The pattern is available for download here and also at weallsew where you will find the step by step tutorial. I can’t wait to see what you make!
New to using PDF sewing patterns? Check out this link for tips on assembly.
Head over to weallsew to download and get the tutorial.
Happy Sewing!
XOXO, Hilarie
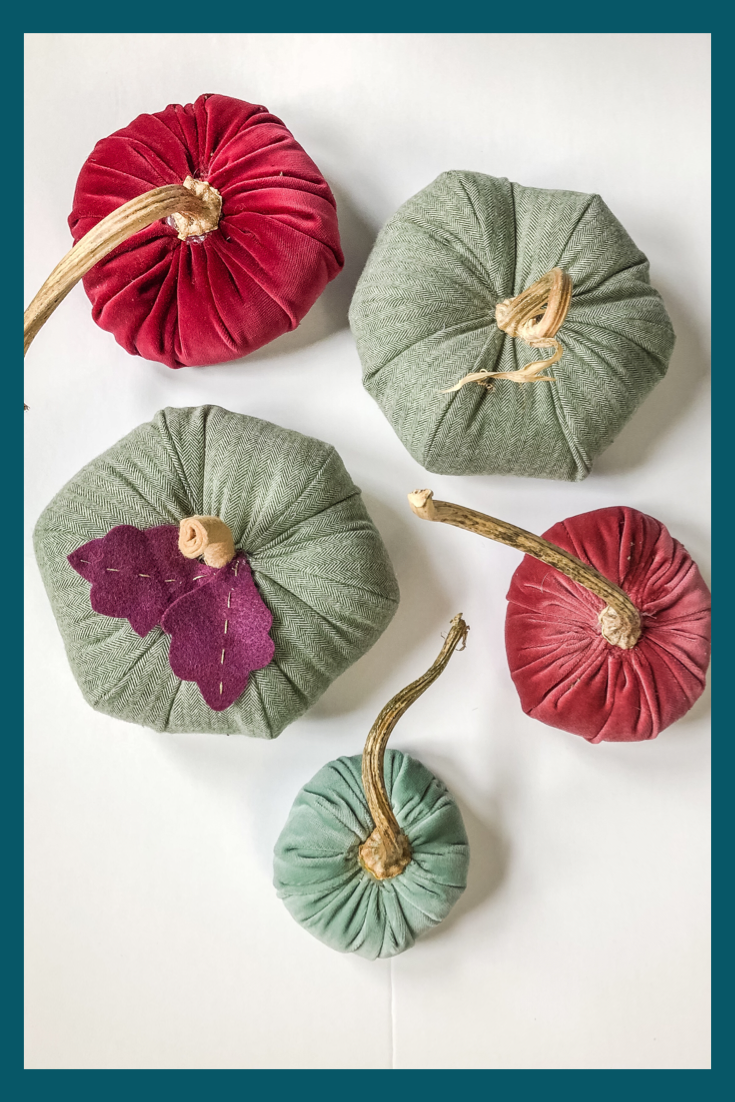
How to Make Plush Fabric Pumpkins Free PDF Pattern and Tutorial
Happy Thanksgiving! Since most of us will be home this year to celebrate, and needing some festive decor, I’ve got a fun DIY for you. This tutorial is a bit of an update from one that I wrote a few years back. The construction and pattern are the same, but I’ll walk you through a few other options for stems. Plus, like the velvet pumpkins that I love to make and gift each year- we can tuft these to give them a more organic pumpkin-y shape.
How to Make a Plush Fabric Pumpkin
Happy Thanksgiving! Since most of us will be home this year to celebrate, and needing some festive decor, I’ve got a fun DIY for you. This tutorial is a bit of an update from one that I wrote a few years back. The construction and pattern are the same, but I’ll walk you through a few other options for stems. Plus, like the velvet pumpkins that I love to make and gift each year- we can tuft these to give them a more organic pumpkin-y shape.
How to Make a Plush Fabric Pumpkins Free PDF Pattern and Tutorial
Materials to Make a Plush Fabric Pumpkin
1/4" of mid-weight fabric (I have used velvet, flannel, silk and cotton.)
Scissors
Thimble (Trust me on this one!)
A pumpkin stem that has been dried OR a small piece of tan felt and a pipe cleaner.
Poly-fill stuffing
Optional: Felt for leaves to add a bit of embellishment
Hot Glue Gun and Glue Sticks
I’m Stuffed Plush Pumpkin PDF Pattern
Notes:
Once you print the pattern, measure the scaling square to be sure that it measures 1".
Follow the original tutorial until you get to the step where you insert the stem (stick).
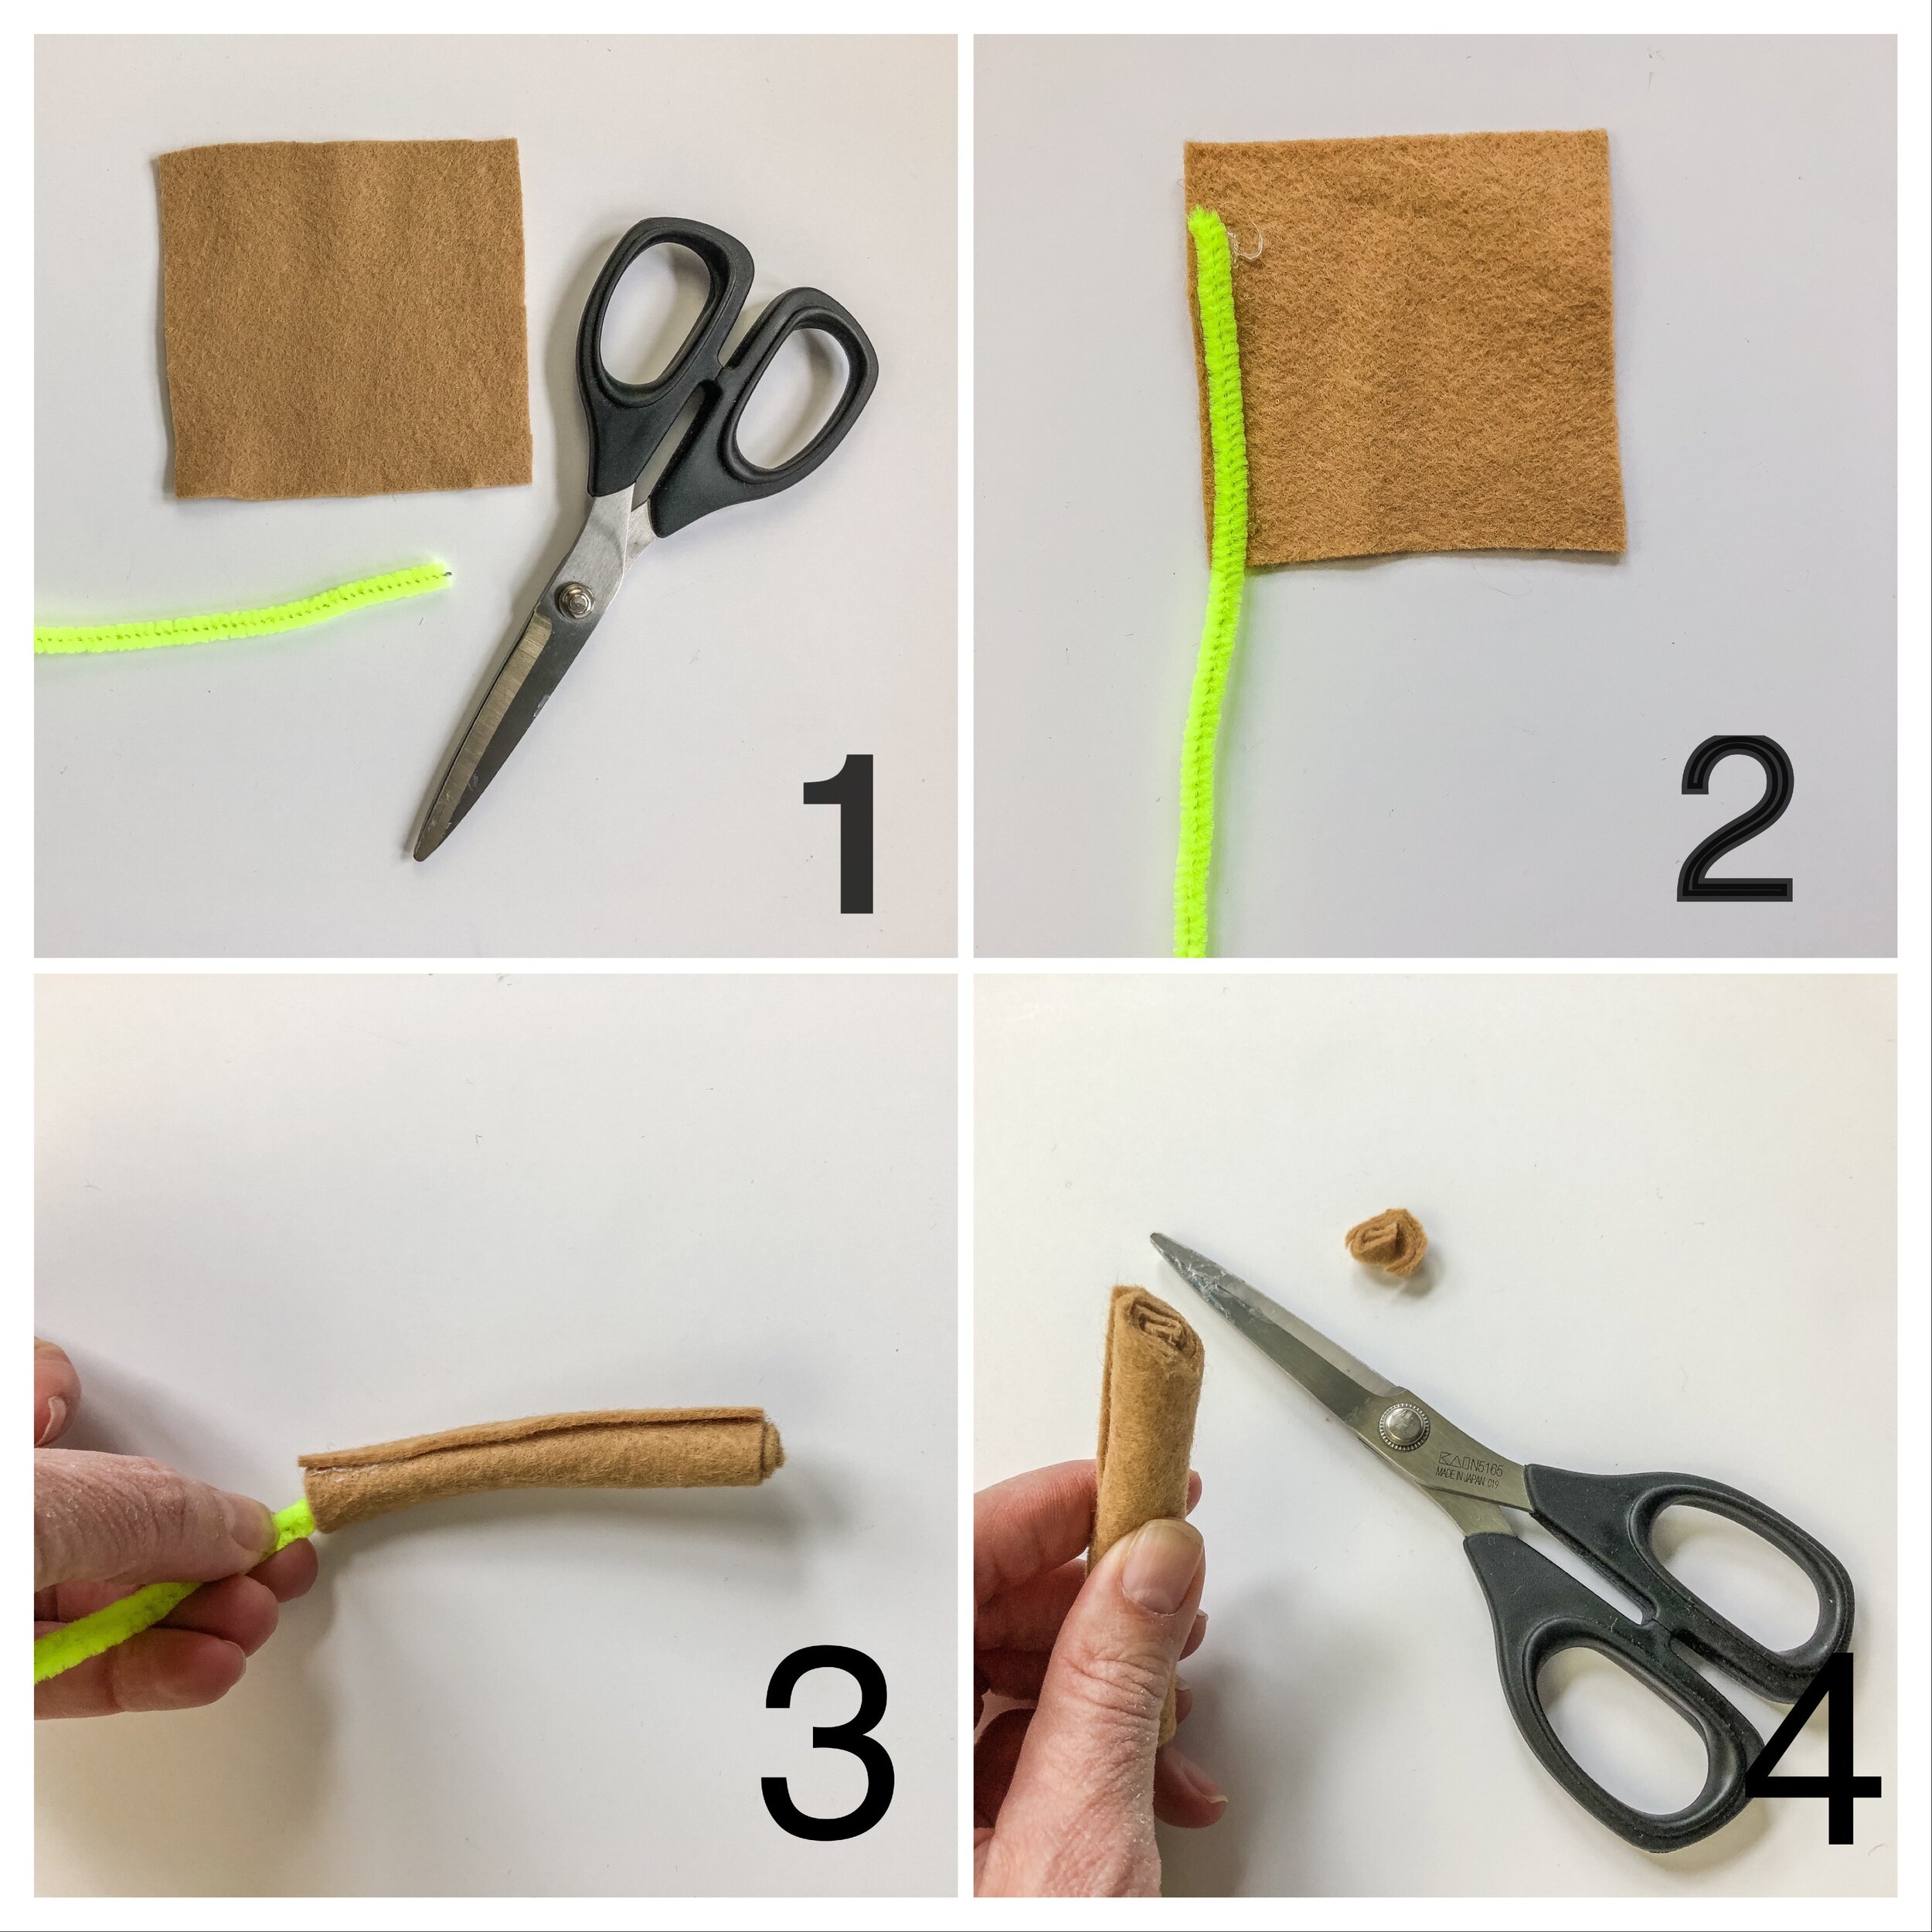
Picture order Left to right, top to bottom.
Cut a 45” length of thread.
Thread needle, doubling over and tie ends into a double knot..
To begin stitching, try to Insert the needle into a seam allowance just inside the pumpkin. Make a small stitch or two to secure.
Using a running stitch about 1/4”-1/2” long, stitch around the opening of the pumpkin.
Pull threads to cinch and tie.
Restitch through each gather of fabric around opening.. Tie and knot to secure.
Do not cut the thread!
Tufting time!
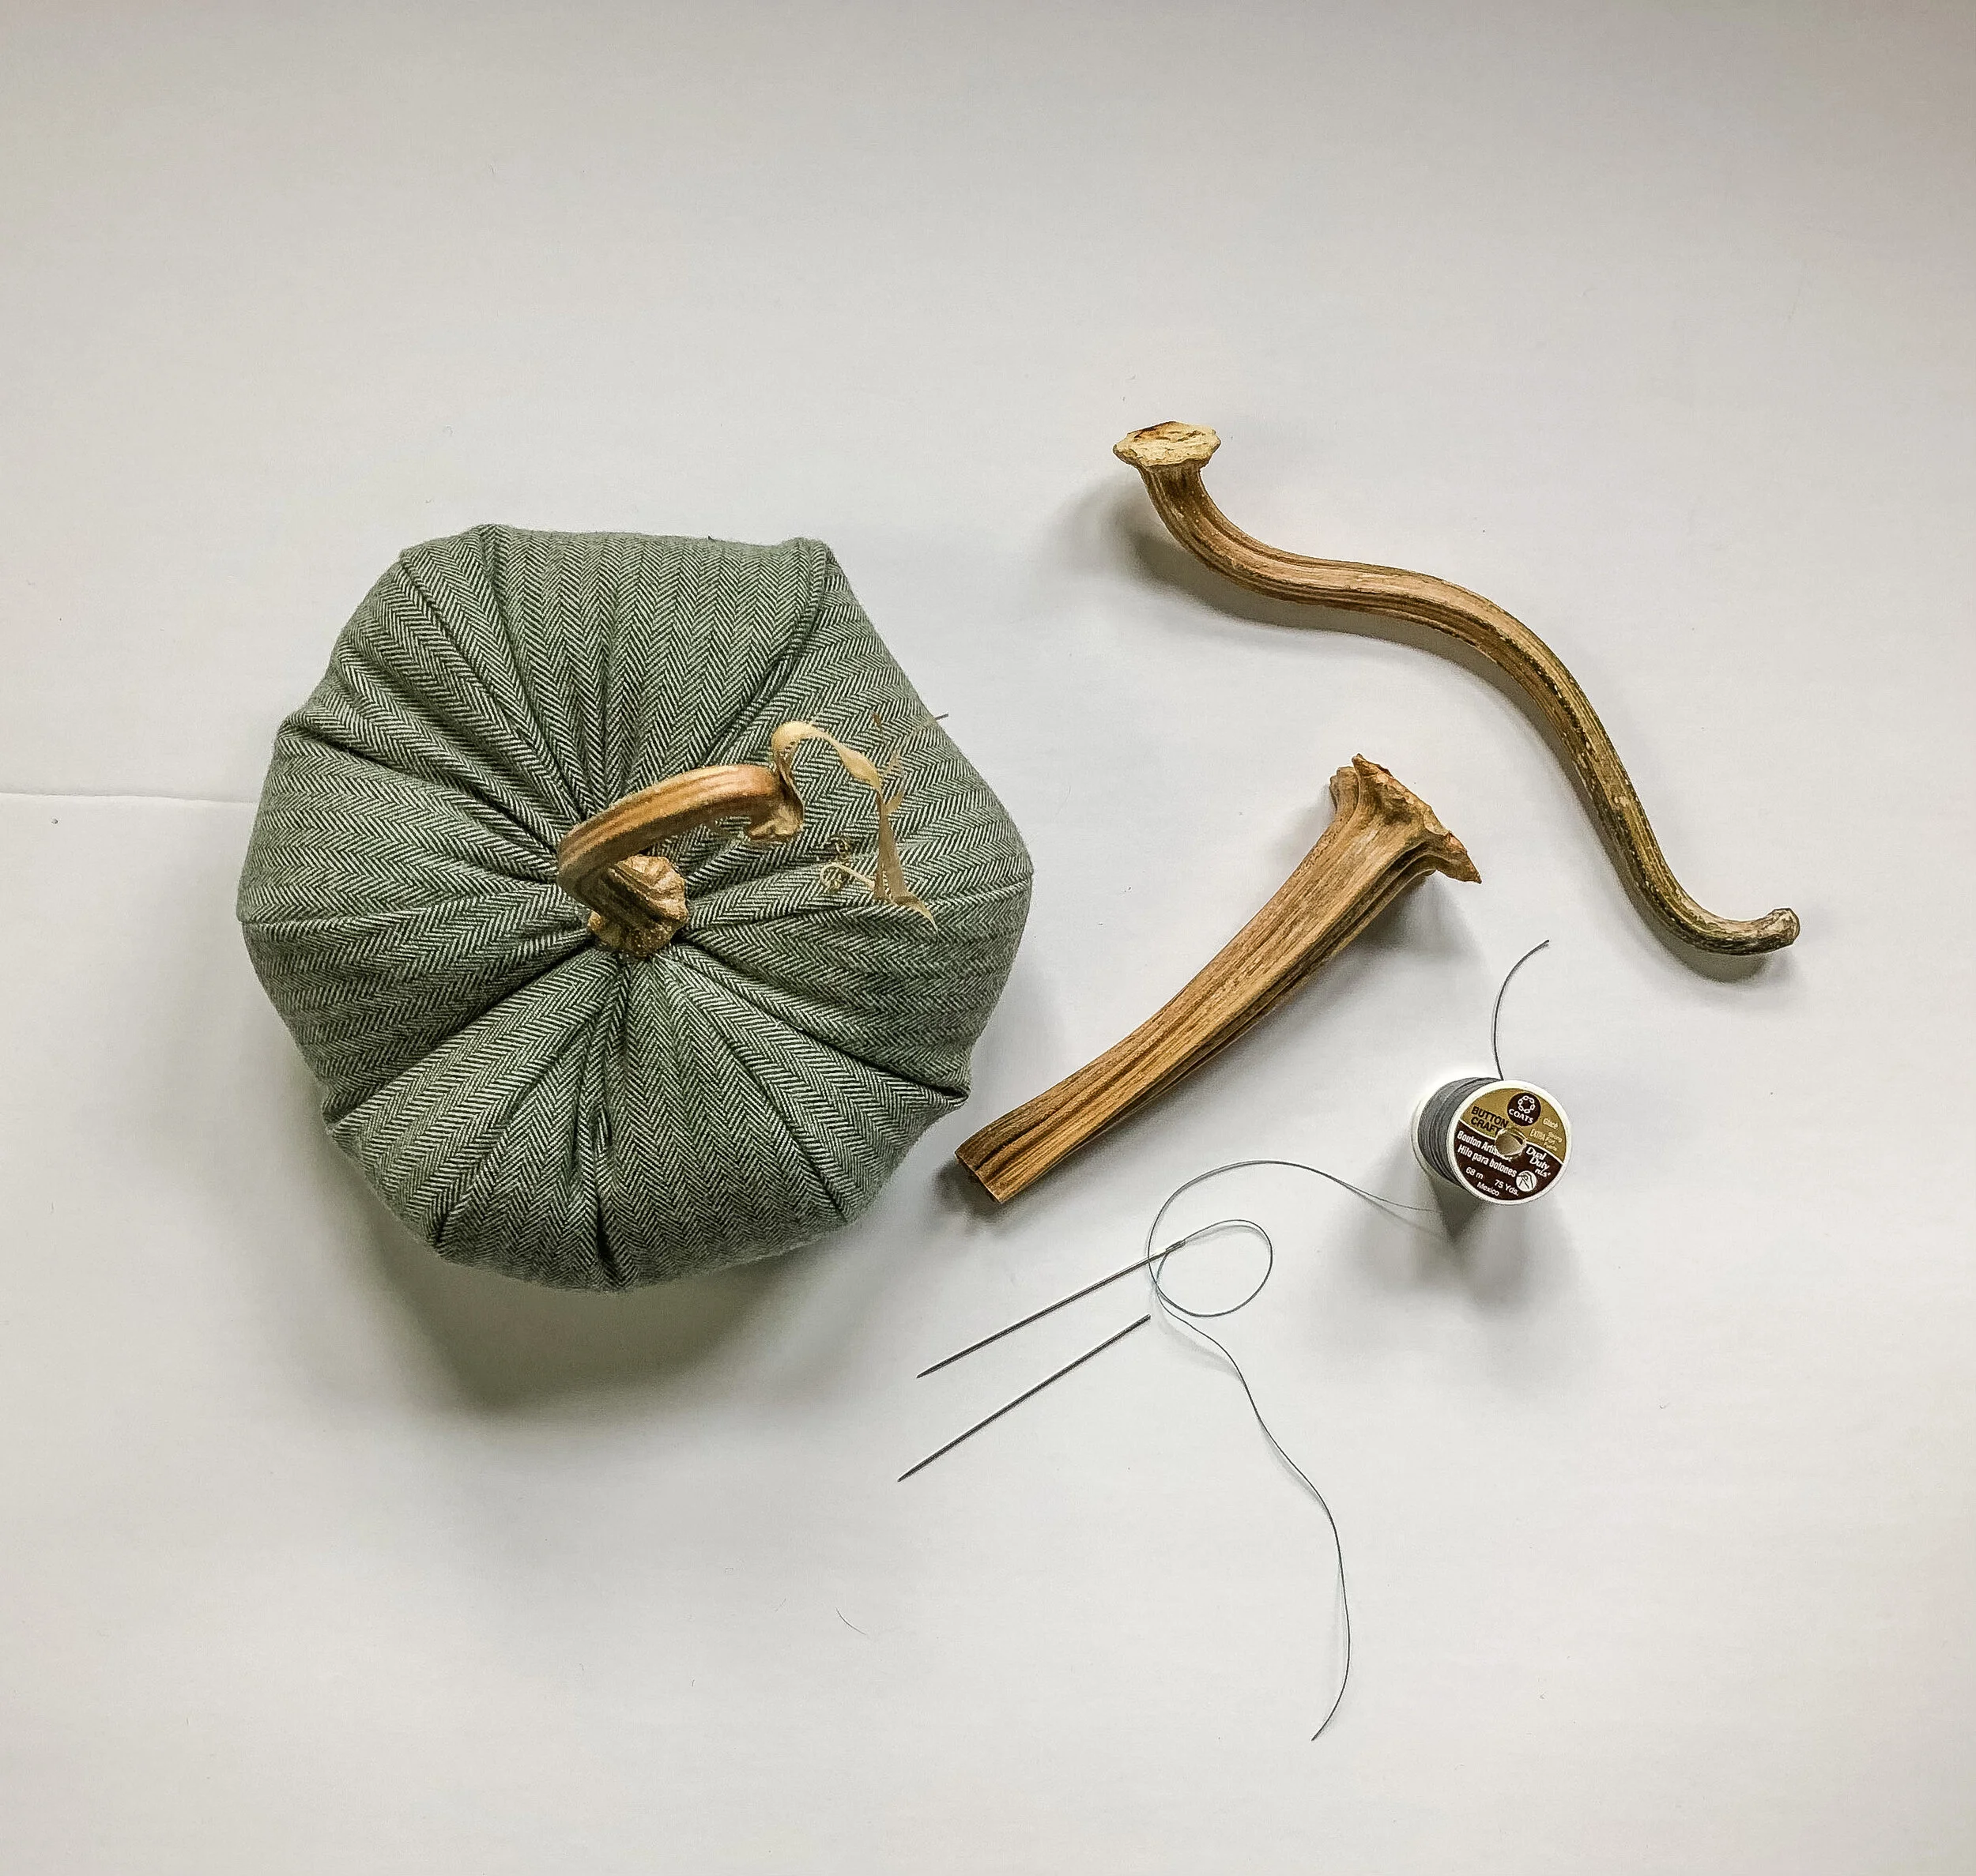
Take the needle and pushit through the center of the pumpkin directing it to come out at center of the bottom. If you don’t already have a thimble on- get one STAT.
Put needle through the center bottom, and turn to sew back up through the center top opening. To help anchor the thread, I take a small stitch just over the lip of the opening each time I pull the needle up. Then when I turn the needle and stitch straight back down, this little step helps to neaten the draw of the fabric.. Pulling the thread taut. Repeat a few times until the pumpkin is the size and shape that you desire.
Knot to secure. Trim thread and tuck inside pumpkin.
Stems
How to dry a natural pumpkin stem
Each Autumn, I prowl pumpkin stands for beautiful stems that beckon to be preserved, After the pumpkin has sat on my porch for weeks, I carefully cut around the stem, remove it and get as much pumpkin flesh off as possible. Then I let them air dry for several days. Once they seem light and dry, I put them on a cookie sheet and bake in the oven at a really low temperature (about 225 degrees) for about an hour. This dries out the stem and kills the bugs.
*I encourage you to do a web search to discover other methods of drying.
Take a dry (and baked!) pumpkin stem. Check the bottom to make sure it is somewhat smooth and even. If not, lightly sand with sand paper.
Add bit of glue to the center of opening. Set stem and hold until dry.
How to make a stem from felt and a pipecleaner
Materials
Small piece of felt
Pipe cleaner
Glue
Old Scissors
1. Cut felt into a 4” X 4” square
2. Align and glue pipe cleaner along one side of the felt square.
3. Hold onto the pipecleaner while tightly rolling the felt.
Apply glue to secure.
4. Cut the stem at a 45-degree angle.
To help anchor the stem into the pumpkin, bend the part of pipe cleaner that sticks out in half before inserting.
Insert into pumpkin. Add a bit of glue to secure.
Bend the felt stem to a pleasing shape..
Please be gentle with yourself and those that you love. Find some space and time to rest and don’t forget to call your mom.
Happy Thanksgiving!
XO, Hilarie
Last year’s harvest.
A Garment Construction Plan; 25 Steps to Successful Sewing
I’ve always loved the excitement and sheer certainty that comes with starting an ambitious new project. Once the fabric is in hand, it feels like it is only hours until I get to wear this dream de jour. Each moment spent preparing, is filled with thoughts such as, “what shoes should I wear with it?” “What kind of bag goes with awesome?” Oh and – “where will I wear it?” Of course, as a mom, I quickly realize that time slips away and those mere hours from concept to ‘all decked out’ turn into weeks or months. When I was much younger, it was nothing to stay up all night and sew a new outfit for school the next day, or for some dance or occasion. I can still picture myself sitting on the floor in my room, sketching, cutting, sewing and dreaming the days away. I’ve managed to hold onto a few of those pieces that I made early on. When I look at them now, part of me is appalled by the lack of skill and obvious haste in which these clothes were made- but the other is touched with the charming memories and joy of the sheer zeal and passion of my younger self.
I’ve always loved the excitement and sheer certainty that comes with starting an ambitious new project. Once the fabric is in hand, it feels like it is only hours until I get to wear this dream de jour. Each moment spent preparing, is filled with thoughts such as, “what shoes should I wear with it?” “What kind of bag goes with awesome?” Oh and – “where will I wear it?” Of course, as a mom, I quickly realize that time slips away and those mere hours from concept to ‘all decked out’ turn into weeks or months. When I was much younger, it was nothing to stay up all night and sew a new outfit for school the next day, or for some dance or occasion. I can still picture myself sitting on the floor in my room, sketching, cutting, sewing and dreaming the days away. I’ve managed to hold onto a few of those pieces that I made early on. When I look at them now, part of me is appalled by the lack of skill and obvious haste in which these clothes were made- but the other is touched with the charming memories and joy of the sheer zeal and passion of my younger self.
In the decades that have passed, I’ve refined my skills. While some of my training has been formal, much has been learned through trial and error. It takes time to learn to sew well. Part of it is being able to execute a set of individual skills, but so many aspects of sewing are interdependent. Fabric, fit, structure, design; if any one of these is less than ideally balanced then the project is a flop.
There are as many methods and ways to sew as there are people who sew. Some of my favorite projects for beginners- and anyone who is enthusiastic about sewing, are purses and other wearable fashion accessories. They are fairly quick, a great opportunity to try out new techniques and don’t always require lots of fabric and experience. In fact, if you are ready to jump in right now, I have written a lots of blog posts with tutorials and a couple of books on sewing fashion accessories. (Shameless plug!)
Cutting, marking, pinning, basting, stitching, seam finishing, trimming, pressing, stabilizing- all of these techniques are used in sewing over and over no matter what it is you are making. While there is a general order of construction to follow, and some guidelines, there happen to be a lot of exceptions too. This can lead to unnecessary frustration for beginners!
When you buy a pattern, whether indie or from one of the big commercial companies, you will find several pages of directions for constructing the project. The instructions begin with a few line drawings and a list of pattern pieces that will need to be cut out, marked and sewn together. Most beginner – Intermediate patterns will rely on the method of unit construction. Unit construction means that you will work on a single piece, completing as much as possible before moving on to the next. This method offers many advantages to the beginner. By keeping the work flat, it reduces handling of the fabric which could lead to stretching and distortion in inexperienced hands. The straightforward finishing and construction is mostly completed on the machine, which speeds up the sewing process. When you are learning how to sew, there are so many details that you need to consider, that projects calling for very basic techniques and few pattern pieces are a great place to begin.
As you gain more sewing experience, you will begin to anticipate the sewing instruction order. The easier patterns will use basic construction methods, but as you move on to more advanced styles, you will be working on multiple steps at once. Pattern instructions are often minimal and presuppose some type of working knowledge. This is where books, sewing classes, and articles about specific techniques come in handy- they help to fill in the knowledge gap.
No matter how simple or advanced a project you are making, the steps will be outlined with a plan. With this plan, even complicated construction can be simplified. A sewing project begins with preparing the fabric and pattern before moving on to fitting, shaping and finishing. Some patterns have more information and are more detailed than others. I have found that those new to sewing are often apprehensive to work bit out of order from the pattern for fear of ruining their project. Additionally, many patterns that my students bring in are written without much emphasis on fitting and finer finishes.
With this in mind, I have written a plan for garment construction with an eye toward fitting and design. Of course, this list is not exhaustive and will not apply to every project. Some of your garments you make may not have every detail that I’ve mentioned- and some will have more. I encourage you to use this as more of a companion to your pattern instructions so that you can begin to make connections to the steps and to discover how to integrate new techniques.
Over the course of the next few weeks, we can take a deeper look into the organization of this plan. My goal is to help you to not only understand what you are doing, but why. Once you understand that, sewing will become so much easier.
Garment Construction Plan
25 Steps to Success
Preparation
Study the pattern.
Compare your body measurements to the pattern and make any necessary pattern adjustments.
Prepare the fabric by straightening the grainline.
Layout the fabric and pattern pieces. Pin (or use weights) fabric to pattern when you are pleased with the layout.
Once you have determined that you have all of the necessary pieces laid out correctly on the grain, double check again to confirm before cutting.
Mark all of the construction details.
Staystitch each garment section.
Interface each area as suggested in your pattern.
Stitch and press all darts, tucks, pleats or gathers.
Shaping
Prepare all lining or underlining.
If there are any style lines such as a yoke or princess seams, pin and stitch.
Stitch the center front and center back seams.
Prepare and apply style details such as tabs and pockets.
Baste the shoulder seams.
Baste the side seams and inseam.
Try on for fit. If you are pleased with the fit, go ahead and stitch the shoulder, side seams and inseam. Remove basting.
When the design calls for a waistband, prepare and attach it to the seam.
When the style features a collar, make it.
When the design calls for sleeves, set and stitch the sleeves
If a neckline or armhole needs a facing, prepare and attach the facing.
Finishing
If a zipper is needed, insert it.
Finish the inside seams.
Set and sew the hems
Add the closures-buttons, buttonhole and snaps..
Complete any other hand finishing.
*Throughout each step, have your iron and pressing cloth ready.
Here is a handy PDF of versions this plan for you to print and keep with your sewing books and patterns.
Introducing: The Basic Principles of Garment Construction, A New Blog Series
So many of you are discovering the possibilities that open up when you learn to sew. With even a basic set of skills, you can begin to make simple clothing, fashionable accessories and home decor projects. Soon you may find yourself searching for patterns, fabric and fancy new sewing machines. Suddenly a whole new world opens up- it really is an exciting time.
Well, that is until it isn’t.
There are so many frustrating moments that you will encounter when learning to sew. Tangled threads, broken needles, machine malfunctions. All normal stuff- I promise. You see, there is a difference between knowing how to sew and how to sew well. Learning to sew well takes time and patience. Yes, you will continue to make mistakes, I still do! But it is through these mistakes that you can begin to really learn why things need to be done in a certain order or way – and what happens when you don’t.
To truly master anything, it is not enough to know how to do something- you also need to know why.
Introduction to Garment Construction
In this series, my intention is to guide you step by step through a variety of methods and techniques to help you to gain a true understanding of the fundamentals of sewing. Through hands on practice, I hope that you will begin to notice the underlying construction principles and techniques that come up in sewing again and again.
Cutting, marking, pinning, basting, stitching, seam finishing, trimming, stabilizing- all of these techniques are used in sewing over and over no matter what it is you are making. It really helps to understand why each step is necessary and how it will relate to your final project. Though there are many ways approach a single technique, I will share with you what works best for me. Please don’t expect any shortcuts, as that is not what I do. Instead, I believe in spending time to develop a very special set of skills that will set your work apart and help you to create the pieces that you dream of.
Get your scissors ready!
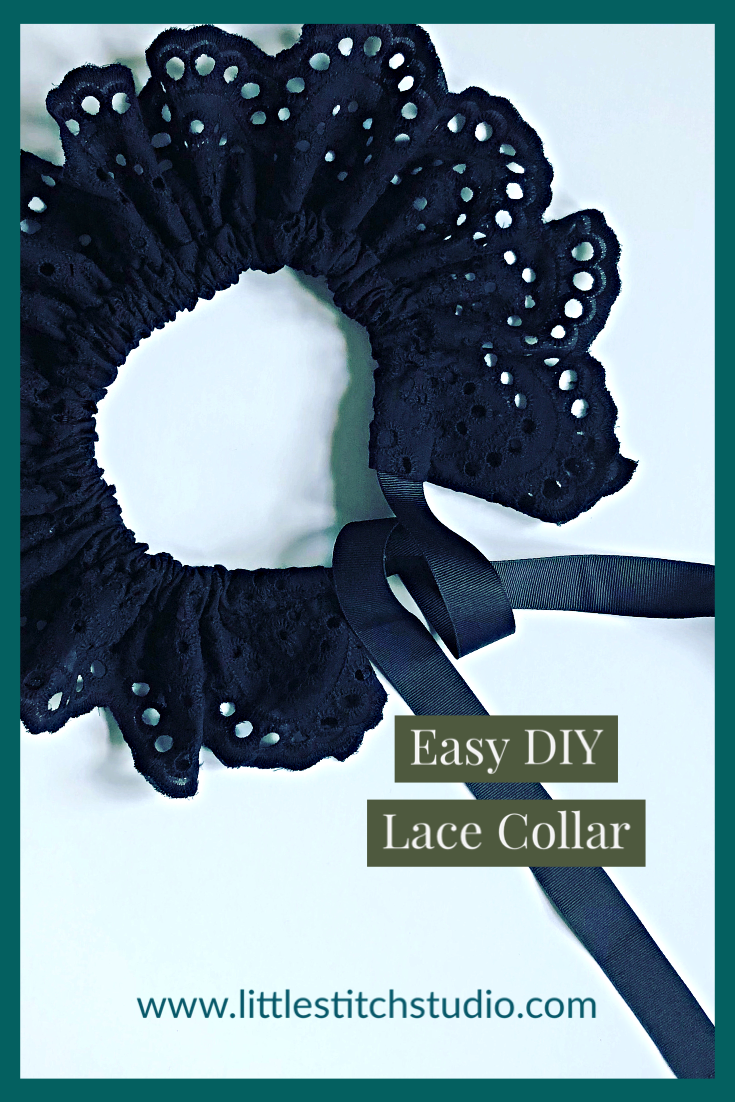
Easy DIY Lace Collar Necklace
Have you gotten used to dressing too comfortable while working from home? Like many of you, I have been looking forward to the change of season wardrobe and some fun experimentation with color and layering. This DIY lace collar necklace is an easy update that can instantly elevate an everyday cardigan or sweater top. The idea is reminiscent of lace detachable collars of the 80’s but so much less stuffy. Gone are the Laura Ashley floral prints and fussy ruffles. These collars are designed to make a statement and bring a bit of contrast to up your look. Ready to sew?
I voted today!
This is the eighth presidential election that I have had the privilege to exercise my right to vote- but it feels like it might be one of the most significant. After getting my kids fed, dressed and started on their virtual school day, I went to get myself ready.
To mark the occasion, I wanted to dress up a bit- to show respect for the women who have come before me and to all of the young girls coming up. Our voice counts- we matter. Looking down at my T-shirt, I saw the illustration of Ruth Bader Ginsburg in her dissent collar. Her “notorious” dissent collar. I need a lace collar! This occasion calls for a lace collar.
I ran upstairs to survey my lace options and decided to use some black cotton eyelet. Since I only had a small window of time to both vote and sew- this had to be quick.
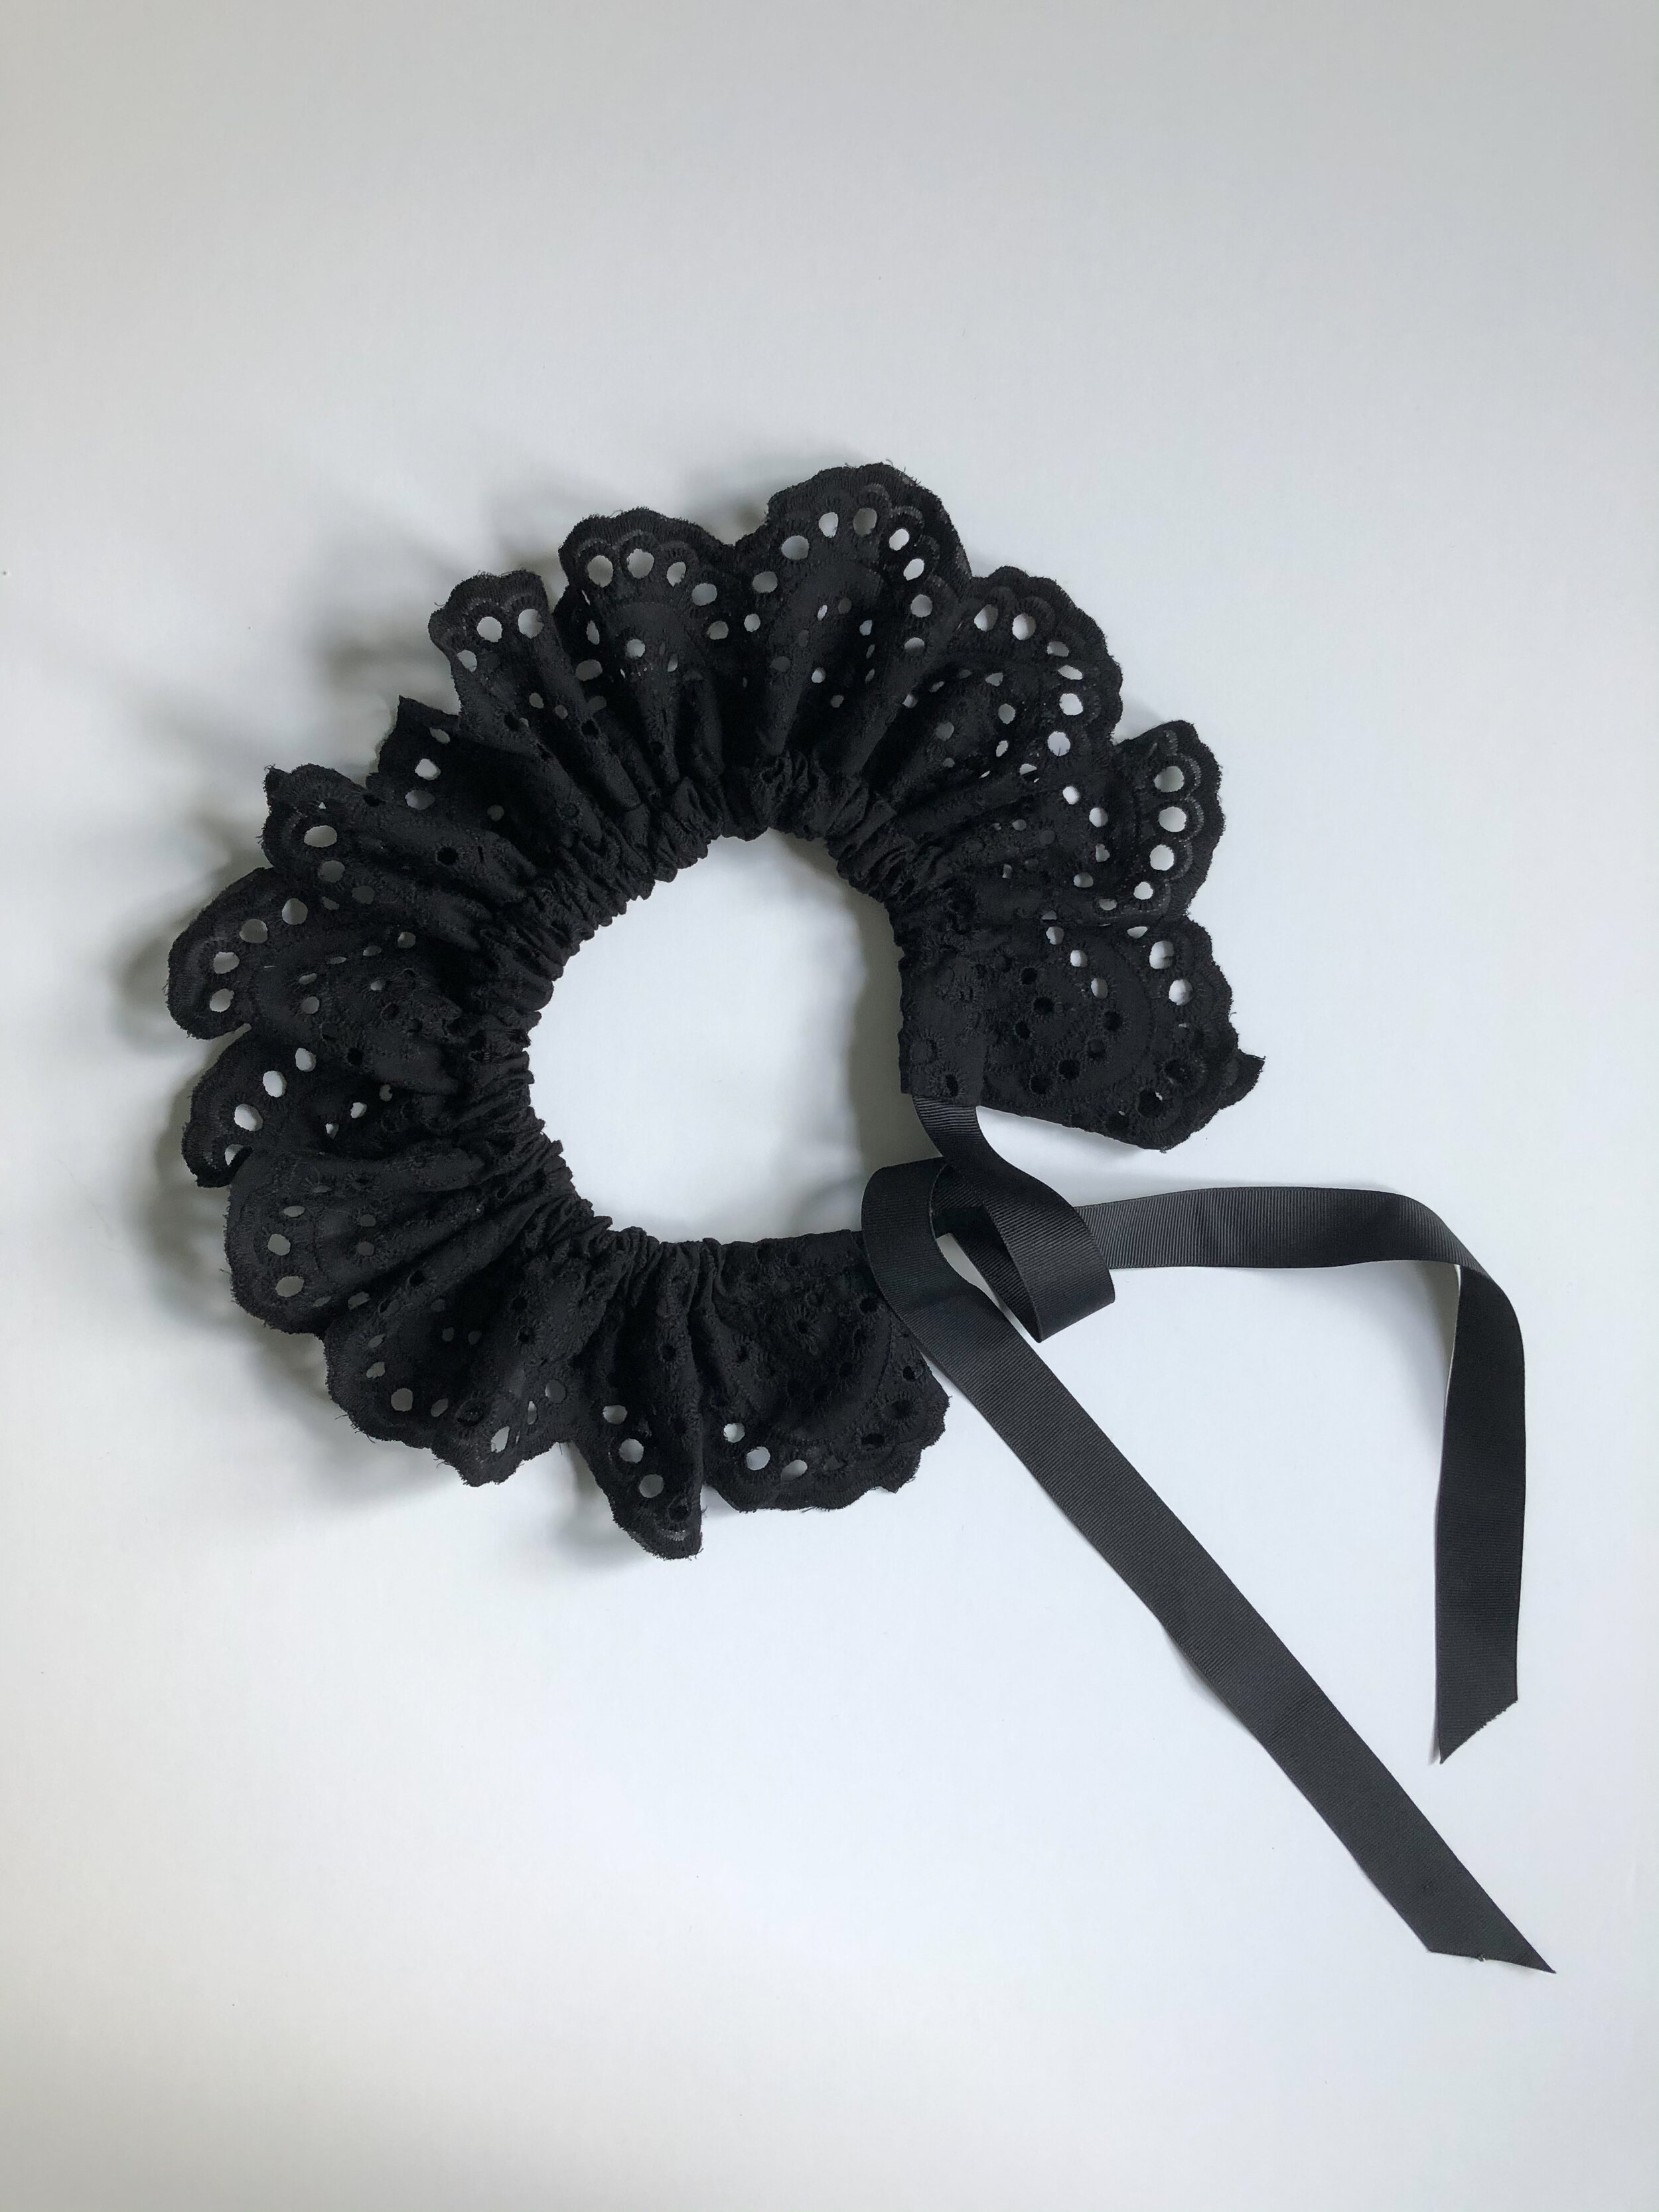
Part collar, part necklace. It turned out perfect!
Scroll down to create your own lace collar necklace.
Sewing with Eyelet Fabric and Lace
Have you sewn with cotton eyelet before?
Eyelet is a fabric with an embroidered, open-work pattern. Though generally made of woven cotton, modern interpretations can be found in wool, leather, jersey, silk and even neoprene.
Like other types of lace, whether delicate or sturdy, special handling is required to ensure the beauty of the finished garment.
Successfully sewing with lace depends in large part on the placement of the motifs of the fabric in relationship to the garment design. This is more easily accomplished than you might think! It just takes a little more time and thought.
Thread:
The ideal weight of the thread is fully dependent on the content of the fiber and type of weave rather than the “lace” design. If you are sewing with cotton or linen eyelet, use cotton or polyester thread, size 50.
Needle:
For lightweight cotton, linen or wool eyelet: Universal-H Point, jeans (HJ) 70/10
More about needle sizes and application.
Seam Finish:
There are as many types of seam finishes as there are functions, fabrics and preferences. Like other laces, eyelet has little holes incorporated throughout the design. Construction methods are determined by the sheerness or opacity of the lace. This should be kept in mind as you consider seam finishes and lining options, as they will be somewhat visible on the right side of the finished garment. Seam finishes such as a bound seam (using a strip of silk organza), French seam, whipped French seam and serged edges look best- and don’t add bulk.
Pressing:
You should press eyelet fabrics face down on a soft pad- a terry cloth towel is good, to avoid flattening the embroidery. Generally, the thread used to embroider most eyelet fabrics is synthetic, and could flatten, burn or pick up some unwanted shine when ironed. Use a pressing cloth and test a small swatch to see how it reacts.
Hem:
When finishing a garment made of lace, there are several important construction details that you will need to keep in mind. The ideal type of hem will allow the fabric to drape and hang in a flattering manner. To achieve this, you will need to consider the overall weight of the fabric as well as the garment design to select an appropriate hem technique. Some garments and fabrics will require a much deeper hem than others.
Generally, the hem is formed by folding under and pressing the raw edge twice before stitching the inside the fold. Depending on the design of your eyelet, the fabric’s selvage might have a beautiful lace border which you can cut to use as the hem of your garment.
Opaque, backed, or underlined laces may have hem edges finished in any of the traditional ways; rolled hems, turned-up bound hems and facings. I do suggest looking at high end garments for ideas at finishing techniques as well as practicing a few for yourself and see what you think works best.
Fabric Preparation:
Lace can be used for an entire garment, or for only a bodice or skirt or even just as trim. Let the weight, density, width and cost of the fabric assist you in determining the look you create.
Lace motifs should be advantageously placed whenever possible, to serve as decorative edges or trim your garment. If your lace is one which has a scalloped edge, pattern pieces can be positioned so that this forms a decorative finish alone a straight neck edge or hemline.
Lace should be laid out flat, in a single layer on a table or other flat surface. Cutting should be taken with care.
Scalloped lace borders.
The Lace Collar Necklace
Free Pattern and Tutorial
The Lace Collar Necklace
Free Pattern and Tutorial
Finished Size: 42” x 4”
One size fits all
Supplies:
1 yard of Black Cotton Eyelet Lace (similar to this)
1 1/3 Yards of 7/8” Grosgrain Ribbon
Prepare:
Layout the entire piece of fabric, in a single layer on a table or other flat surface. Scallops along the edge of a hem need planning. Check the scalloped border to determine the ideal place to begin and end cutting your collar.
For this project, there is a turned casing at the neckline.. The bottom of the collar was cut to feature the beautiful selvedge border.
If you look closely at mine, I began and ended my cut in the center of a lace motif. This way, when I go to turn the opening for the casing, the lace will fold back in and mirror the shape of the motif next to it. This will help to make a pretty opening.
Cut:
Measure and cut lace 44” X 5.5”.
Press:
To prepare the center front casing, layout the cut lace and fold one short end of the lace in the center of a scallop inward matching the scallop shape along the edge. Press. Repeat for the opposite side.
Sew:
Finish the raw edge of the lace. (I used a serger for mine.)
Fold cut edge of fabric 2” toward the inside of the collar.
Pin through both layers of lace across the collar.
Since my ribbon was 7/8” of an inch wide, I made my seam opening, 1 1/8” wide to allow for the ribbon to draw through plus a bit of ease for gathering.
Stitch. Clip threads.
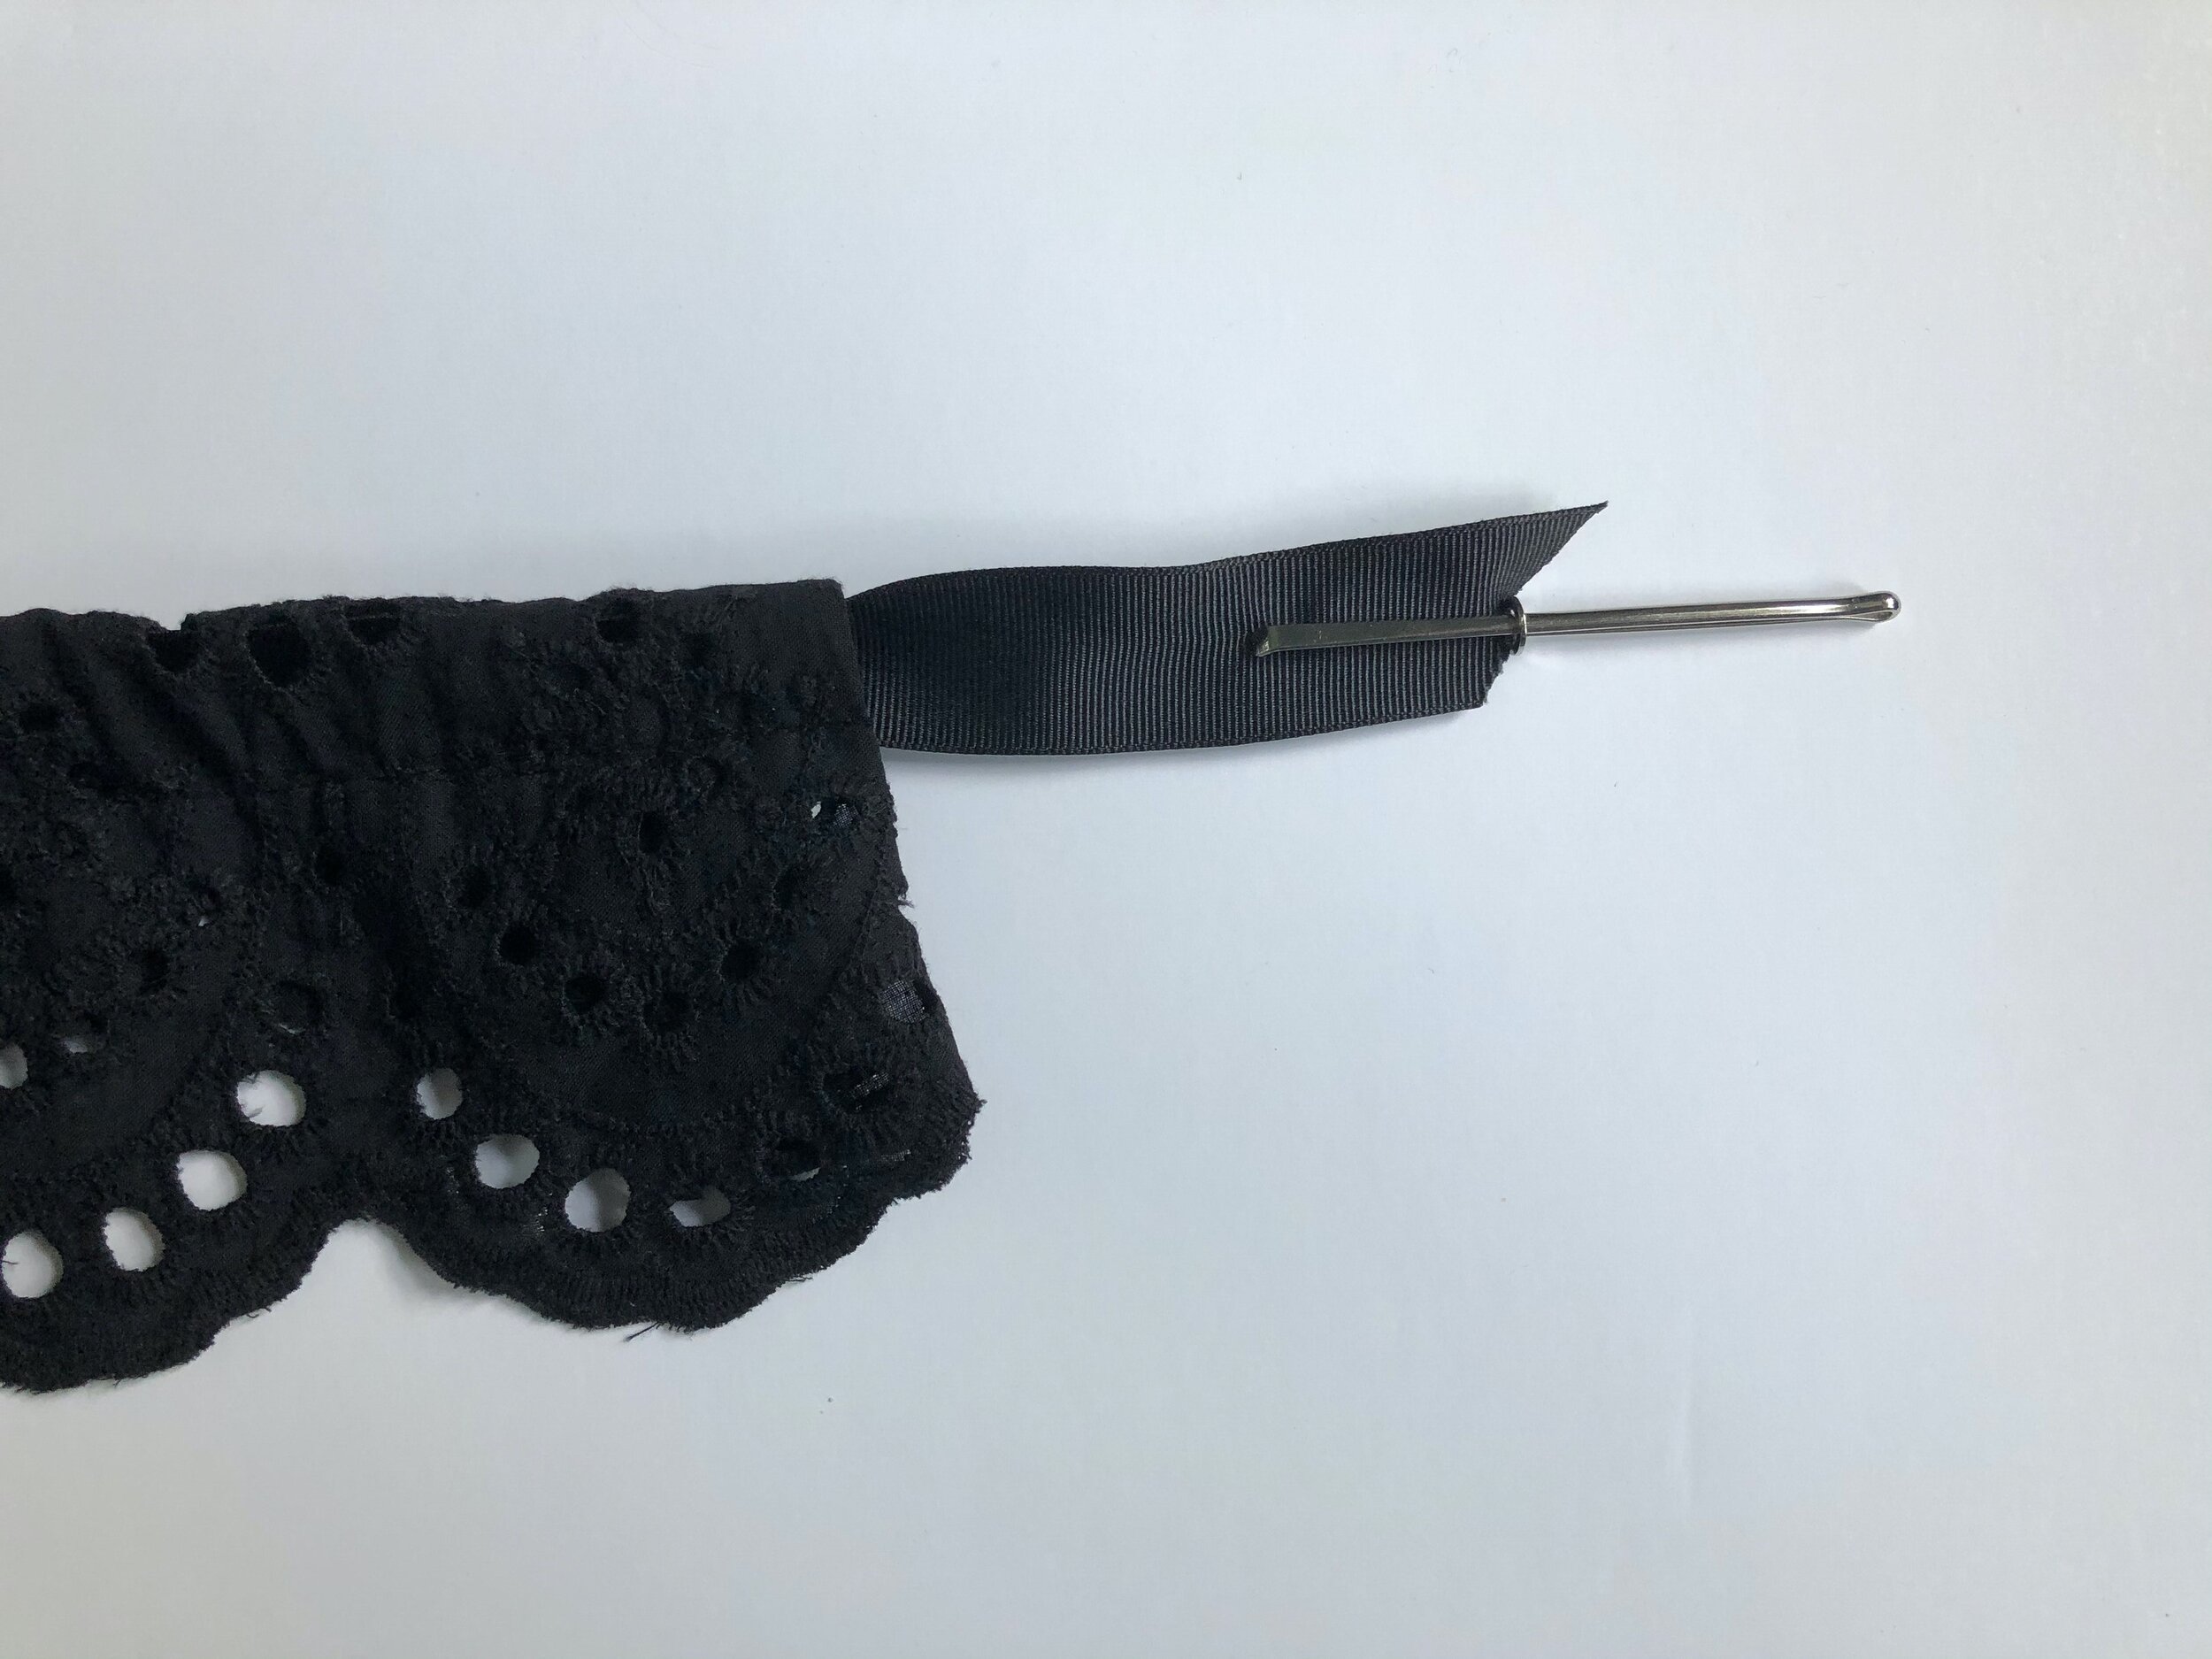
Take the ribbon and thread it through a safety pin or bodkin and draw through the casing. Once the ribbon is pulled through, cinch the collar to encourage it to ruffle a bit.
The ribbon should be just a few inches longer than the entire length of the collar before cinching.
Try it on and adjust the gathers and ruffle so that they form an attractive collar.
Clip each loose ribbon end at an angle to prevent fraying.
The collar can be tied at the center front for a rounded, ruffled collar.
Try playing with the length and width of the collar. This would be really flattering on a v-neck sweater or cardigan. It reminds me of the dainty Eileen West and Laura Ashley collars from the 80’s- but so much bolder and way more stylish!
The collar would be equally as lovely tied in the back. I could see wearing this out one evening with a halter cut sweater top, jeans and heels- and a great bag of course, too.
XO, Hilarie
Remember to Vote! For more information on voting in the US Election, go to vote.org
Introducing: Sew your own Wraps, Capes & Cover-ups. A Garment Sewing Primer.
I wrote this book to get you excited about making clothing that you will love wearing. The projects are all loose fitting so that you can concentrate on sewing and design and not get too focused on fitting. I show you how to manipulate fabric to make a wardrobe of timeless fashion accessories. Though it is really in the fabrication and finish of each garment where the true test of quality lies. The finish is exceptionally important. Clothing should be as beautiful on the inside as it is on the outside. The sewing techniques and projects in this book emphasize this principle of quality construction. Beyond the projects, the book is about craftsmanship. It explains in text and photos how to finish seams, embellish garments, and some pattern manipulation techniques that I hope will inspire you to expand your sewing skills.
It is hard for me to believe that I’ve nearly finished my second book, Sew Your Own Wraps, Capes & Cover-ups. As I work on the last of the illustrations, I am left feeling both exhausted and invigorated. Writing a book feels a whole lot like having a baby. From proposal to publication It takes about a year and a half of nearly everything you’ve got. Then it is submitted to the publishing team to take over and suddenly- is no longer “yours”.
The editing process is tough-and it can feel so personal. The manuscript and patterns get passed along to a variety of editors to comb through, question, mark up and pass back. Of course, without their skillful consideration- there would be no book! Since this was my second time writing a book, I thought- “I’ve got this! “– and was convinced that it was going to so much easier than the first one. Then 2020 began.
The manuscript and projects were due at the end of March- only a few weeks after the Governor of Virginia issued Stay at Home orders. At first the initial 2 -week shelter in place, seemed like a dream. More time to write and think! But, my kids were home too and those early days were filled with so much anxiety. Over time, we began to feel our way through it, and find a quiet, slower pace. The book provided a much-needed distraction. A distraction from politics, from Covid-19, from anxiety, from life really.
From March- July my business was closed. I was afraid. Besides not bringing in any income, I was issuing refunds each week as more classes, workshops, parties and camps were cancelled. Fortunately, I was able to rearrange my workspace and come up with a plan to return to teaching the day the restrictions were lifted and Virginia went into Phase 3.
A silver lining of the 2020 doomsday cloud is that so many more people are now sewing. At first it was for the animals injured and abandoned from the fires in Australia, and then Covid hit and we needed masks. Suddenly sewing machines were sold out everywhere and thread and elastic were scarce. People were sewing again! Now that masks are readily available, the new to the sewing crowd folks want to learn more. I cannot tell you the number of emails and calls I get each day with people eager to sharpen their new-found skills.
The book feels perfectly timed to help fulfill that burgeoning curiosity in those that are new to sewing as well as an invitation to explore pattern making and garment sewing to those already well on their path to mastery. As a way of introducing the book concepts and to educate a larger audience, you can look forward to lots of posts about garment sewing, pattern making and fashion design.
About the Book
Sew Your Own Wraps, Capes & Cover-Ups: 16 Variations; Unlimited Possibilities
Fashion made easy
Take your wardrobe from drab to fab with modern wraps, capes, and coverups. Start with the basic sewing patterns, and then customize your unique look with 16 variations and tons of embellishment options. Each pattern comes with variation and design options making it easy to alter looks for any season so you can be fashionable all year round. Learn how to pick the right fabrics to flatter your shape as well as how to best place pockets, details, and embellishments for a truly trendsetting look.
Elevate your wardrobe with stylish women's clothing patterns and designs
No detailed sewing! Simple garments made elegant with guidance on how to cut and drape the fabric into a flattering fit
Customize your unique look with endless embellishment choices
I can’t wait to share the book with you!
XO, Hilarie
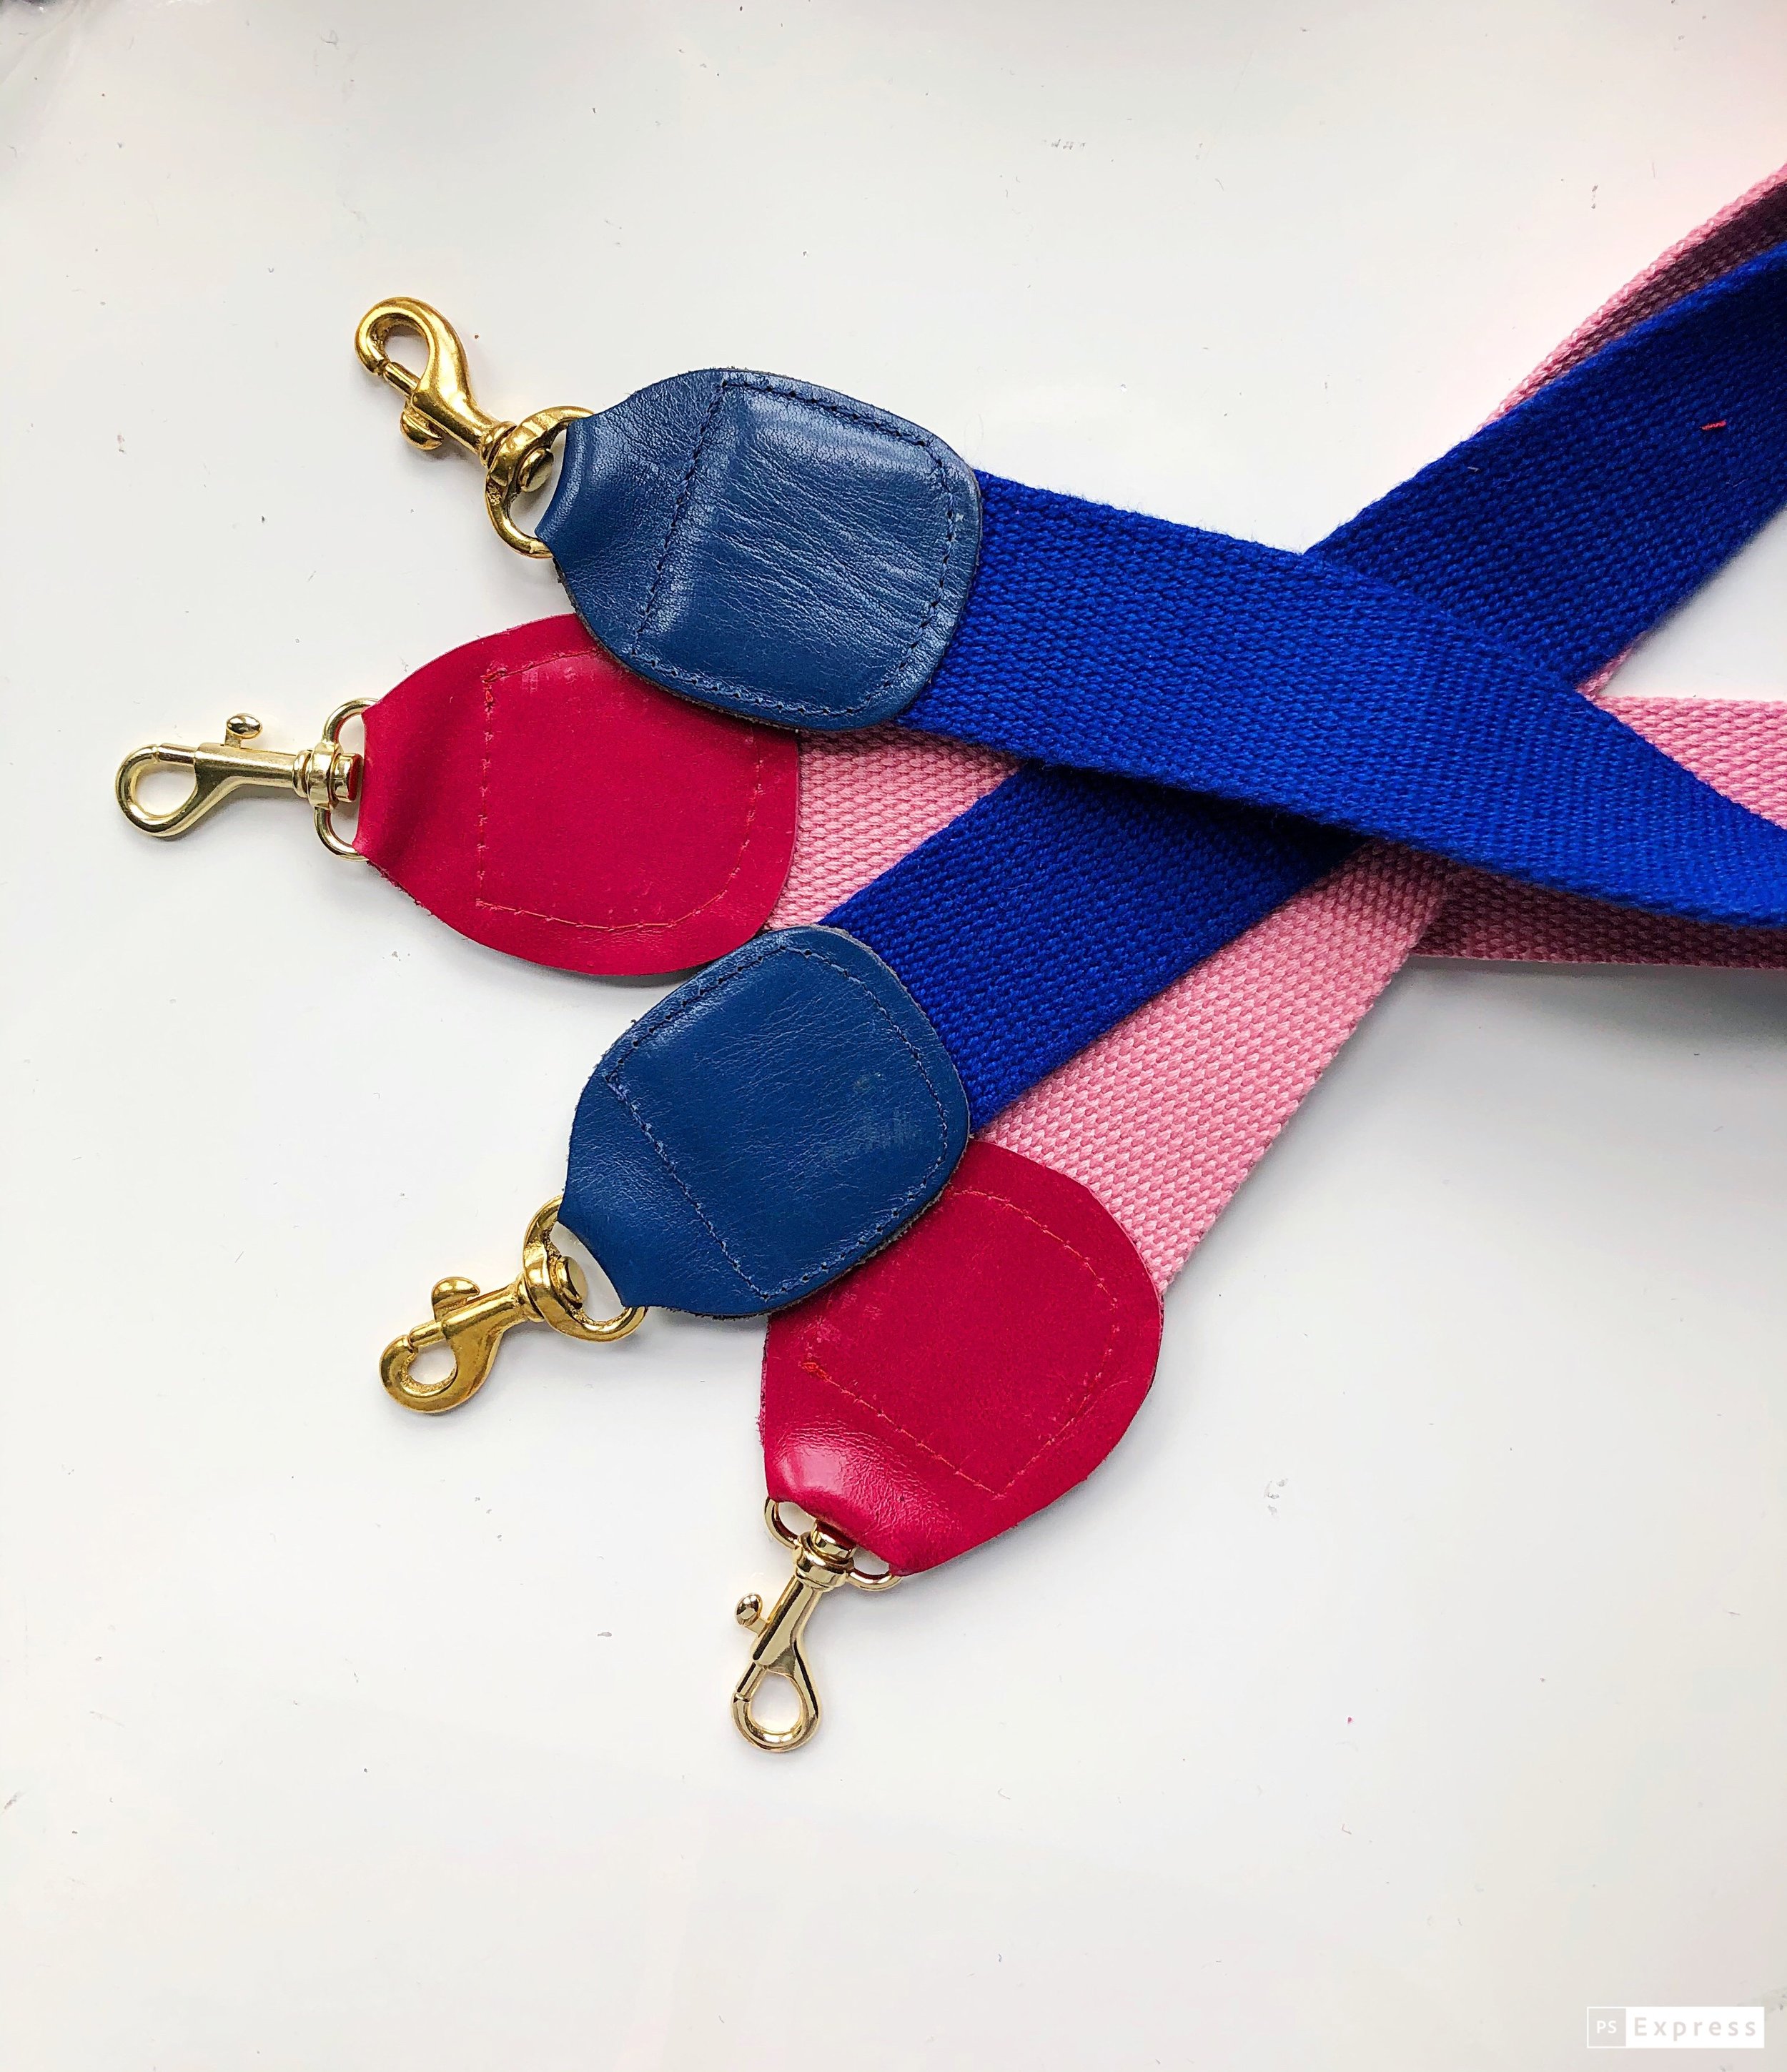
How to make a detachable shoulder strap for your bag
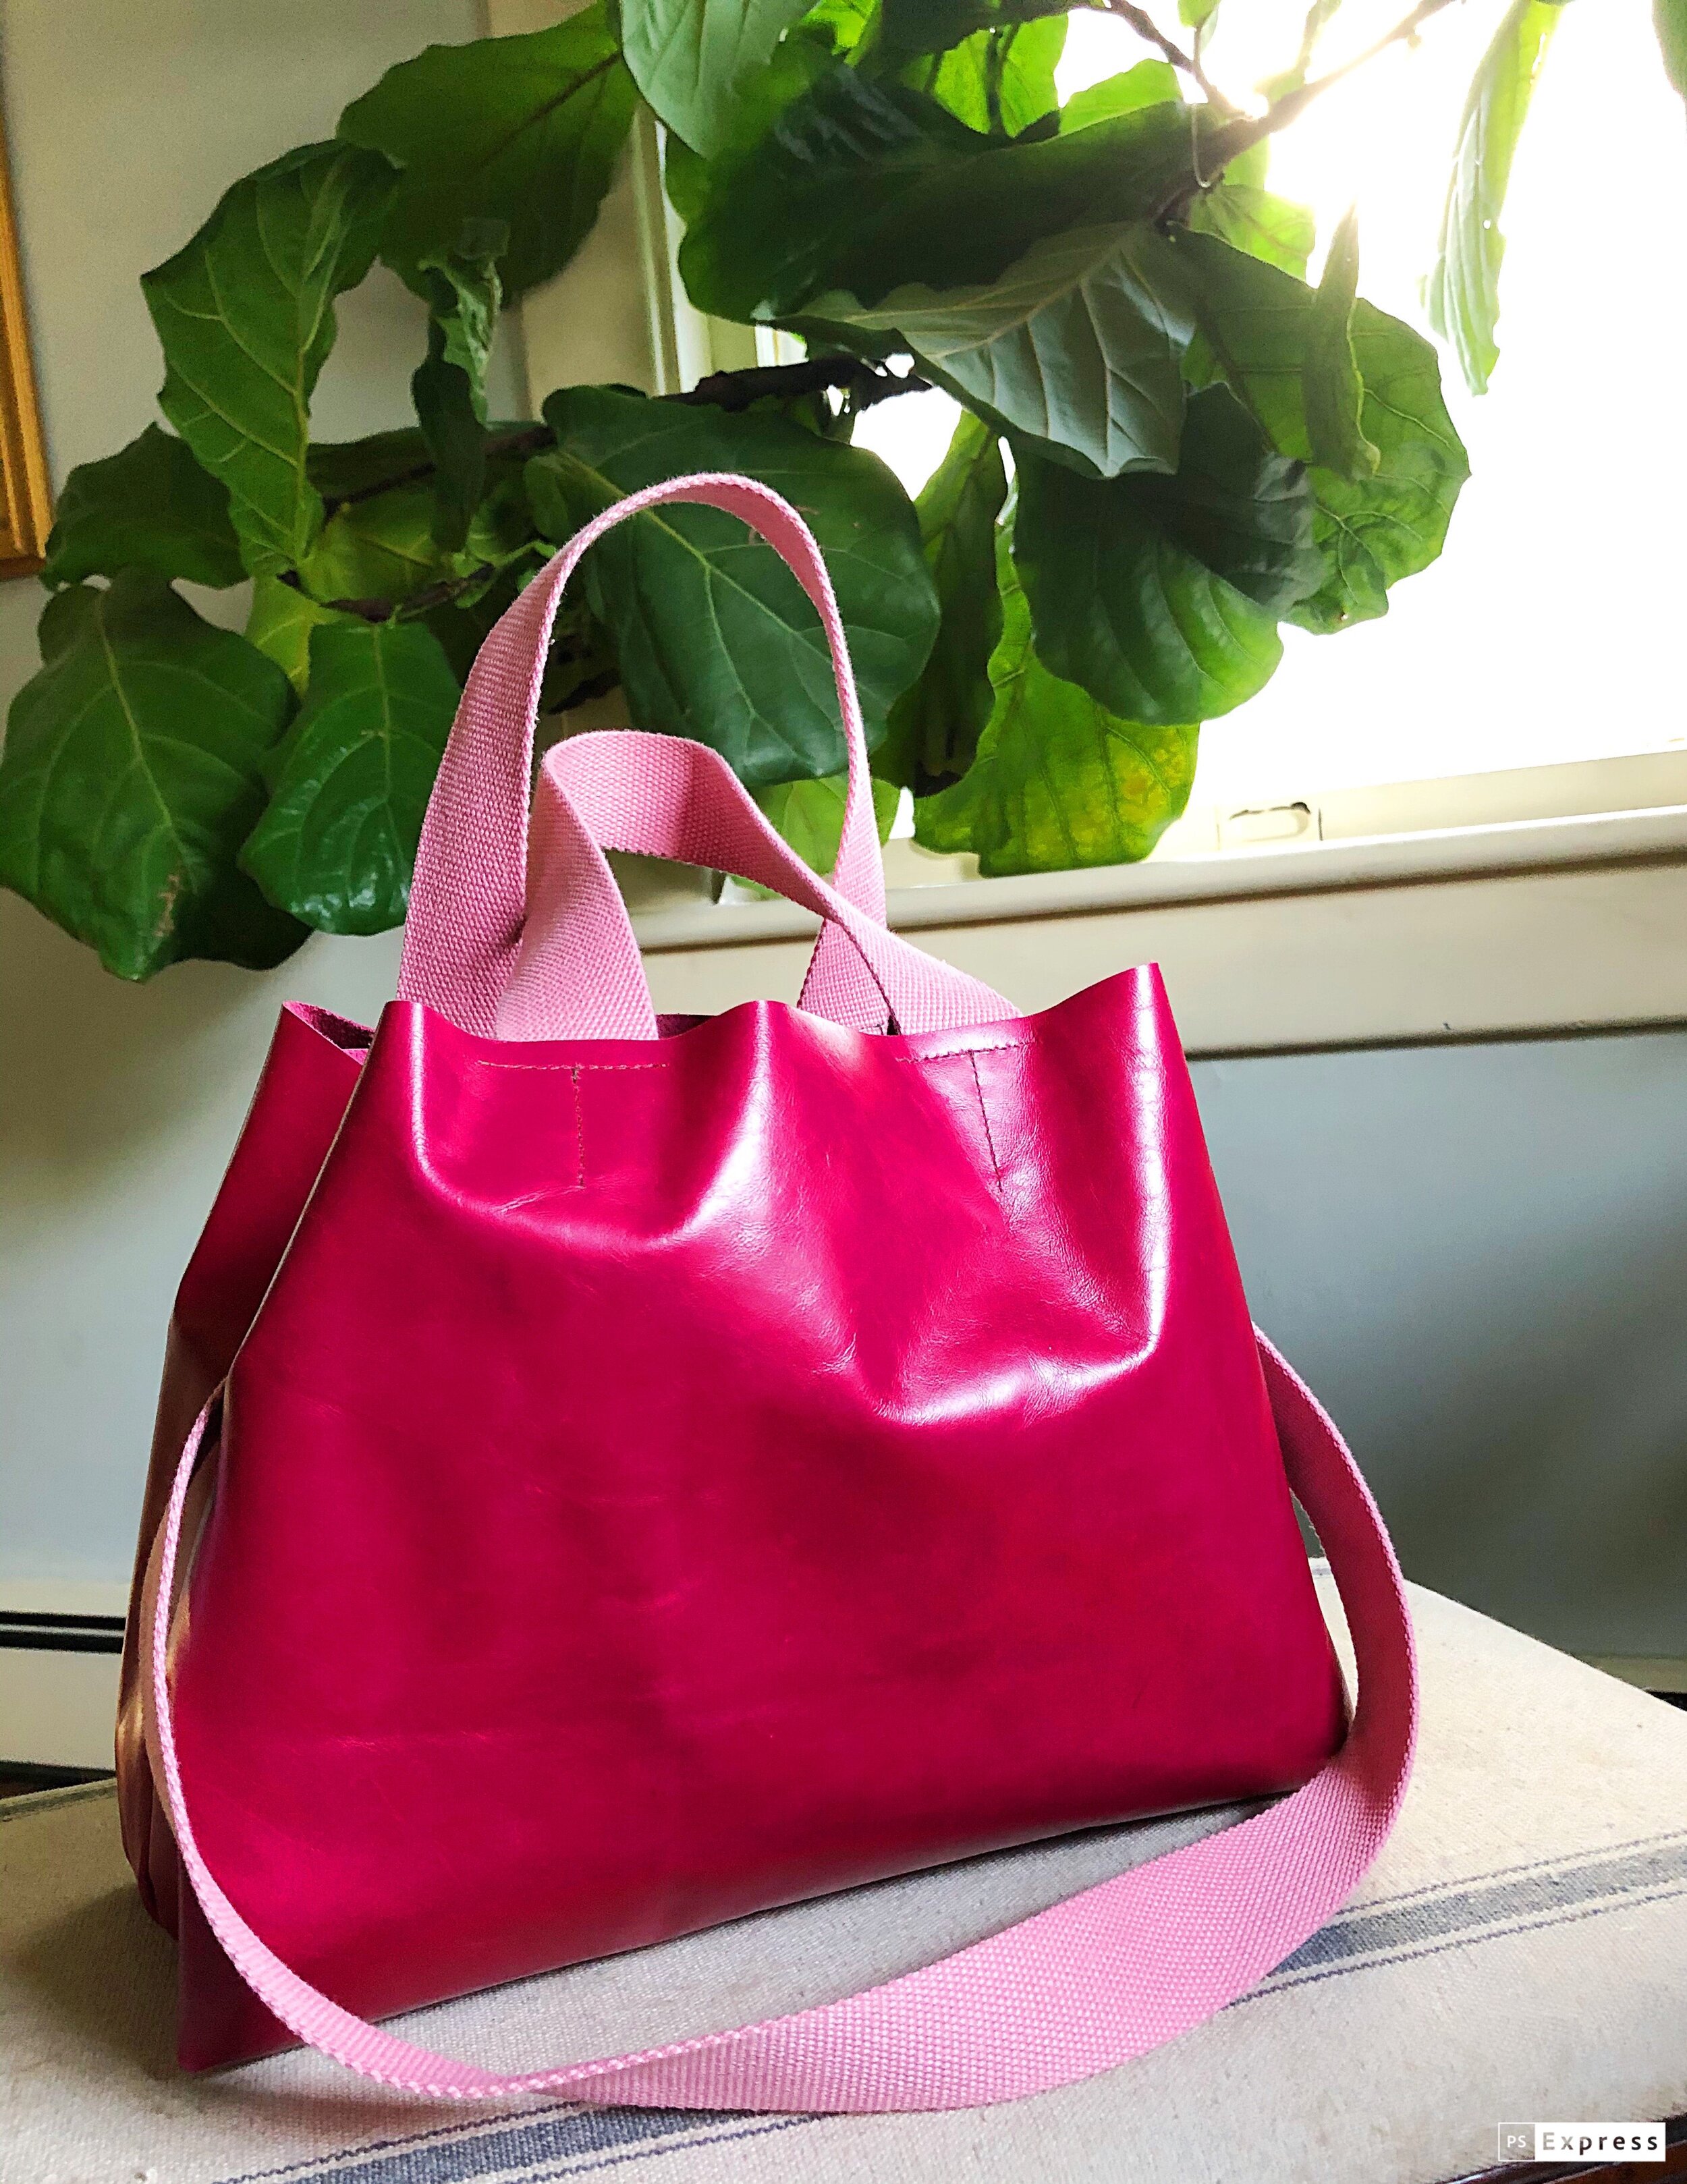
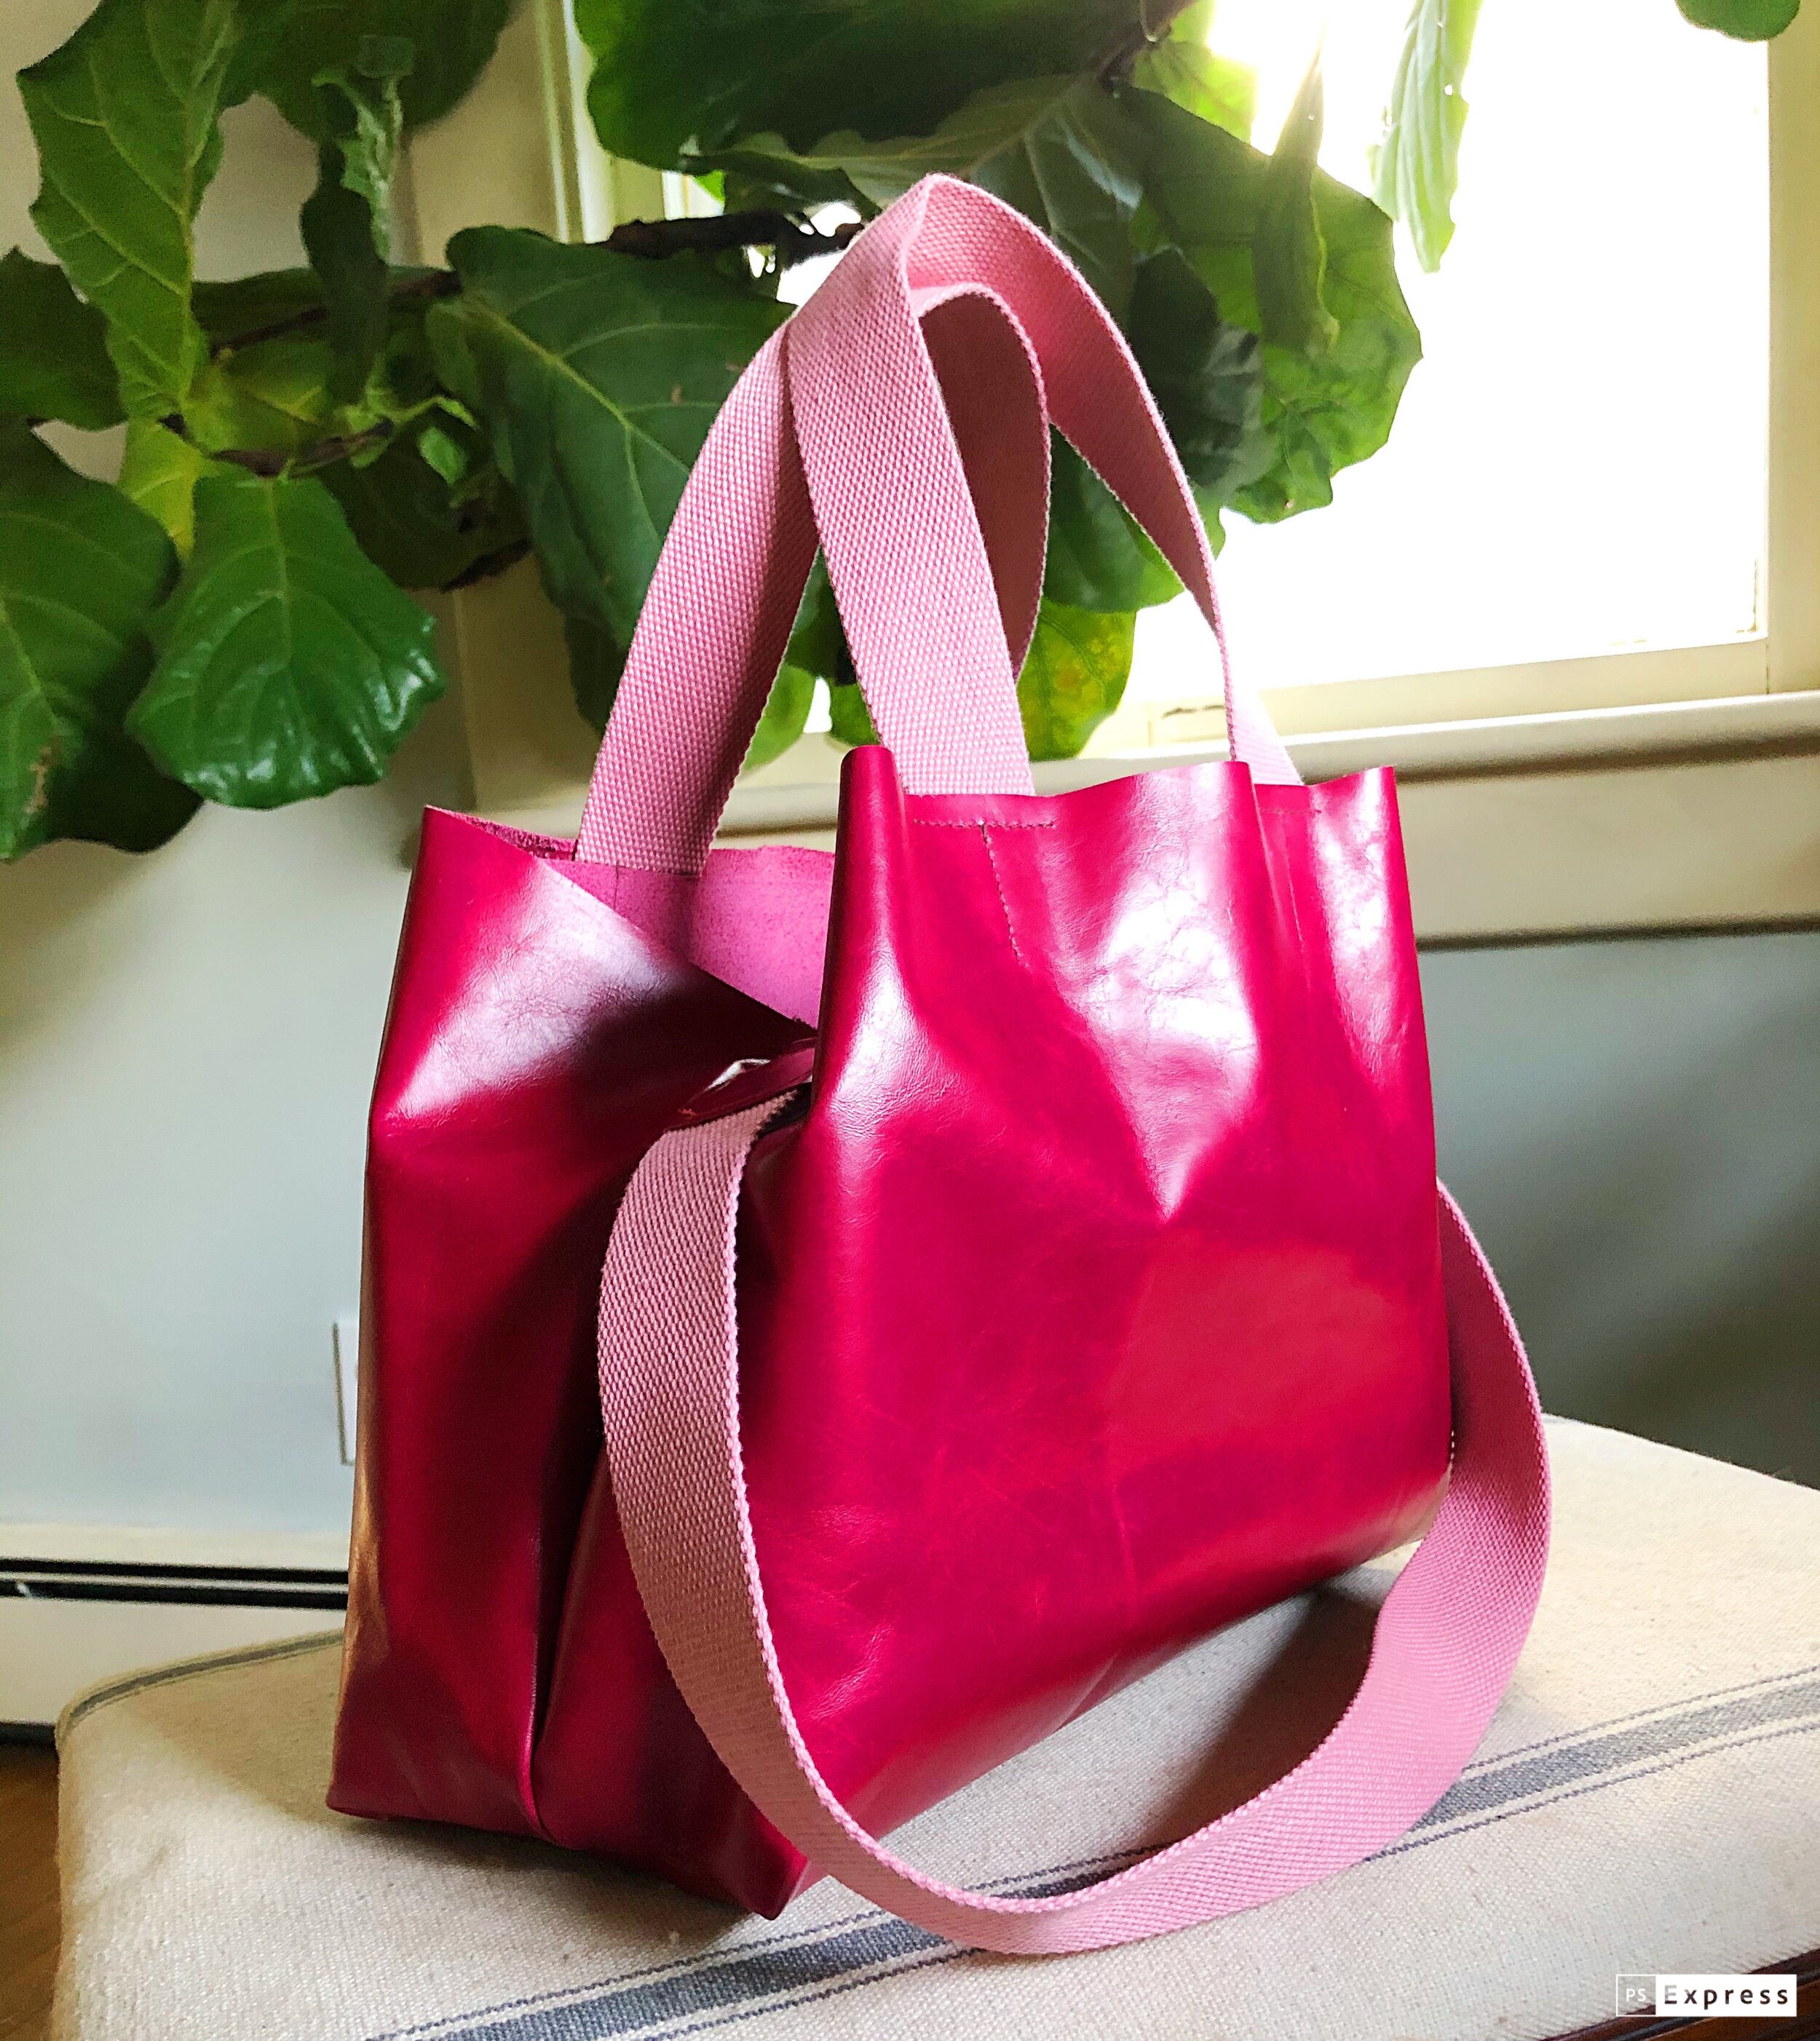
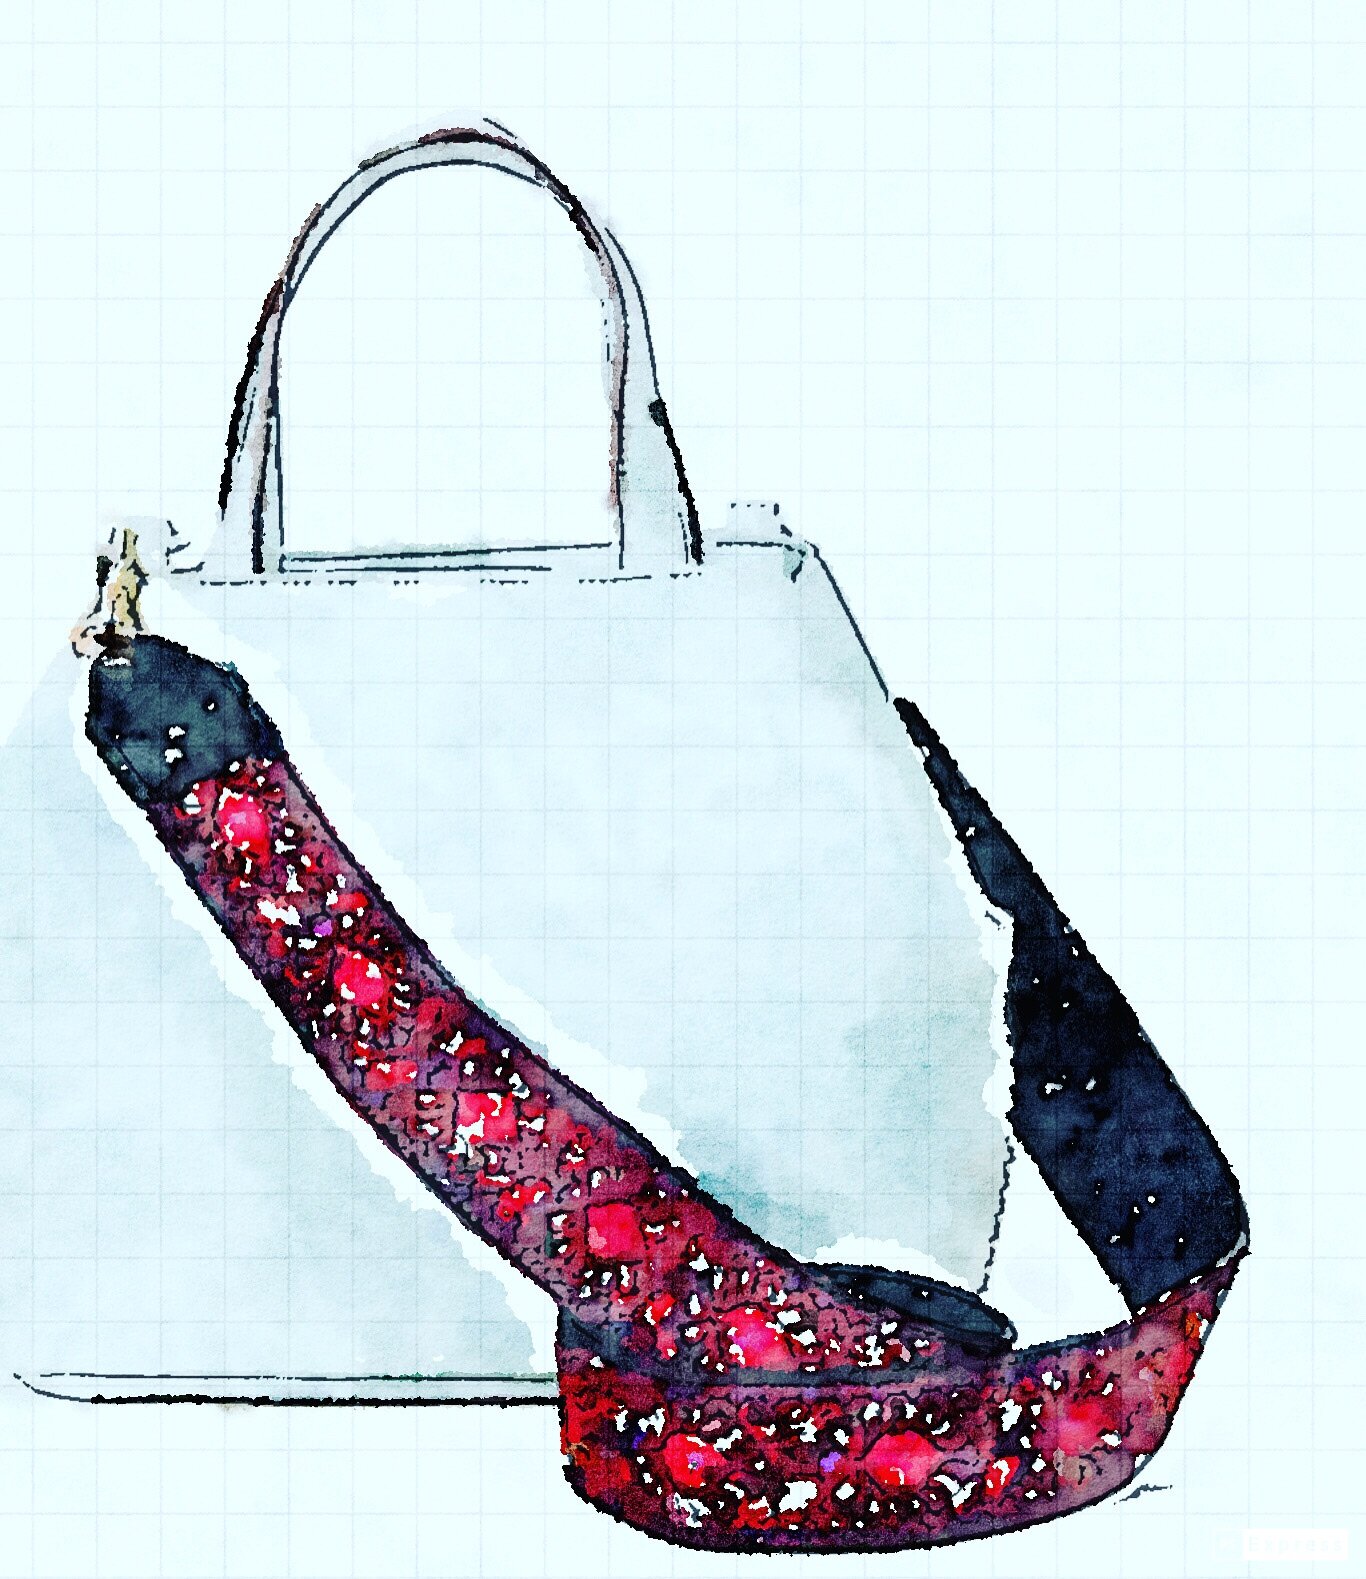
You have seen the new guitar type purse straps, right? While they weren’t really on my radar until early this year when I read an article in the NY Times. Since then, I haven’t been able to get this detachable strap out of my mind. I began to imagine the countless options and reinterpretations. Suddenly it seemed as if each bag I own needed to have its own wardrobe. And now, they do.
By now you have surely seen the new guitar type purse straps, right? They weren’t really on my radar until early this year when I read an article in the NY Times. Since then, I haven’t been able to get this detachable strap out of my mind. Suddenly it seemed as if each bag I own needed to have its own wardrobe. ( And now, they do. ) I began to imagine the countless options and reinterpretations.
I love the fun of dressing up a bag with a different strap, and watching the transformation. These shoulder straps allows you to instantly add a personal touch to your bag. The first bag that I tried to pair it with was a crossbody style. The new contrasting strap made it so much more fun and interesting. Then I tried it with a belt bag- now that “belt” bag has three different options. It can be worn on the belt, with a crossbody strap and now, it has a new leather top handle. Same bag, three carrying options. Friends, isn’t that reason enough to pull out your sewing machine?
Today I am going to share with you at a shoulder strap tutorial so that you too can make a detachable shoulder strap that speaks to you, fits you and stands apart from the rest of your bag.
The Ultimate Hook-up: Make a detachable shoulder strap for your bag
HOW TO SEW A DETACHABLE PURSE STRAP
MATERIALS AND SUPPLIES
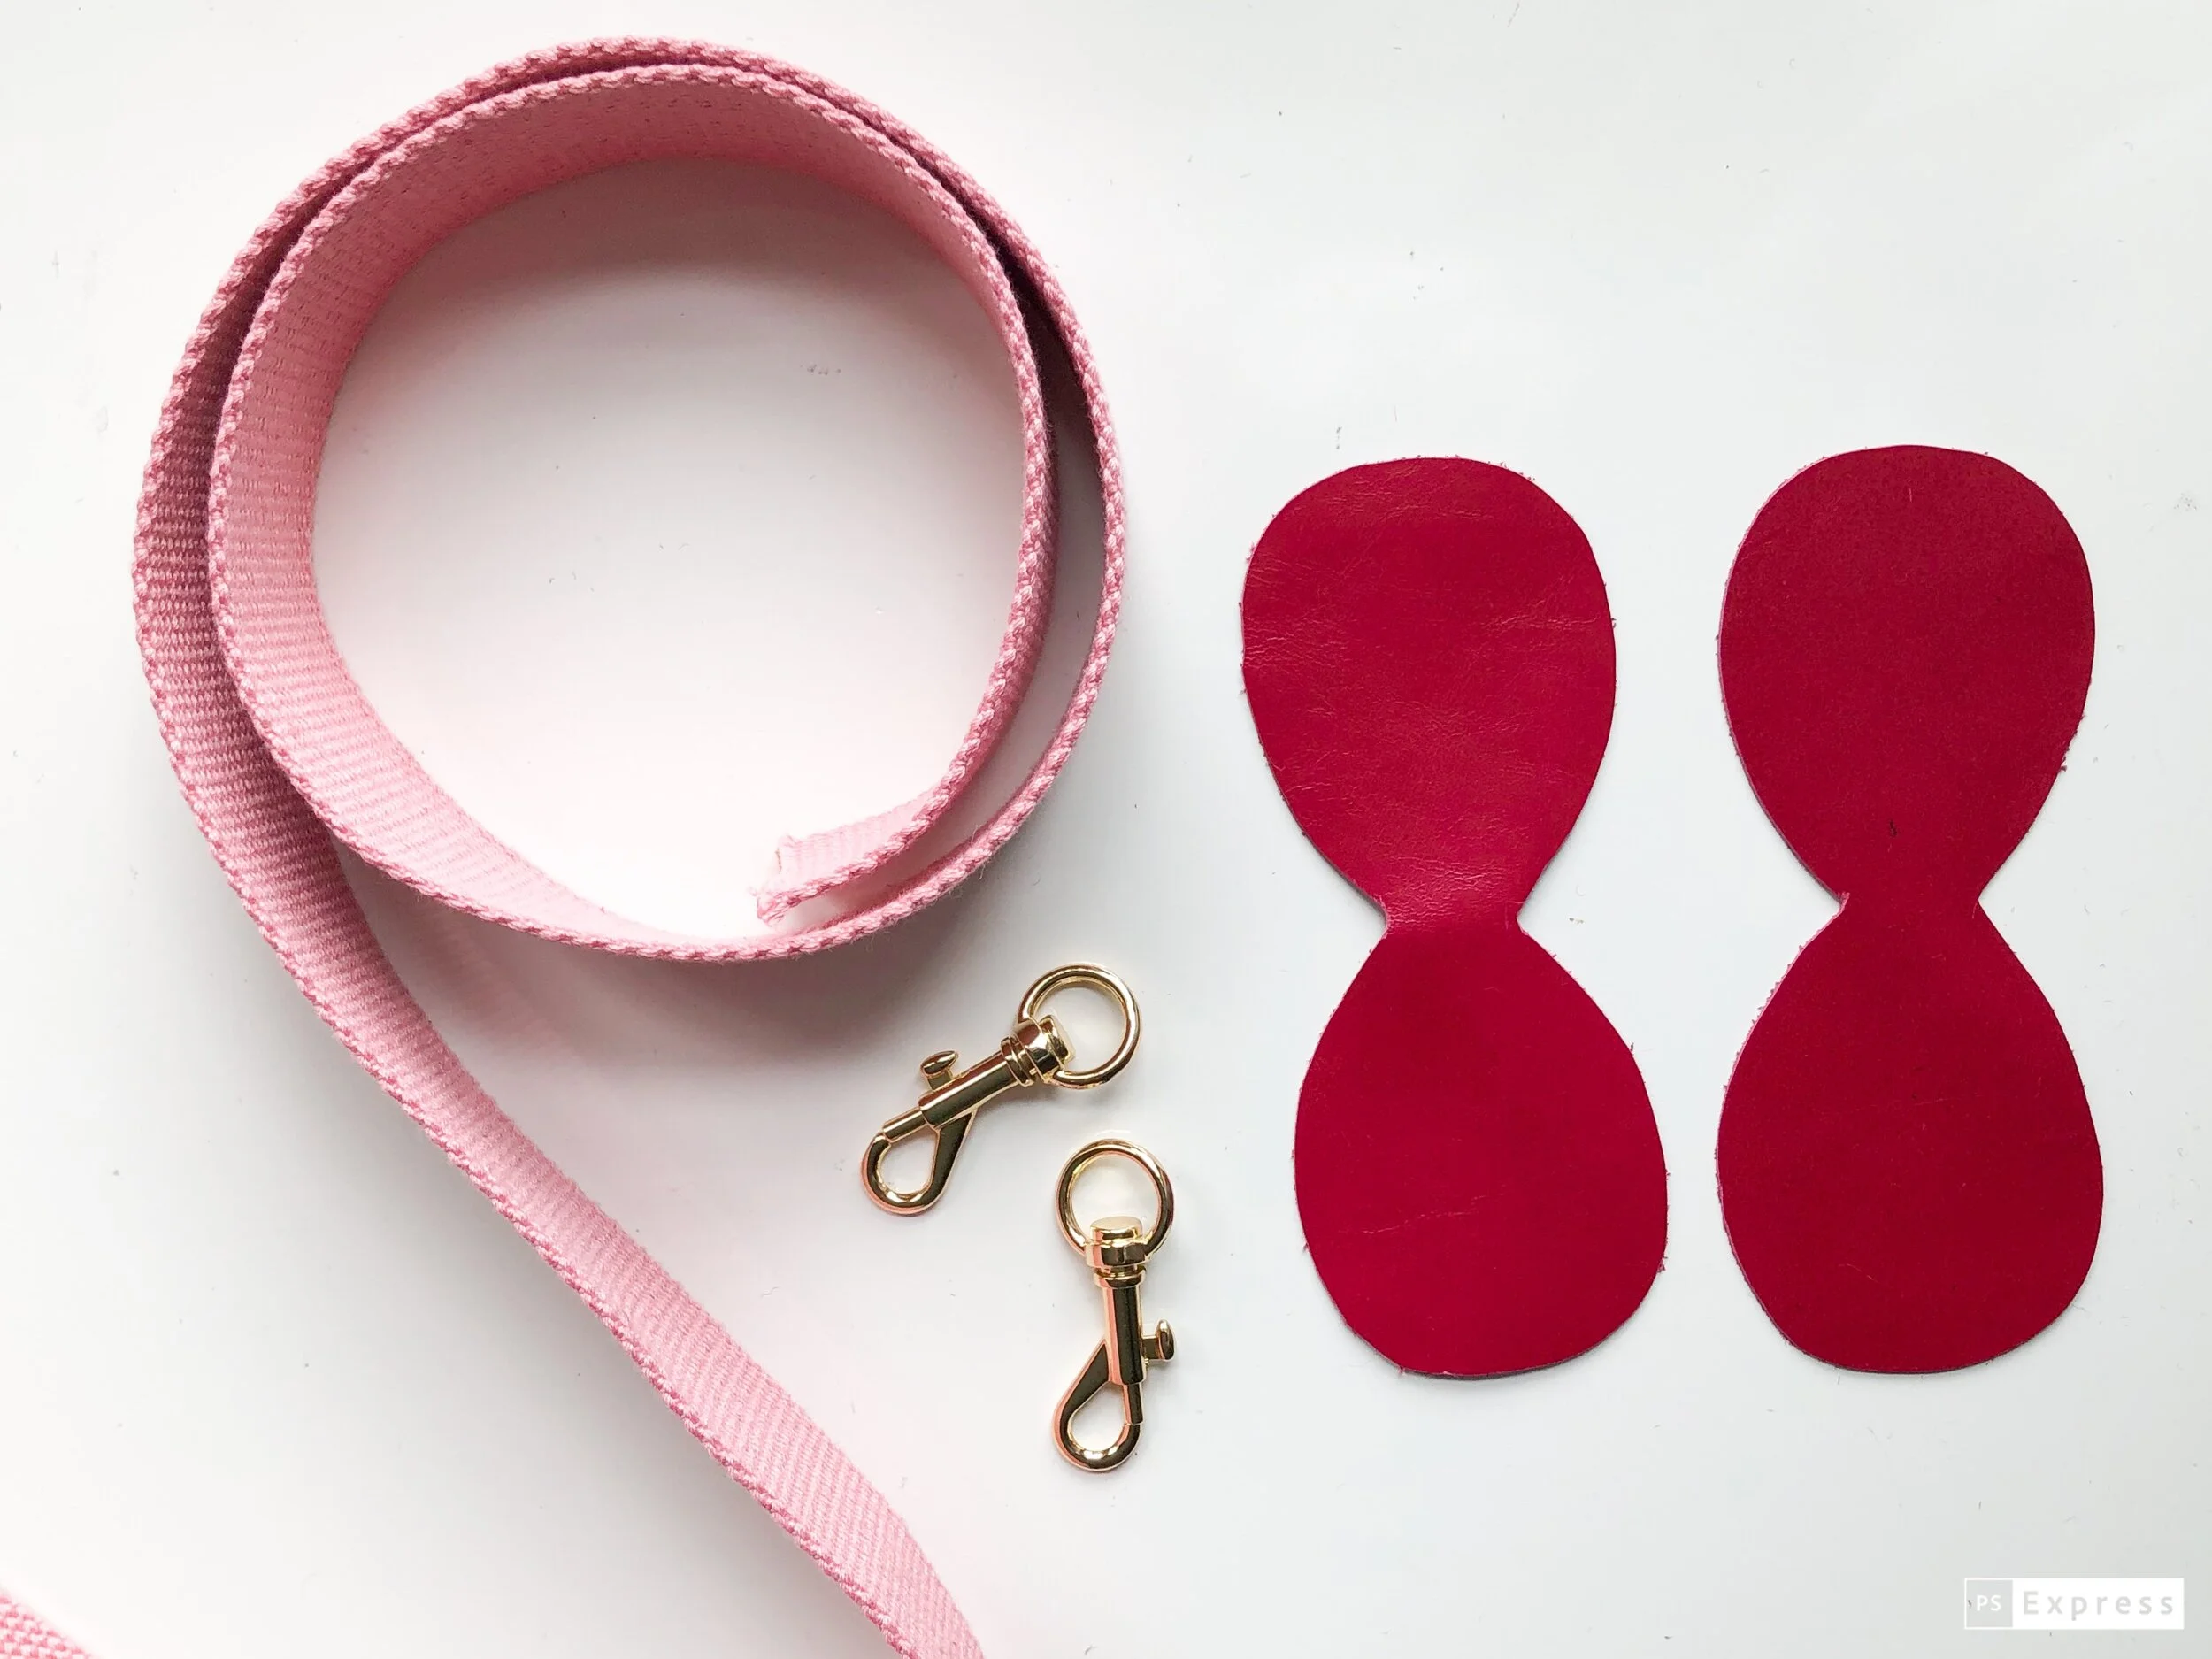
Sewing Machine with a walking foot
Leather scraps, (8 inch square should be enough)
Two 3/8” x 1 1/2” Swivel Snap Hook for the rounded cap; Two 1 1/2” x 1 3/4” for the squared off version.
1 1/4 Yards of Cotton Webbing Mine is 38mm (roughly 1.5”) wide and 44” long
Mid-weight polyester thread to match leather
Scissors or Rotary cutter
Rubber Cement
Chalk or water soluble fabric marking pen
SIZE
Finished dimensions are approximately: 2”x 47”
NOTES
See previous blog posts on sewing with leather, determining the best strap length and using an adjustable slider .
The leather used in this tutorial is from Leather, Suede, Skins, Inc. in NYC
For best results when sewing with leather, the stitch length should be set to about 7-10 stitches per inch depending on the thickness of the leather. Stitches that are too short make too many holes in the leather which decreases stability.
You can adjust the length of the stitch by testing on a scrap of leather. Does the leather feed evenly? Are there any skipped stitches? How is the tension? Are both the top and bottom threads flat and even?
PATTERN INSTRUCTIONS
Please read through the entire pattern before beginning your bag.
THE PATTERN
If you haven’t used a PDF Pattern before, here is a quick tutorial on printing and assembly: PDF Pattern
For more information on working with patterns, see pages 14-18 in my book, Sew Bags: The Practical
Guide to Making Purses, Totes, Clutches & More; 13 Skill-Building Projects C&T Publishing, 2019
PREPARE
There are two end cap styles to choose from. Please be sure that you select the appropriate sized hardware and webbing to fit. For this tutorial, I am using the more rounded off shape to cap my strap.
Trace the End Cap pattern onto the back side of the leather piece. Repeat for the second piece.
CUT
Carefully cut around the traced line.
Measure and cut the webbing to your desired length. Here is a recent article that may help guide you- or you can just measure a strap that you already own and that fits comfortably.
HARDWARE
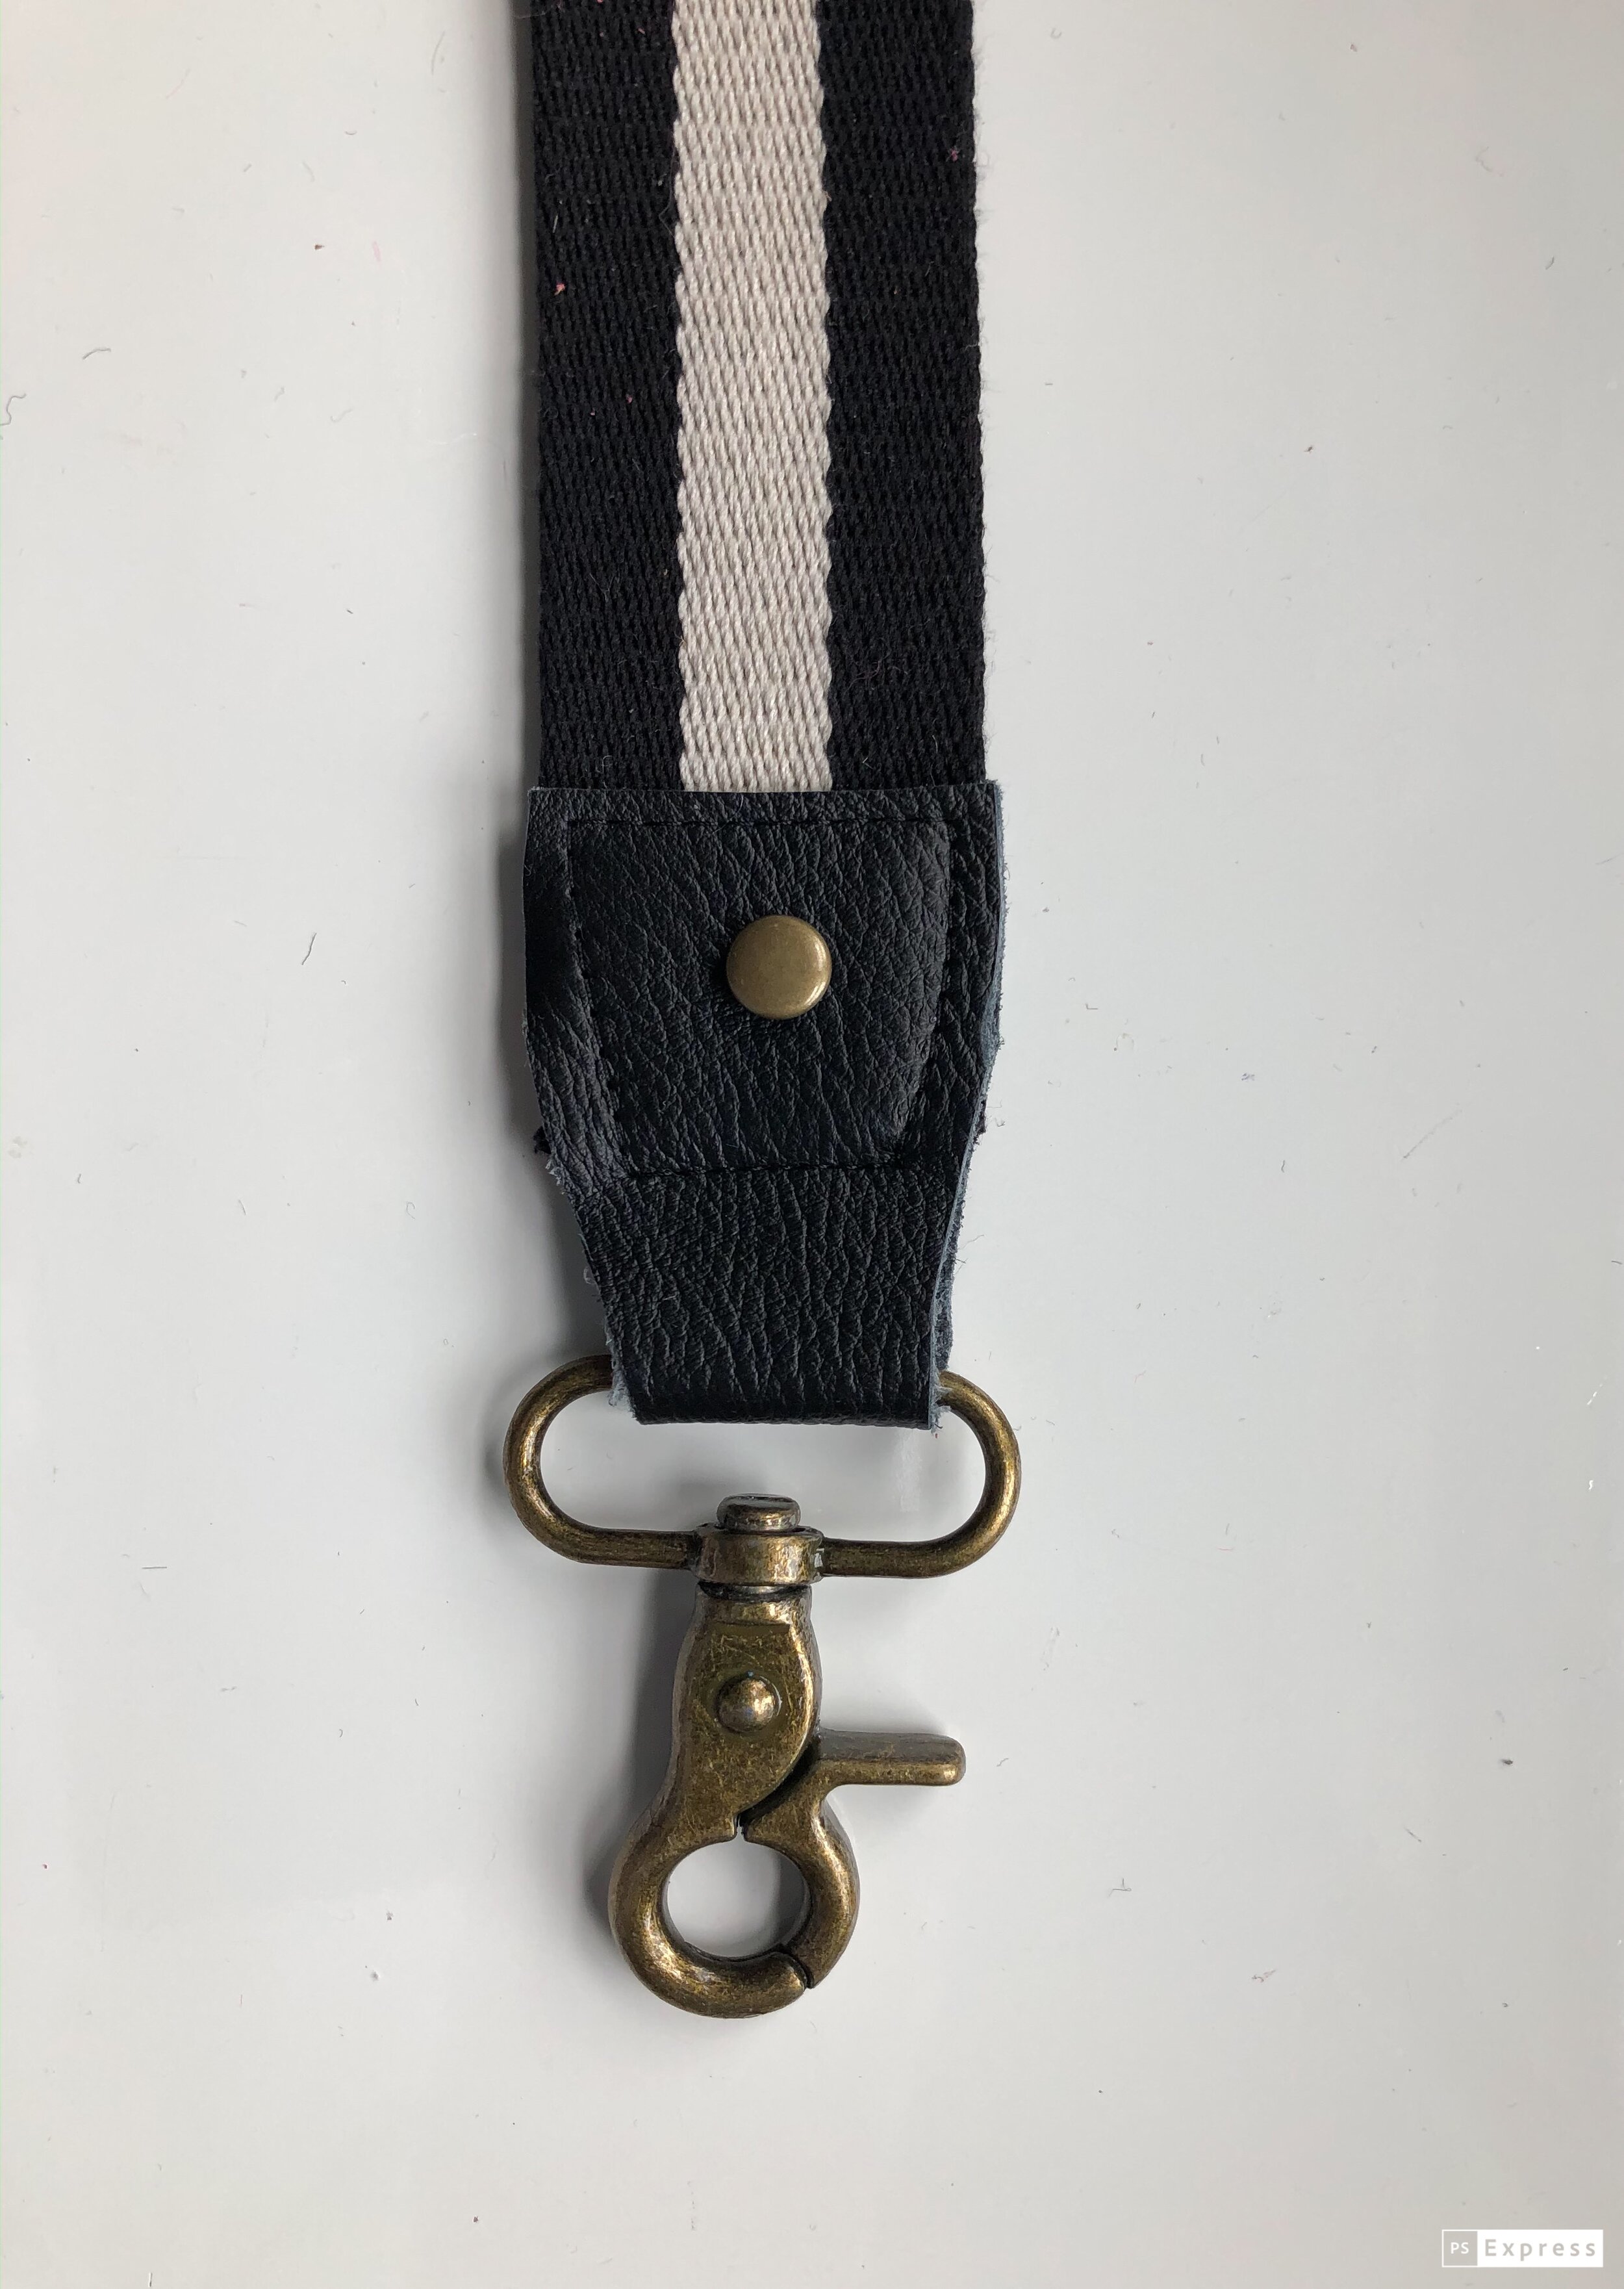
Slide the leather piece into the bottom ring of the snap hook. I find it is easier to fold the leather in half, lengthwise (like a hotdog) and thread it through the ring. Once it is centered, unfold and flatten.
In a well- ventilated area, apply a generous glop of rubber cement to the center of the inside of the leather. Let it sit a moment to get tacky. Place the end of the webbed strap centered on the leather- making sure that the webbing is completely inside the leather. Press to help the rubber cement to adhere.
Add another bit of rubber cement to the top of the strap and press the leather to seal. Allow to dry for a few minutes.
Repeat for the opposite side of the strap end.
MARK
Take a piece of chalk or a water soluble pen and mark the stitching line on the outside of the leather.
SEW
Edgestitch around the end cap. You will be sewing a box that is about one and a half inches square. If you would prefer, feel free to round out your stitching instead (like I did) by just sewing 1/4” from the edge of the leather. It is easier to sew a box shape and get it right the first time. Whichever shape you choose, just try to sew slowly. You can even “walk” your machine if you need to.
TRIM THREADS
Instead of back stitching, I generally recommend leaving long tails and hand knotting the ends, as backstitching can cut the leather. To hide the tails, tie in a double knot as close to the stitch as possible. Thread both ends of the thread onto a hand sewing needle. Insert the needle into the back of the strap of the underside of the seam. Pull through. Tie once again and snip.
Pictures of this method and more details are available here.
I added a rivet to this strap to both dress it up and to provide some additional reinforcement.
My next strap is all laid out and ready to go!
This accessory strap can be used with any bag that has a removable strap. Simply unhook the original, and swap it out for the new and improved.
With this fully customized option, you can breathe new life into old bags. Whether you wear it messenger or standard shoulder style, it is sure to give each outfit some unique style appeal. How will you wear yours? Please share using the hashtags #sewbags #sewbagsthebook #littlestitchstudio
For more bag patterns and sewing techniques, be sure to check out my new book! Sew Bags: The Practical Guide to Making Purses, Totes, Clutches & More; 13 Skill-Building Projects
XOXO, Hilarie
Tips and Tricks for Sewing with leather
There is just nothing like sewing or crafting with beautiful materials. Chief among them for me is leather.
One of the reasons that I was late to release a pattern that requires leather is that for many people, it is tricky to acquire. It is not like you can stop by your local fabric shop and pick up a yard or two. Additionally, while leather is not difficult to sew, you do have to have a few extras available to make it turn out looking fantastic.
There is just nothing like sewing or crafting with beautiful materials. Chief among them for me is leather.
One of the reasons that I was late to release a pattern that requires leather is that for many people, it is tricky to acquire. It is not like you can stop by your local fabric shop and pick up a yard or two. Additionally, while leather is not difficult to sew, you do have to have a few extras available to make it turn out looking fantastic. When I wrote my book, one thing that I really wanted to stress was to not feel the urge to go out and purchase everything that you think you “might” need. As it never really ends- I promise! 45 years in and each time I learn a new technique or take interest in some new esoteric path, the cash flow woes begin! Which brings me back to the point, “Do as I say, not as I do” :)
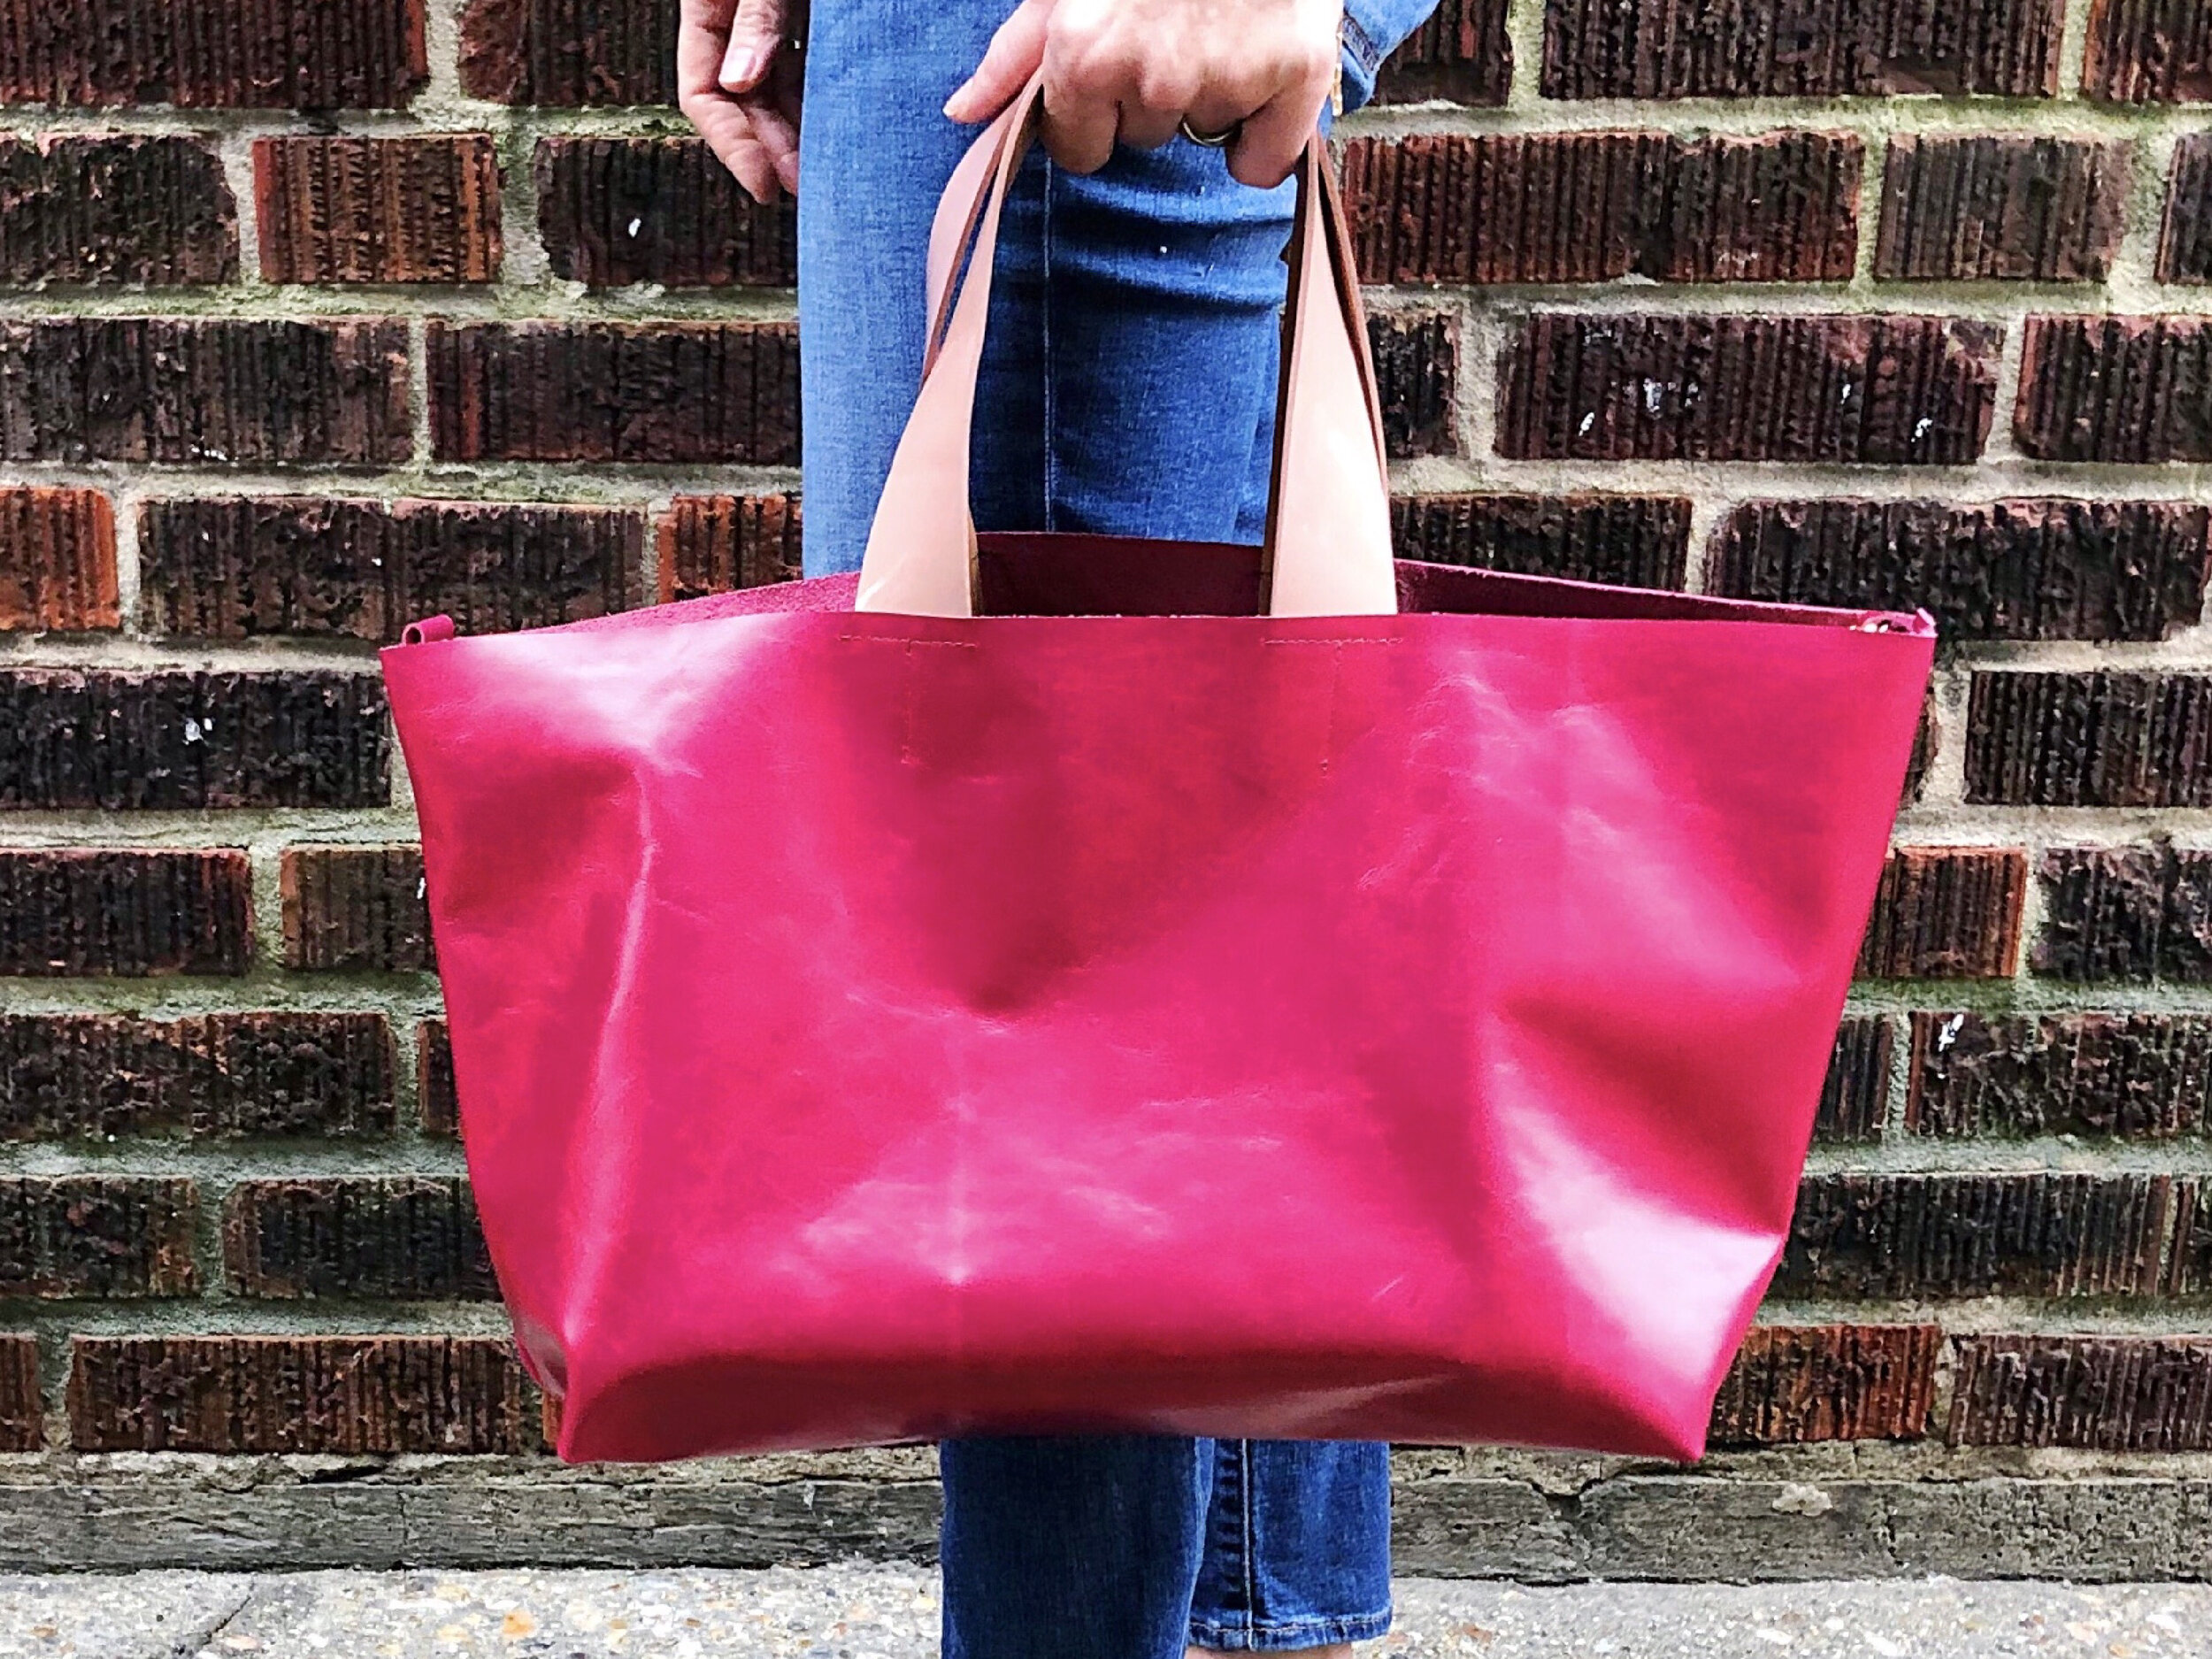
Life is funny sometimes! Through complete serendipity, and the power of Instagram, I have made a new friend, Faina, who happens to own a leather shop! Leather, Suede, Skins, Inc. in NYC. She so generously shared some of her gorgeous leather with me to make the Poppy Convertible Tote and tutorial. But more than that, you now have a place to shop for leather and an expert to consult! Our hope is that together, we can show you how easy and fun it is to sew with leather.
There are a few supplies that you will need to get started. While some are truly necessary to achieve the correct finished look and make the process so much more enjoyable! There are a few others that are more in the “nice to have” category. I’ll share both with you.
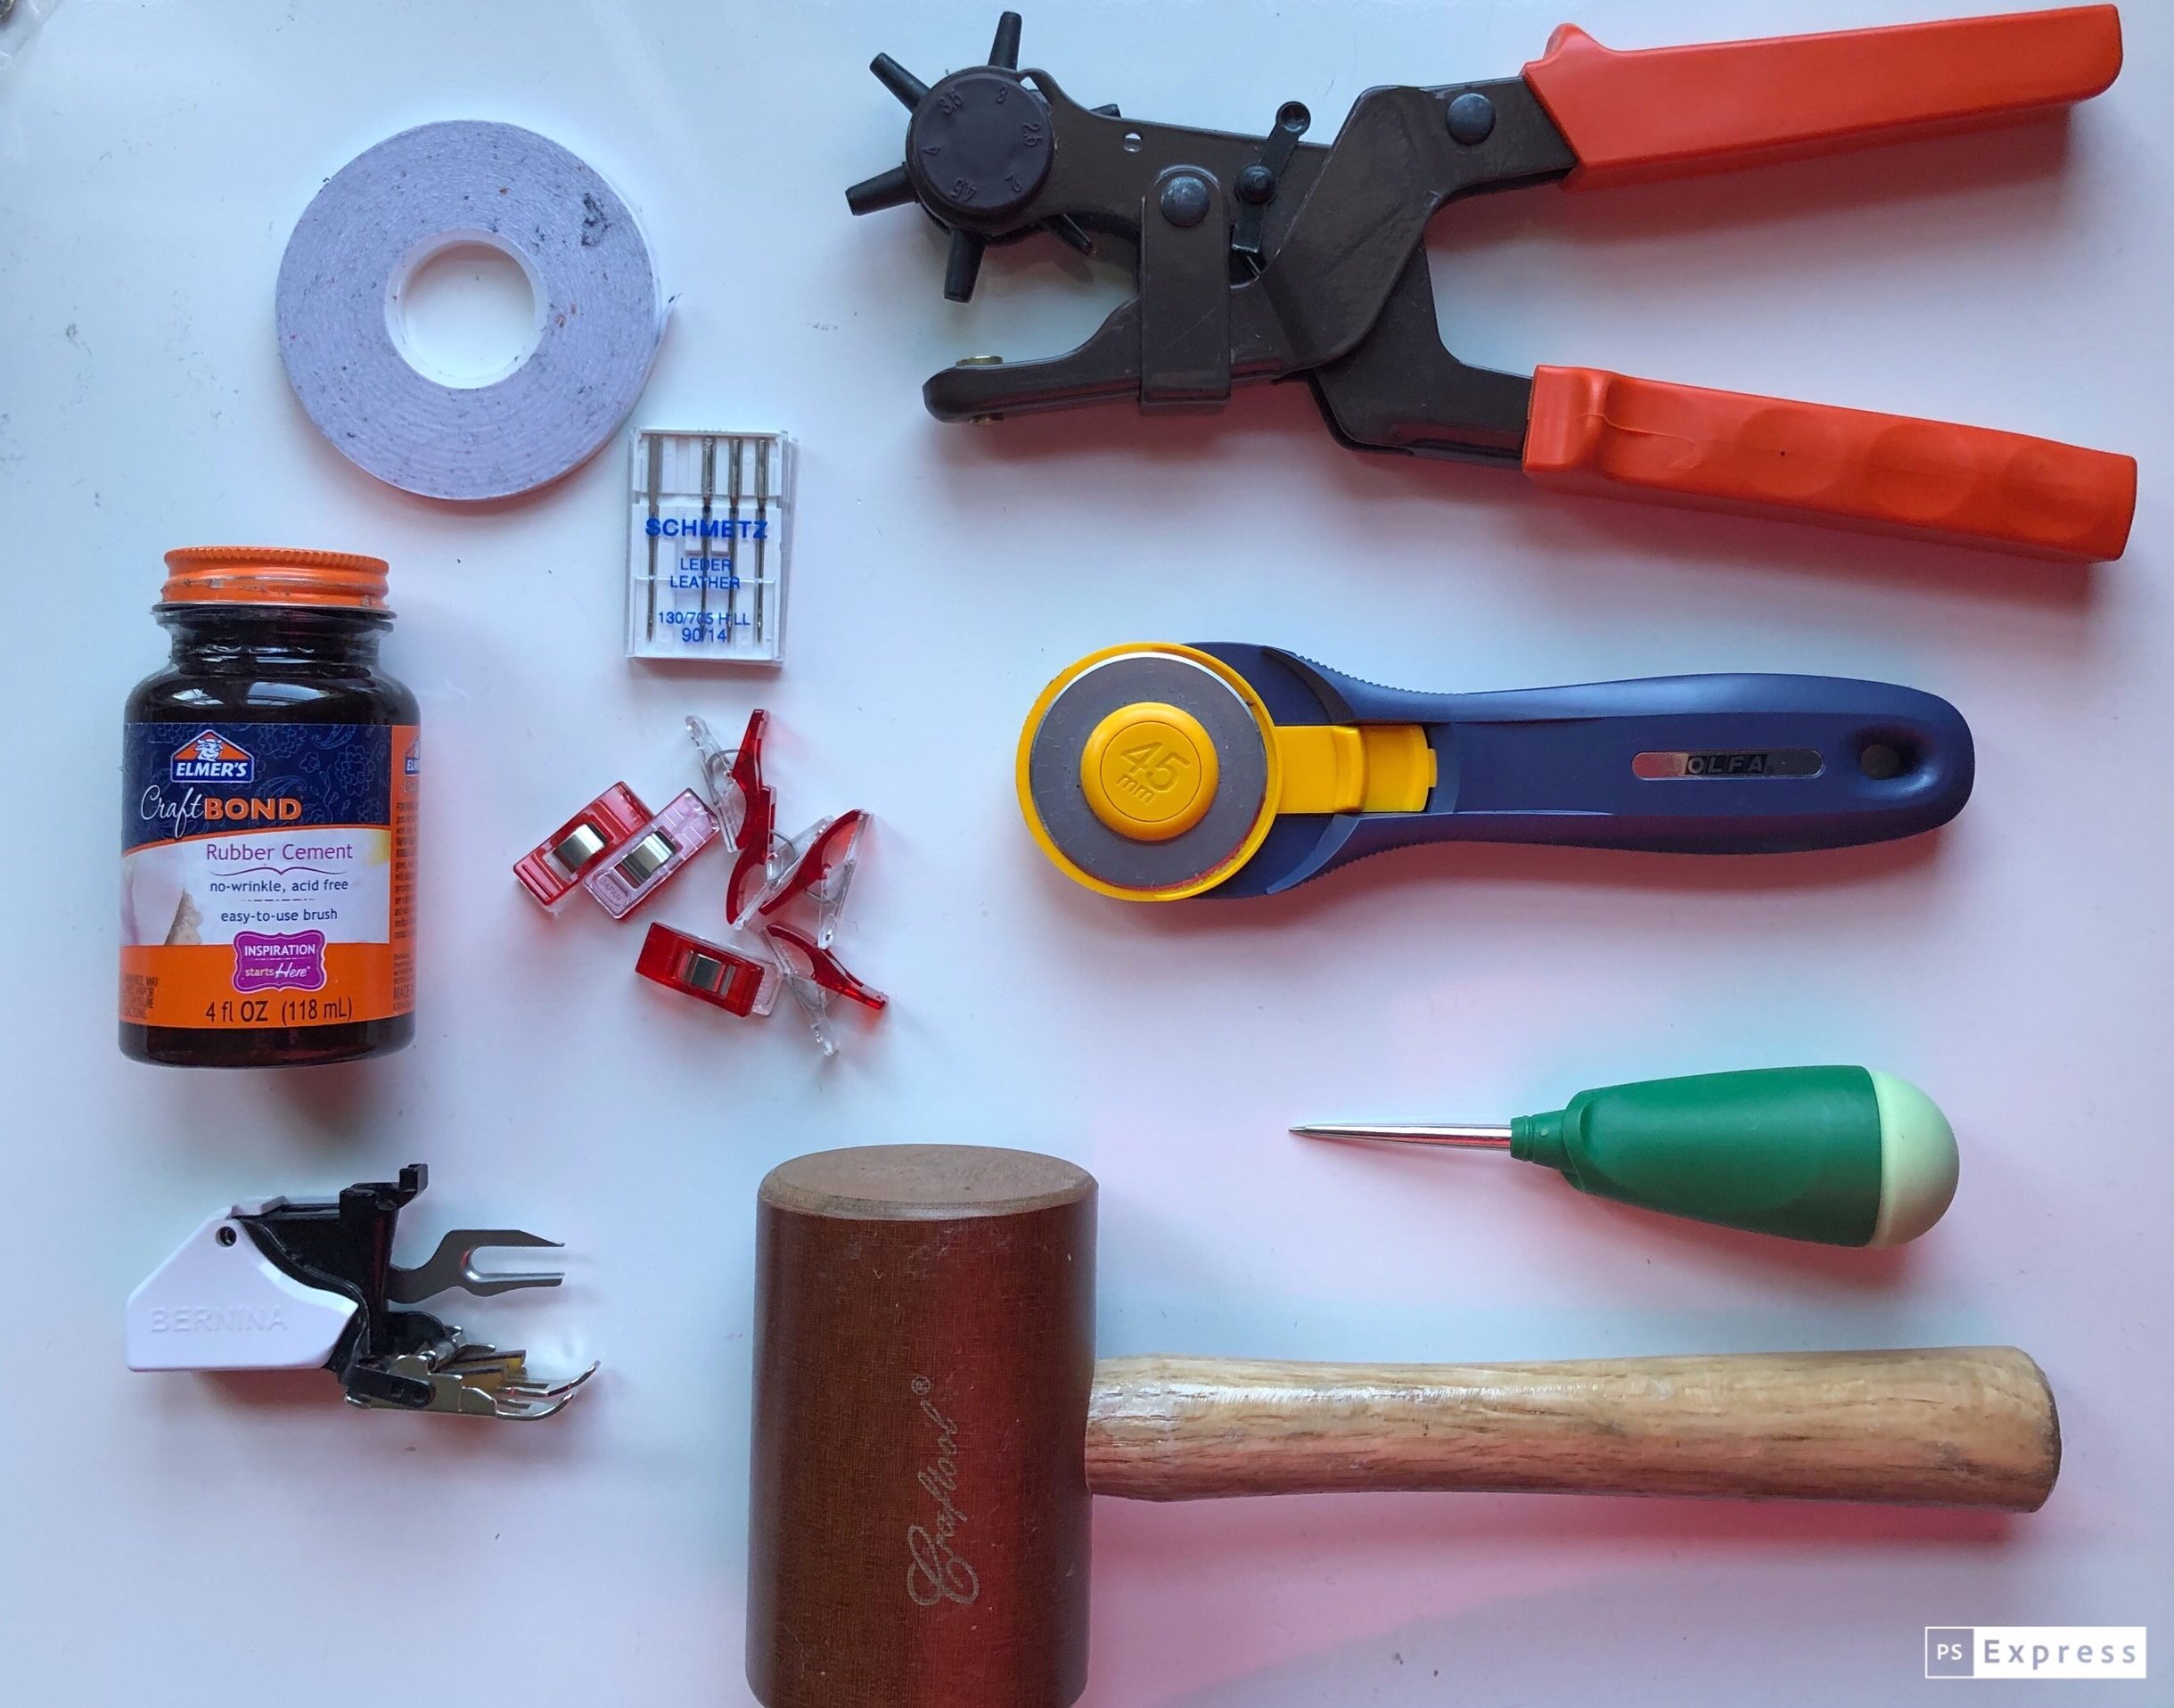
MY FAVORITE LEATHER SEWING TOOLS
Walking Foot, or Even-Feed Foot Don’t be intimidated- the walking foot is your friend! This genius device will evenly feed multiple layers of fabric or leather through your machine. No shifting, dragging or puckering.
Silk or Polyester Thread- this is my favorite Additonally, topstitching thread or denim thread works too. Be sure that it is medium weight and made of silk or polyester. Cotton thread will fray and deteriorate over time due to the chemical reaction to the tannins in the leather.
Double Sided Tape Double-sided leather tape comes can hold layers of leather together for stitching and can also be used to hold seams flat. Please remember to test on scrap leather before trying on your project.
Wonder Clips (Medium sized binder clips work too.) Unlike fabric, pinning leather will leave holes. Instead try using clips.
Microtex or leather Sewing Machine Needles These needles have a special shape and point which is designed to pierce leather with little resistance.
Mallet A rubber or bakelite mallet is used to lightly tap seams in order to flatten them.
Rubber Cement Rubber cement works well for gluing seams flat.
Straight Awl My go-to tool to punch holes or enlarge existing holes in canvas and leather.
Rotary Cutter- This smaller one is great for detail work and the larger size can go through leather so easily.
Leather Hole Punch Punch neat and clean holes in leather and canvas. An essential for preparing straps for hardware.
While each of these tools is really helpful, the ones that you truly “need” to begin sewing with leather are the correct needle, thread, walking foot and clips or tape. The rest can be acquired over time. You do not have to have every notion, attachment and gadget. Instead, I encourage you to start small and build your supply stash as you build your skills.
Download your free PDF sewing pattern to make the Poppy Convertible Tote
When learning to sew- or to sew with a new techniques, please take your time and concentrate on accuracy. Unlike sewing with regular fabric, sewing with leather, the threads can't just be pulled out without leaving holes from the previous stitching. By slowing down and concentrating on learning a new skill, you're much more likely to achieve a result you're really proud of.
I hope these tips help you feel more confident about sewing with leather. If you have any questions please feel free to get in touch. And if you’re looking for a fun project to practice your leather sewing skills, the Poppy Convertible Tote is a great first project. It only requires sewing straight lines- no curves, and the pattern gives you detailed, fully photographed instructions to guide you step by step as you make your first leather bag.
XOXO, Hilarie
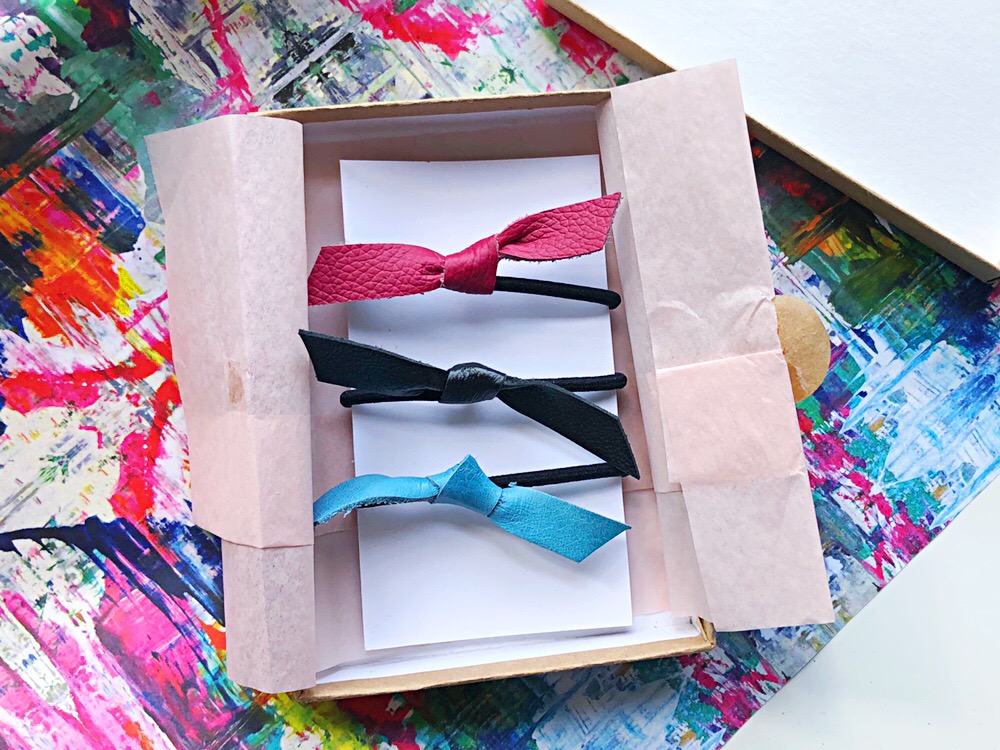
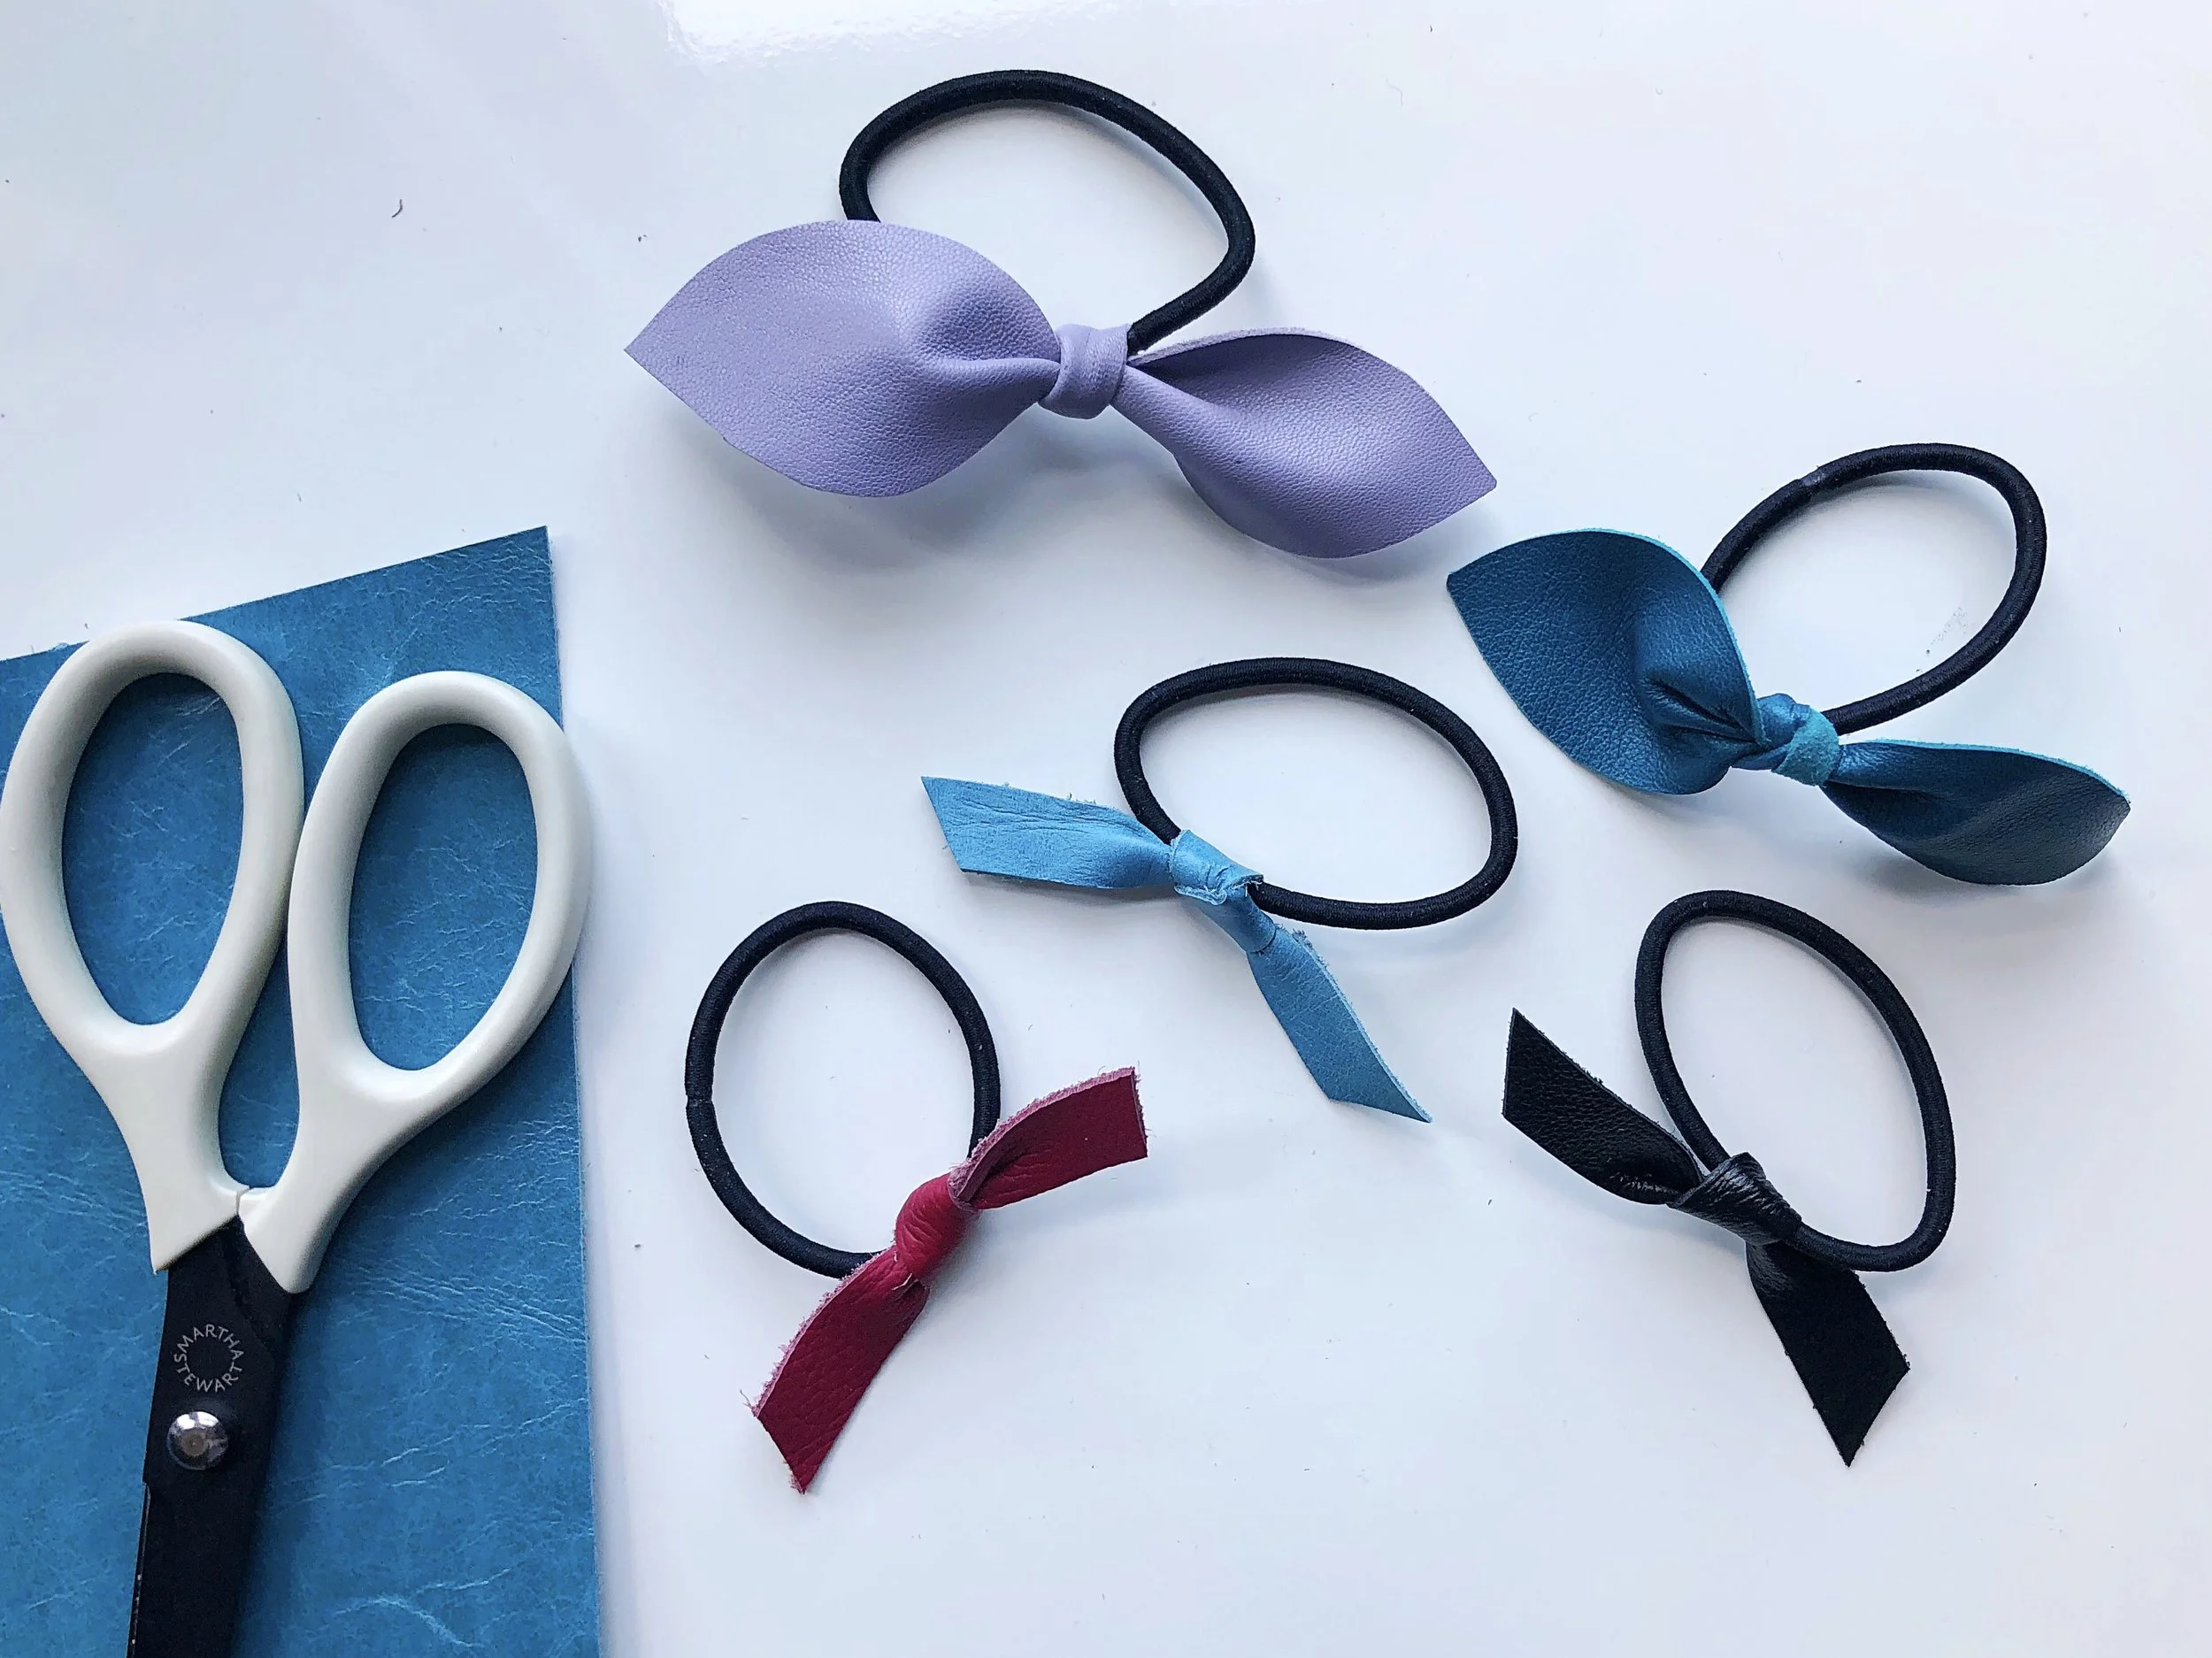
DIY Leather Hair Tie Tutorial
Have you ever tried sewing with leather? It isn’t nearly as tricky as it sounds. Later this month I will be releasing a free pattern for making a leather bag. Before that, I thought it might be fun to give you a small- and instantly gratifying project to get your mind thinking about all things leather.
Sewing With Leather, A Primer Series and Leather Hair Tie Tutorial
Have you ever tried sewing with leather? It isn’t nearly as tricky as it sounds. Later this month I will be releasing a free pattern for making a leather bag. Before that, I thought it might be fun to give you a small- and instantly gratifying project to get your mind thinking about all things leather.
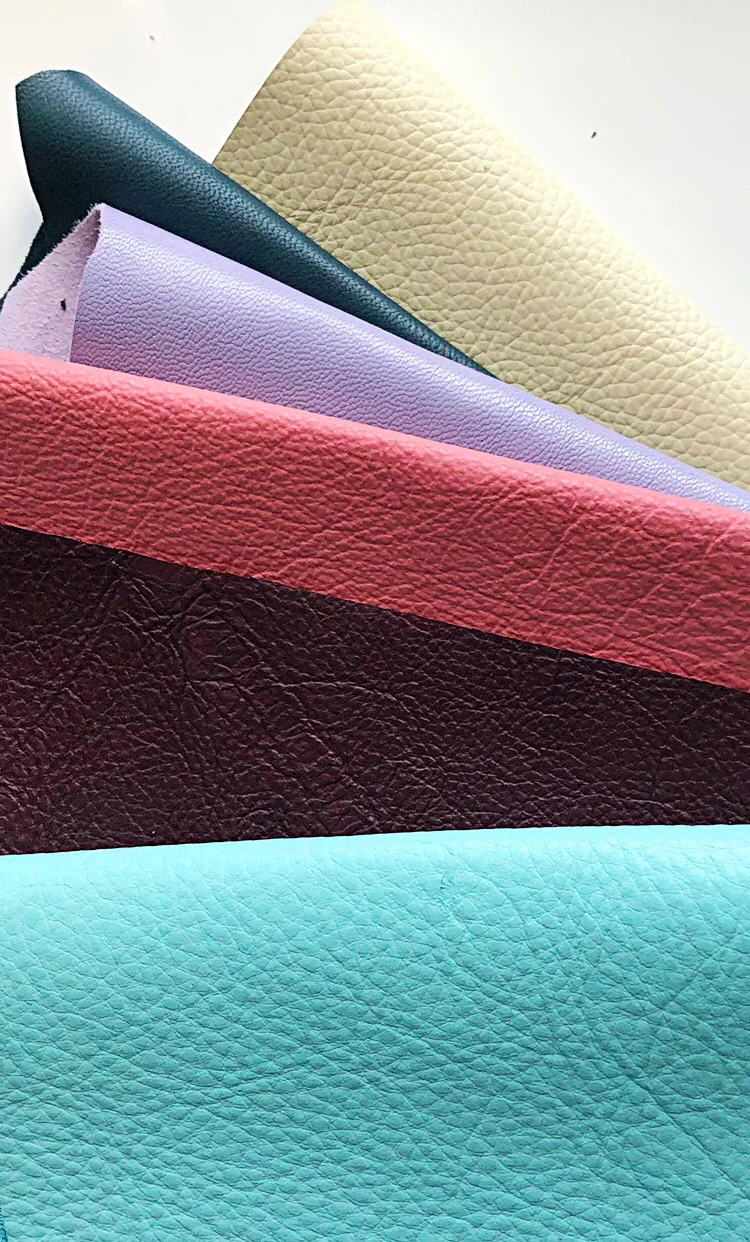
Leather comes in many varieties, weights, textures and colors. It can be a bit intimidating to purchase and to cut into the first time. However, once you understand it- there is no turning back! Unlike fabric that is comes on a bolt, leather is sold in hides and pieces- and by weight. The weight though doesn’t refer to it’s actual weight. Instead it is a gauge of the leather’s thickness. Generally, each ounce of leather equals 1/64th of an inch or 0.4mm thickness.
Since leather comes from an animal, there will be some variation. As such, leather is generally listed for sale in a range of weight. For example 2-3 oz, 3-4 oz. Most home sewing machines will easily stitch leather up to about 3-3.5 ounces.
For the most part, the leather that I use is purchased from Abe’s Leather in Brooklyn, eBay, Etsy and Mood Fabrics. There is a new to me resource that I am excited to share, Leather Suede Skins, in NYC. Also- I tend to love to take apart old clothes and bags too. So keep the thrift store and your closet in mind as an alternative.
Price is based on quality, type of skin, country of origin, size and finish. It doesn’t have to be too expensive so shop around.
Once you have selected your leather, lay it out on a flat surface and examine the hide for imperfections, holes and variations in thickness. Leather does have a grain, but for bags and small accessories, it really isn’t necessary to place patterns along the grain line. Instead, arrange the pattern pieces to fit and to maximize the available leather.
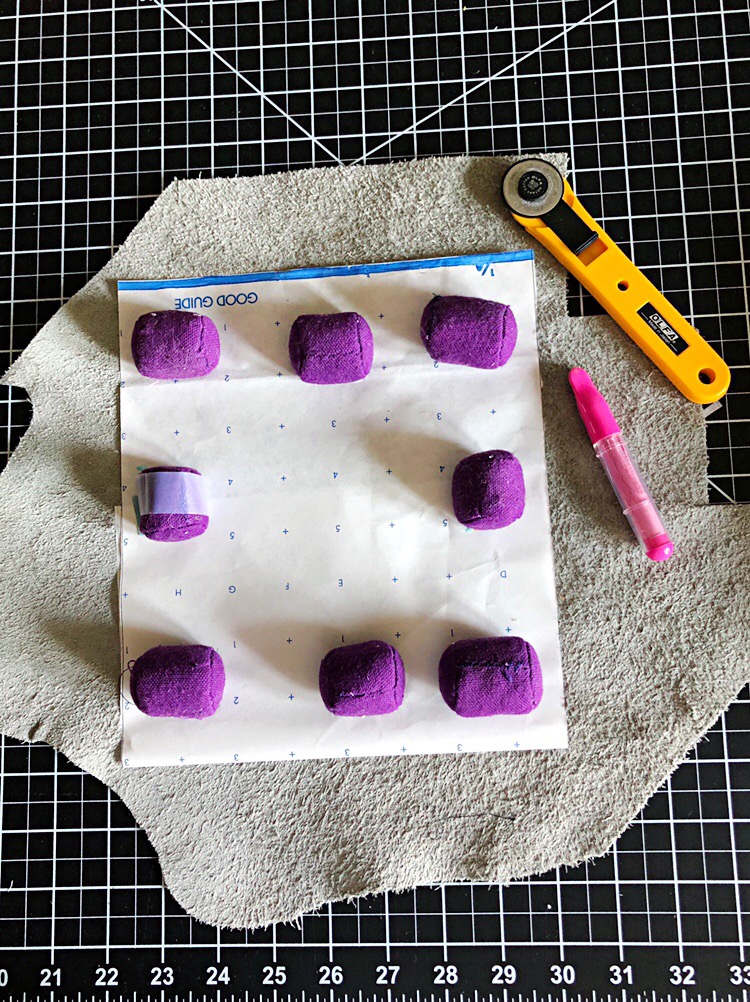
When you have determined the optimal layout, you will want to place a pattern weight (or some close object that will function as a pattern weight and allow you to trace the pattern piece onto the leather. In working with leather, you do not want to use pins as they will leave permanent holes and marks.
Pattern weights holding pattern piece in place.
Non-standard pattern weights work well too!
Tracing a pattern on leather doesn’t really require anything special- a ruler and some kind of pencil. I tend to use a pen, pencil, chalk, marker or even a tracing wheel. It really depends on the color of the leather, how smooth or rough the hide is, and what is on my table at the time.
Leather is easily cut with sharp scissors or a rotary cutter. I generally use a rotary cutter for most things- but for this hair tie project, scissors work just fine.
Here are some of my favorite tools that I use for cutting leather:
Olfa Rotary Cutter I like both the 45 and the 28MM sizes.
Self-Healing Cutting Mat You will want a large mat to comfortably lay out your pieces to cut
Omnigrid Quilting Rulers These come in a variety of useful sizes. Because of their relative thickness, I prefer these rulers over others for guiding my rotary cutter. Fingers can get cut way too easily without the ruler.
In my next post I will share some tips on getting you started sewing with leather on the machine. Needles, feet, thread, interfacing and adhesives.
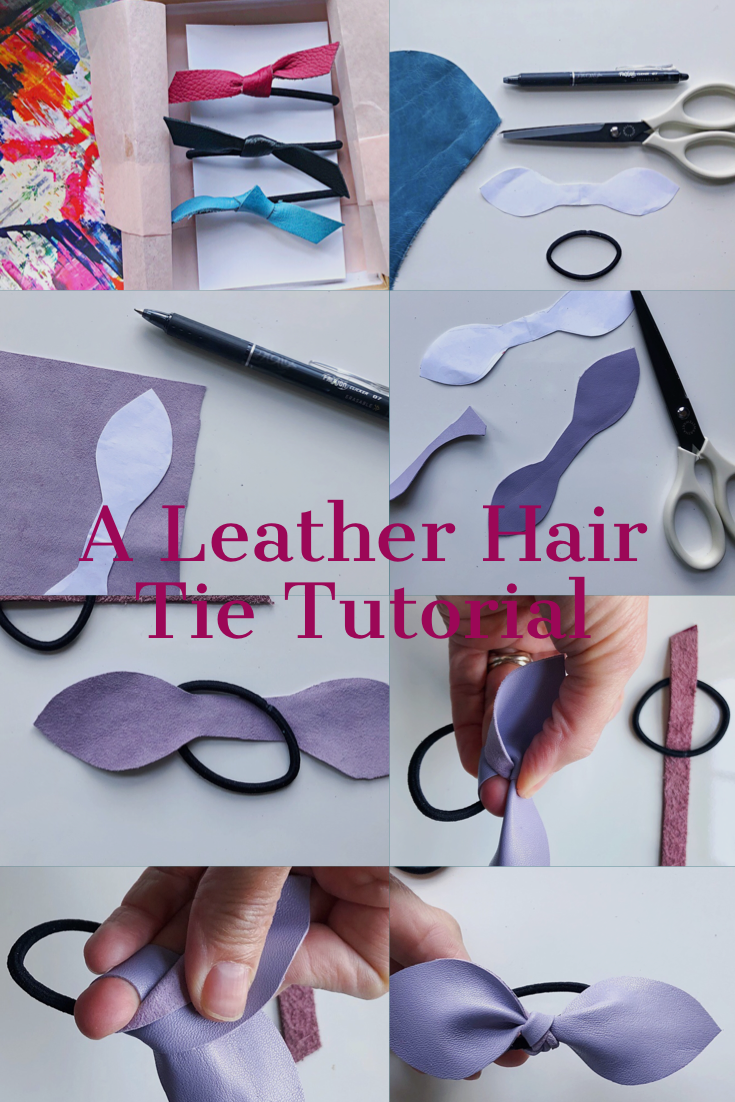
LEATHER HAIR TIE TUTORIAL
MATERIALS
Thin leather (vegan leather, Felt and Kraft-tex work great too!)
Scissors (or rotary cutter)
Pen, pencil or chalk
SIZE
Finished size for the bow is approximately 4 3/4” x 1.5”
Finished size for the tie is approximately 3”x 1/2”
PATTERN
TRACE
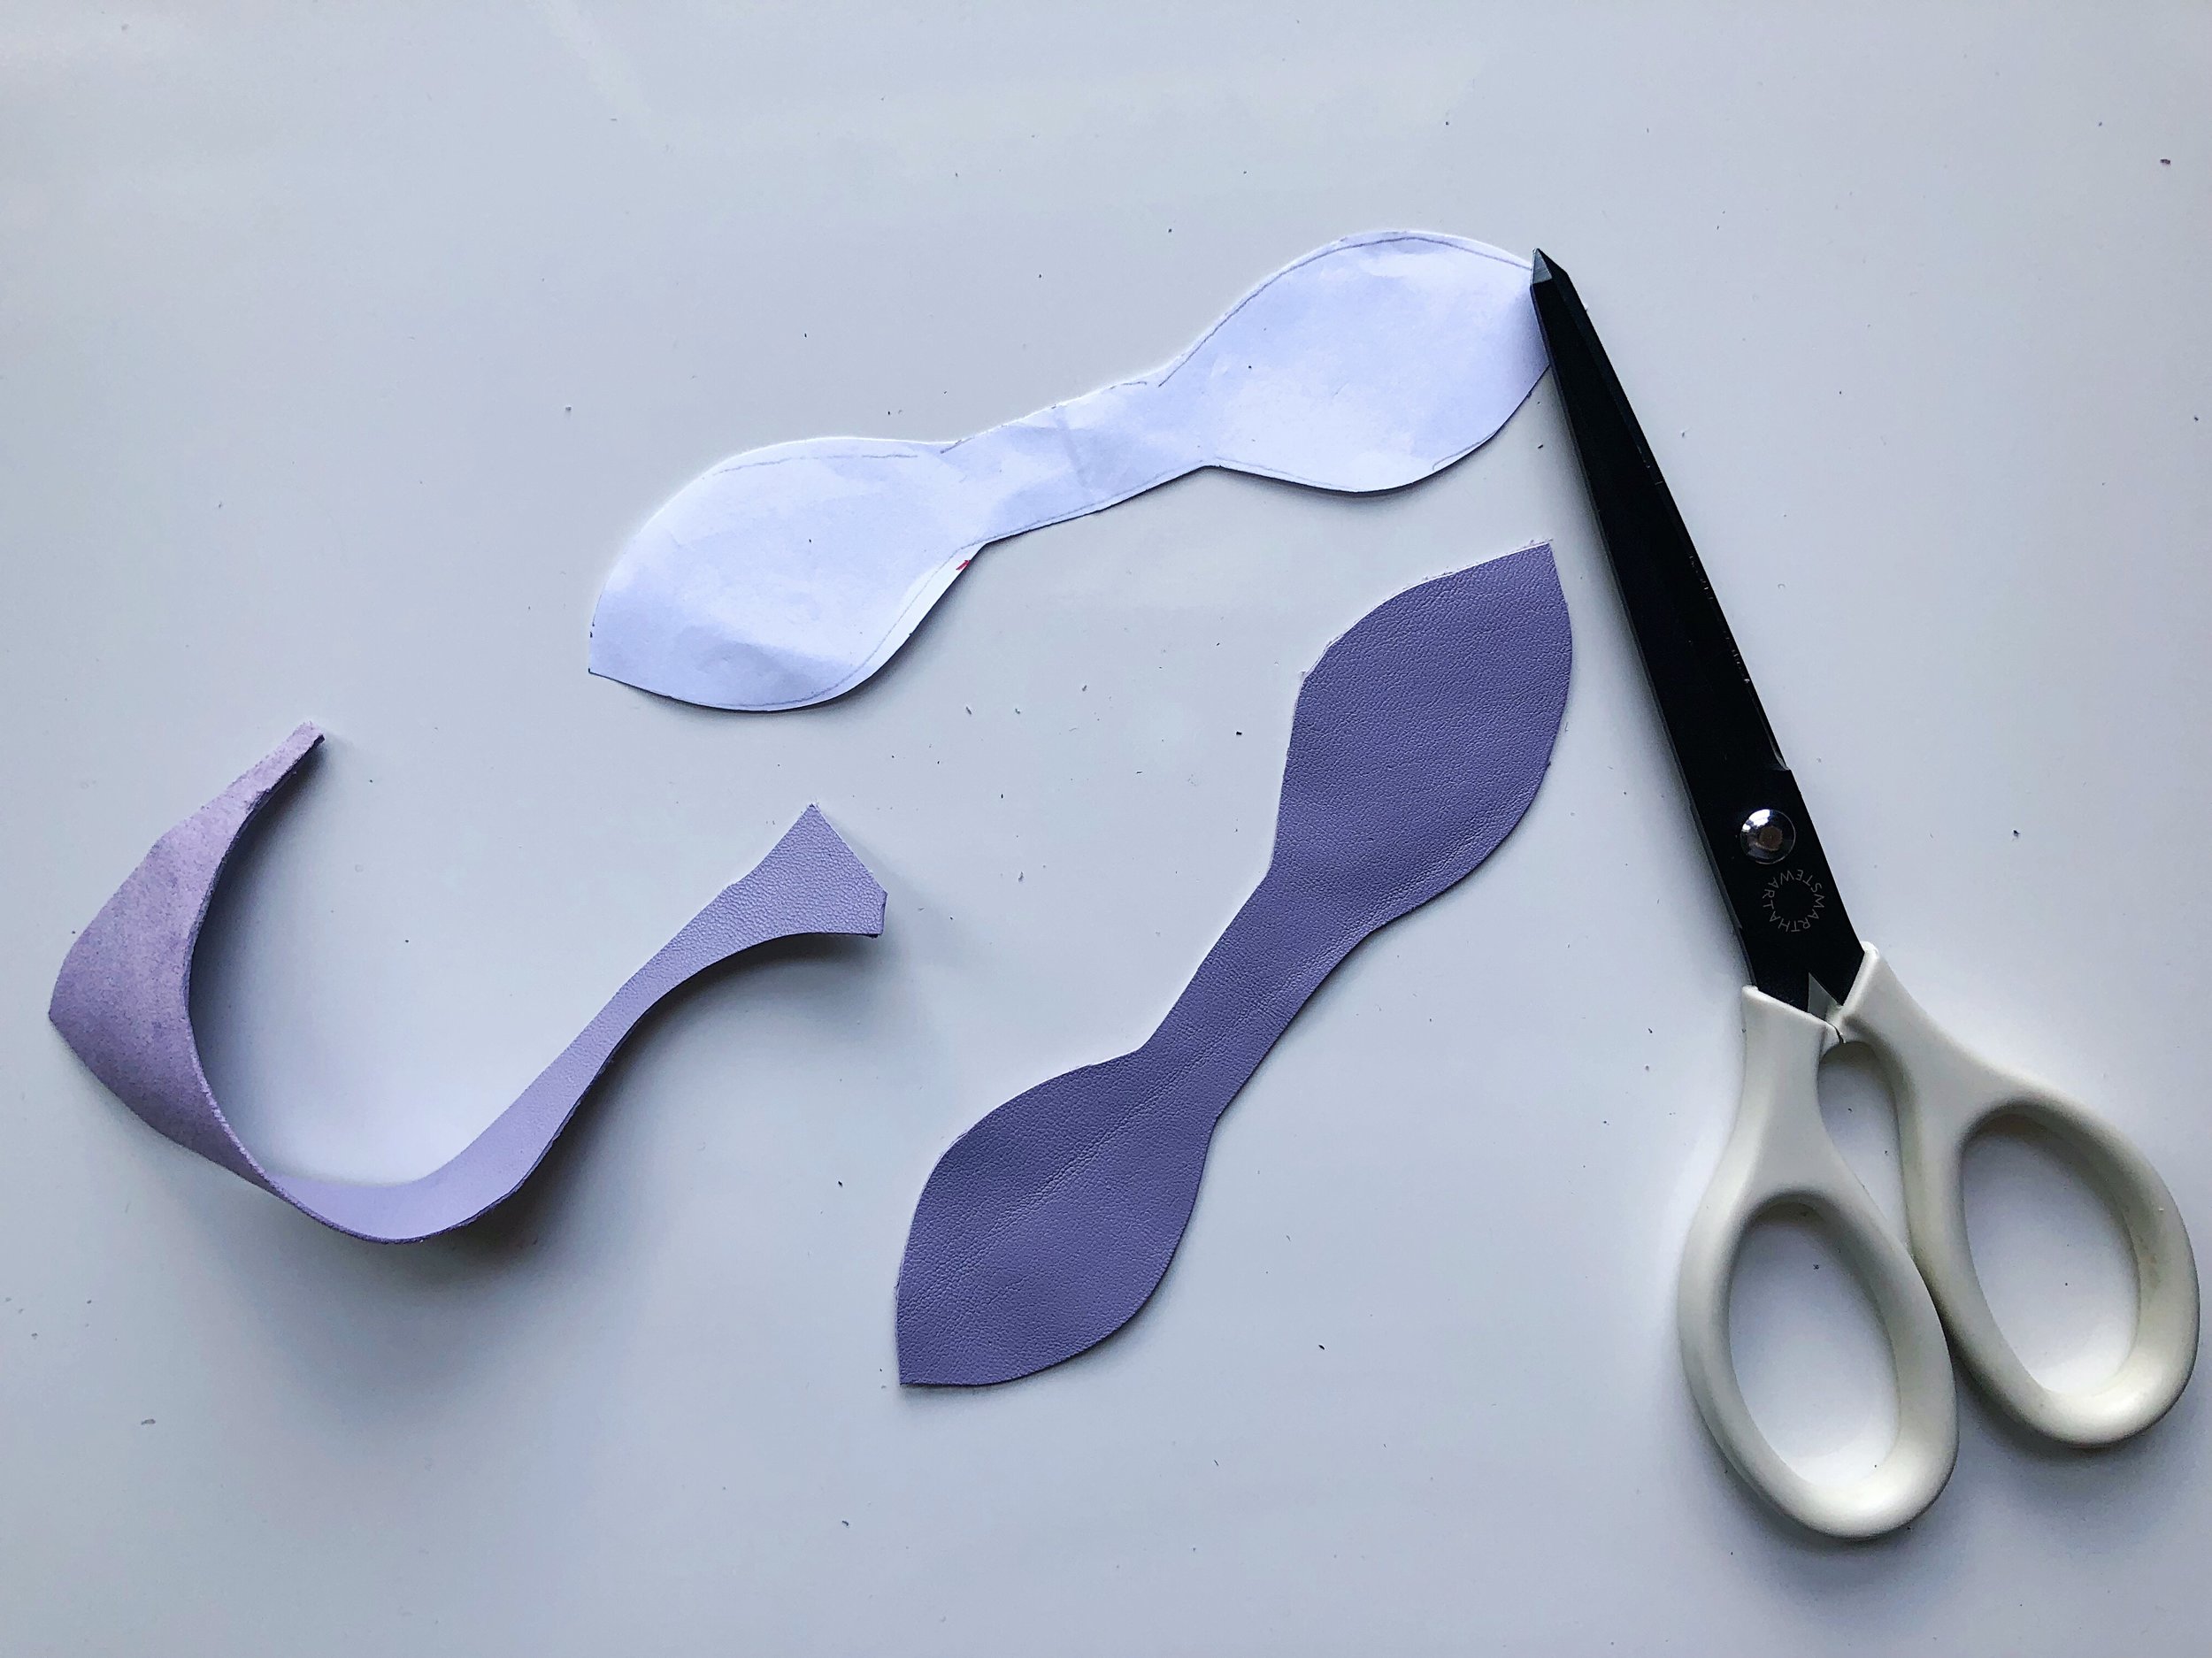
Trace the pattern onto the back side of the leather piece.
CUT
Cut along the traced line.
TIE
Place the leather tie right side facing down and slip into the elastic hair band.
Tie the leather into a knot around the elastic band. The object is to end up with the right side (pretty side) of the leather on the outside of each side of the bow and the center knot.
Before pulling the knot tight, twist the sides around a bit to make sure you are happy with the way the leather faces.
All done!
For this version, tie in the same manner as above making sure that the pretty side of the leather is facing up.
The pattern for the hair tie is just a rectangle. To give you a bit of wiggle room to make it symmetrical, I didn’t add the angled ends. Once your are satisfied with the way your leather is knotted, just cut the ends at an angle.
Aren’t they pretty? I would love to see what you make. Please tag me @littlestichstudio when you show off your fancy work.

